To download the Desktop softphone, navigate to virtualpbx.com/apps and scroll down to the bottom of the page.
Create A Softphone
You must be a VirtualPBX administrator to complete these tasks
.png?table=block&id=e7f89262-53d0-4414-8722-1869a0f8c985&cache=v2)

- In the Dashboard, click on Users
- Click Devices alongside the user you wish to assign the device
- Click Choose Device and select Softphone
- Click Save Changes
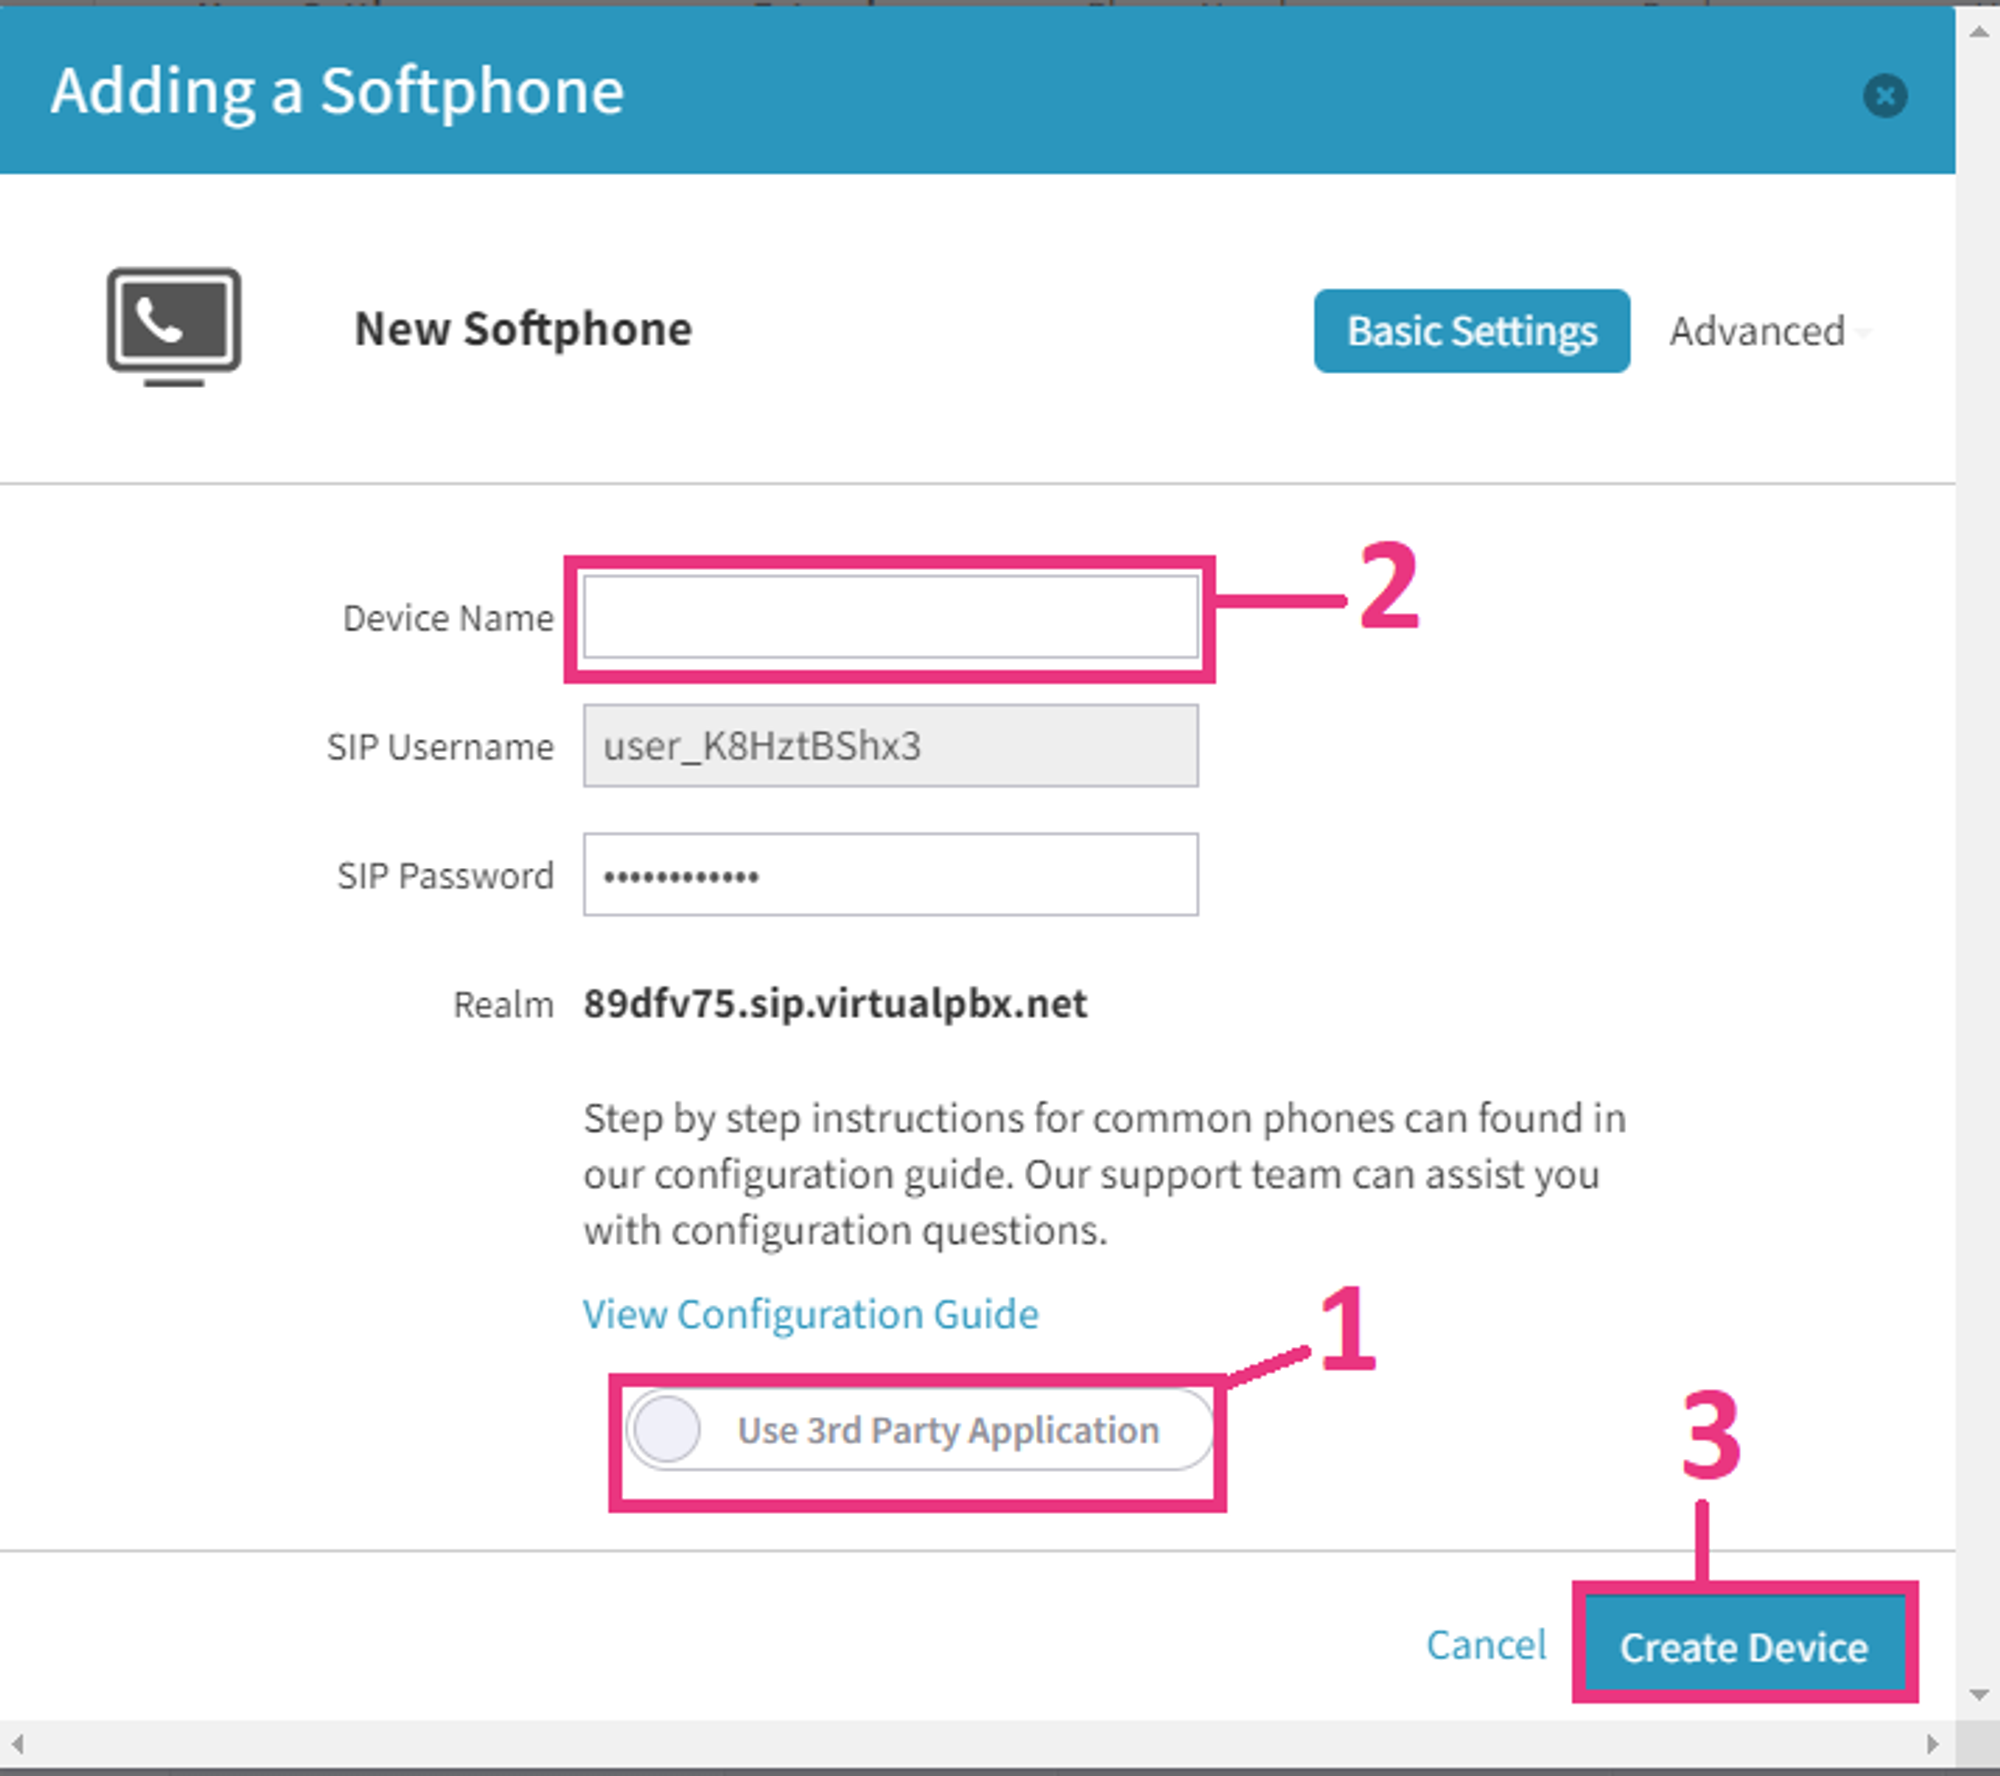
1: Click the toggle from “Use 3rd Party Application” - It should switch to “Use VPBX Application”.
2: Enter a name for the softphone so you can identify it on the Dashboard.
3: Click “Create Device”. The email address you use for login should now receive an email from support@virtualpbx.com with your softphone credentials.
Desktop Softphone User Guide
Once you’ve logged into the softphone and applied permissions, you will see the dialpad
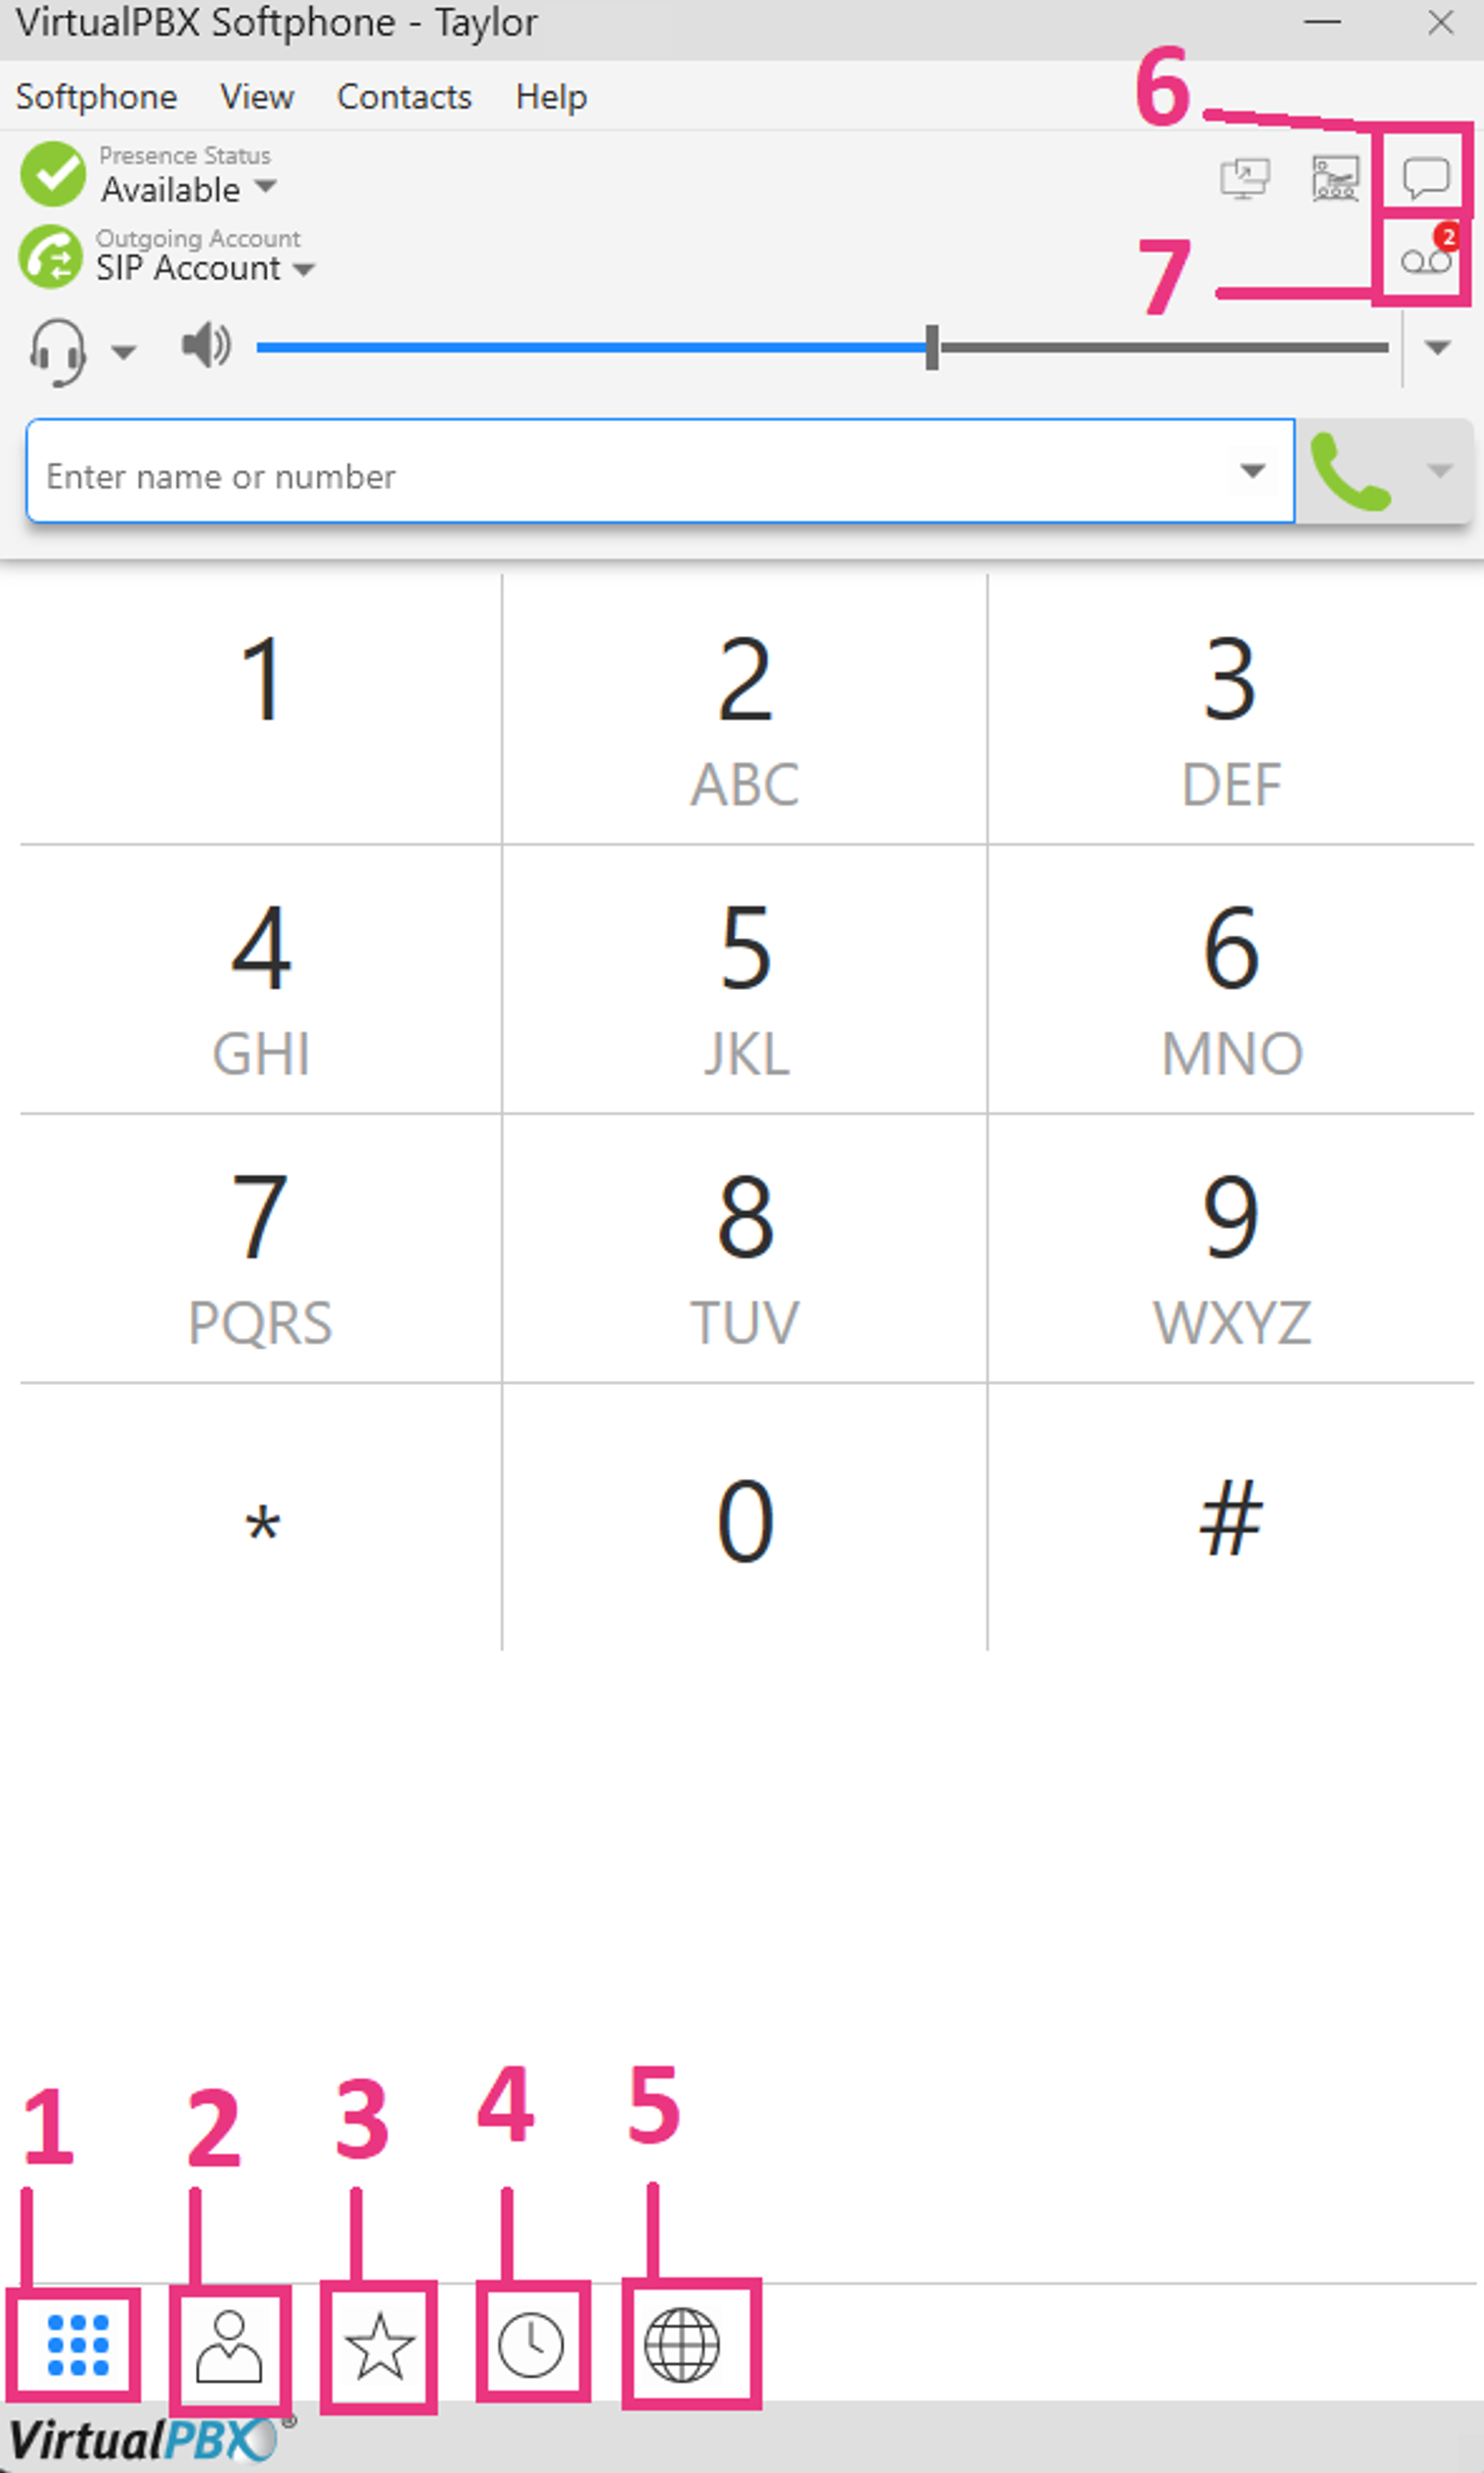
1: Return to the dialpad
2: View contacts
3: Favorites
4: Call History - A number next to this icon means there was a missed call
5: User Portal
6: SMS / Messages
7: Voicemail - A number next to this icon means there is a new voicemail
Contacts
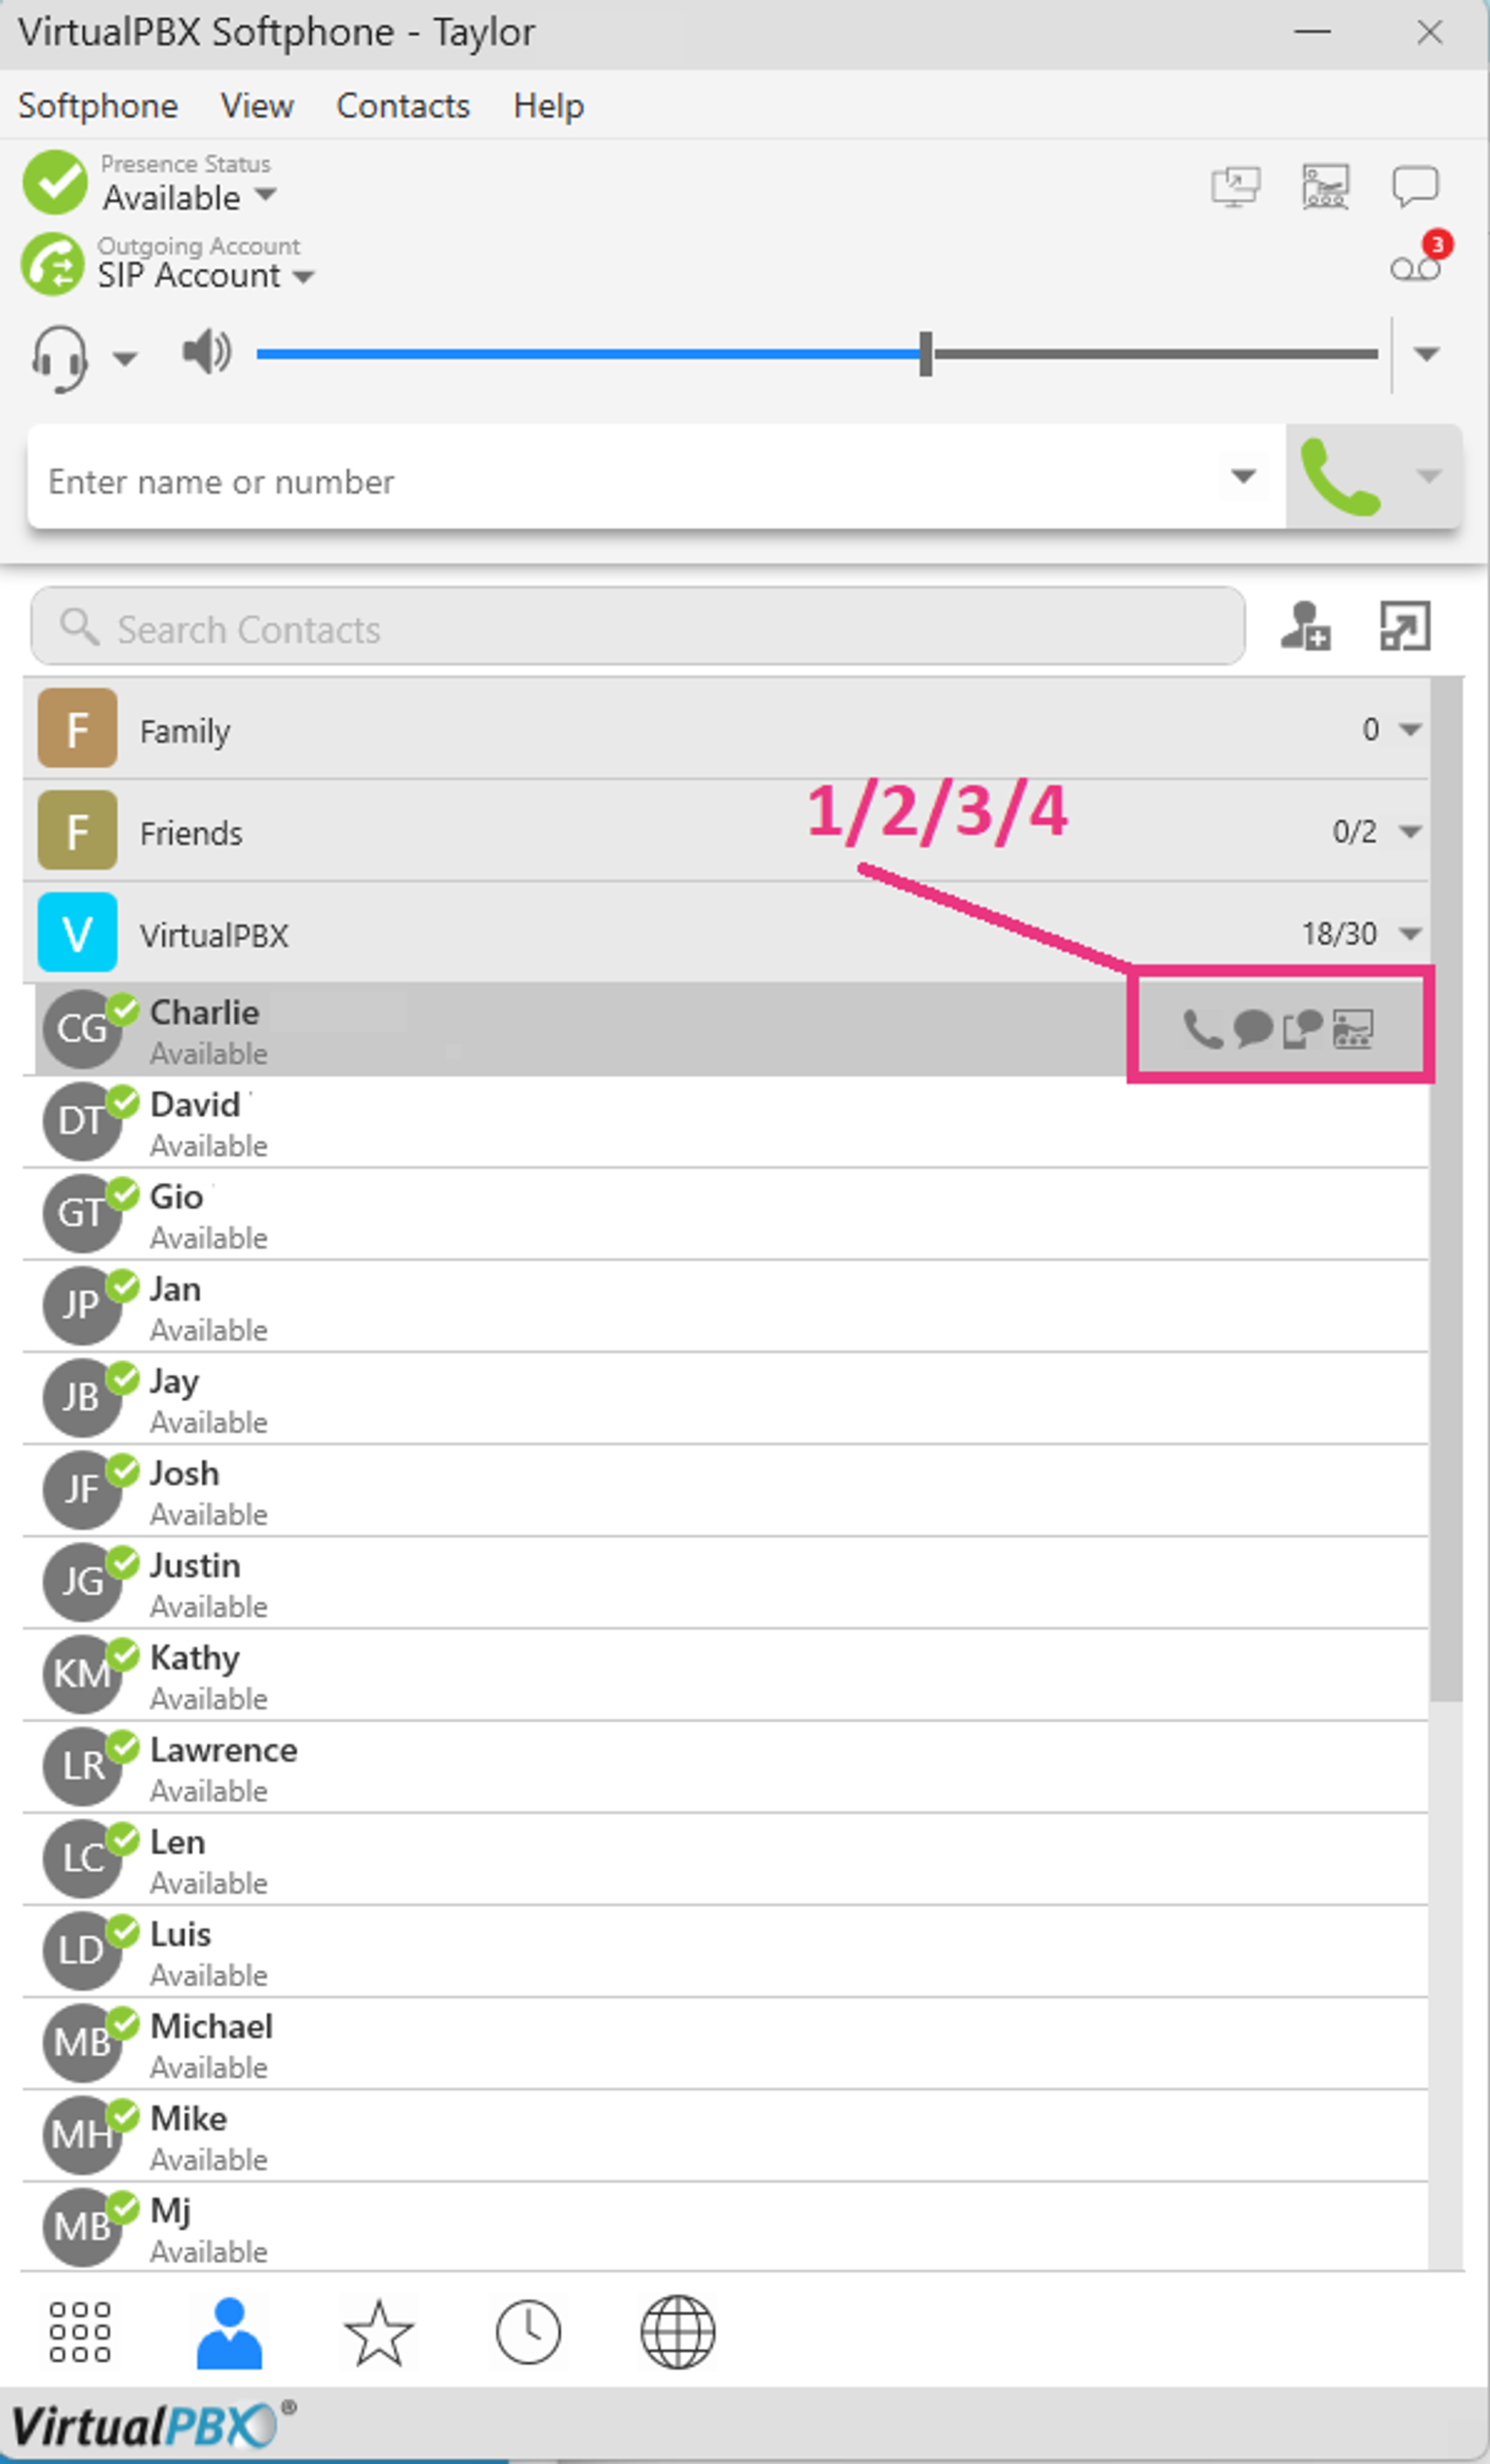
1: Call this contact
2: Send instant message to this contact
3: Send text message to this contact
4: Join this contact’s meeting/conference
Adding your VirtualPBX Directory to your VirtualPBX Desktop Softphone:
If you’re on a FLEX plan, this happens by default. Otherwise, you will need to work these steps:
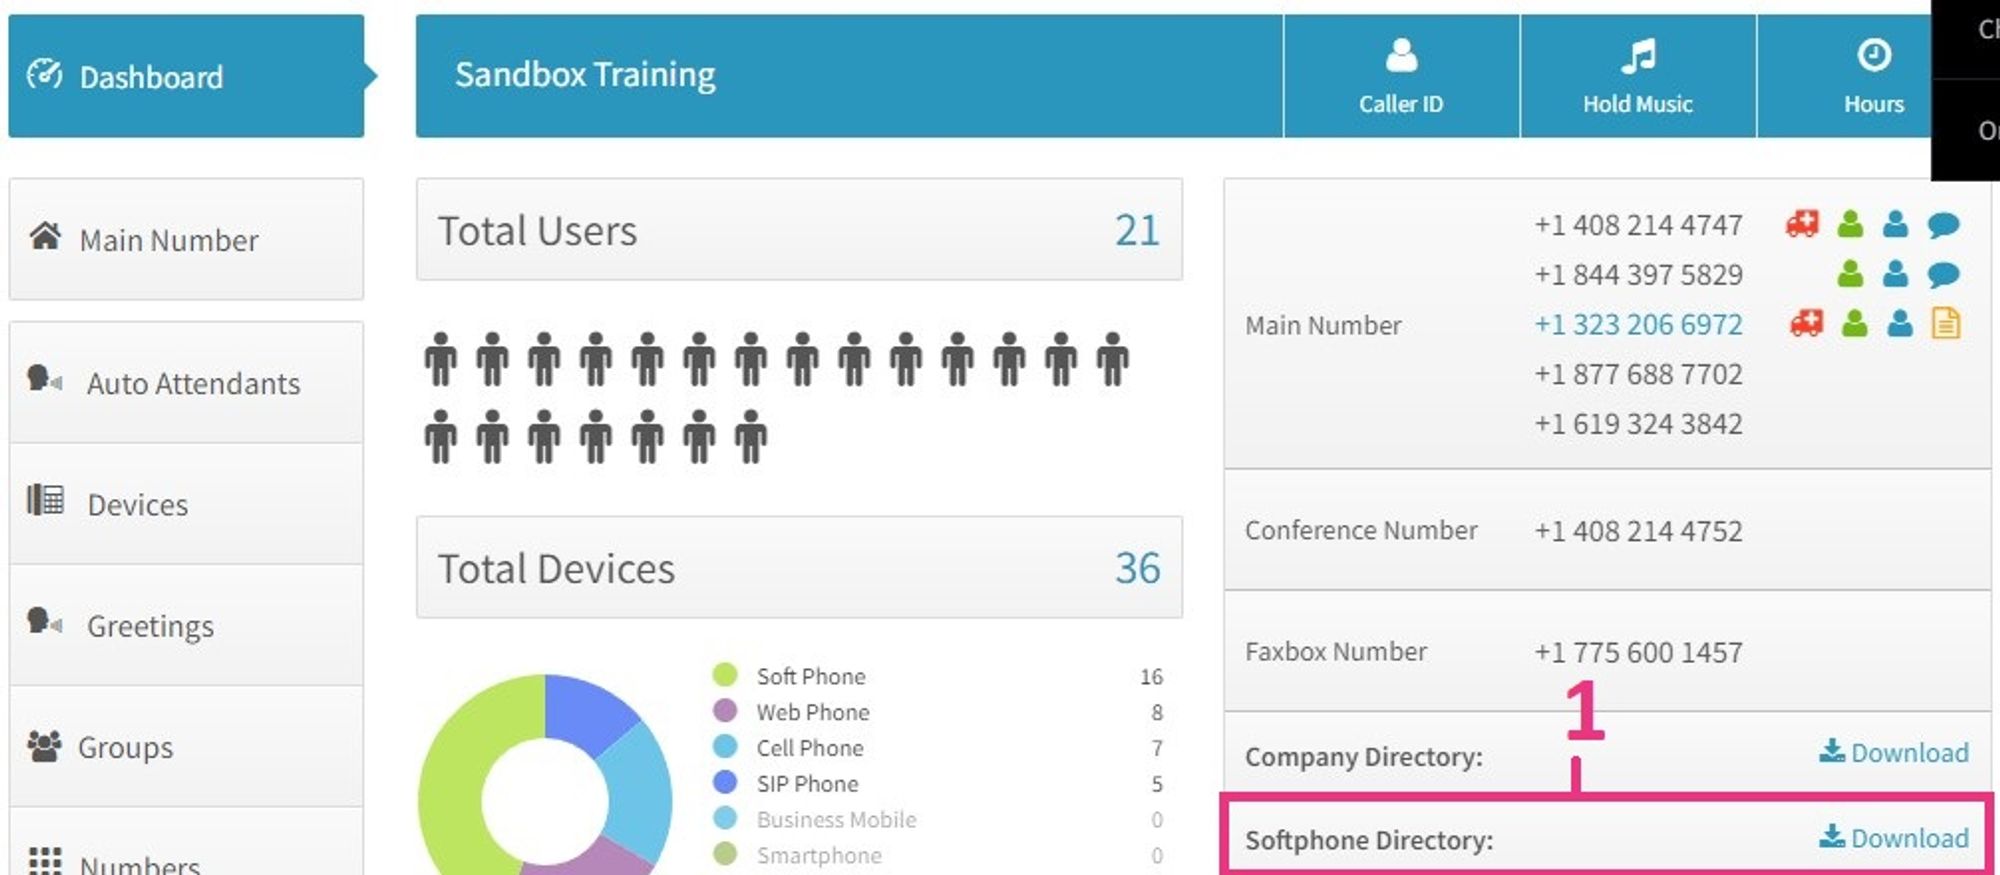
1. On the Dashboard main screen, you can download the Softphone directory. This will download the directory to your computer.
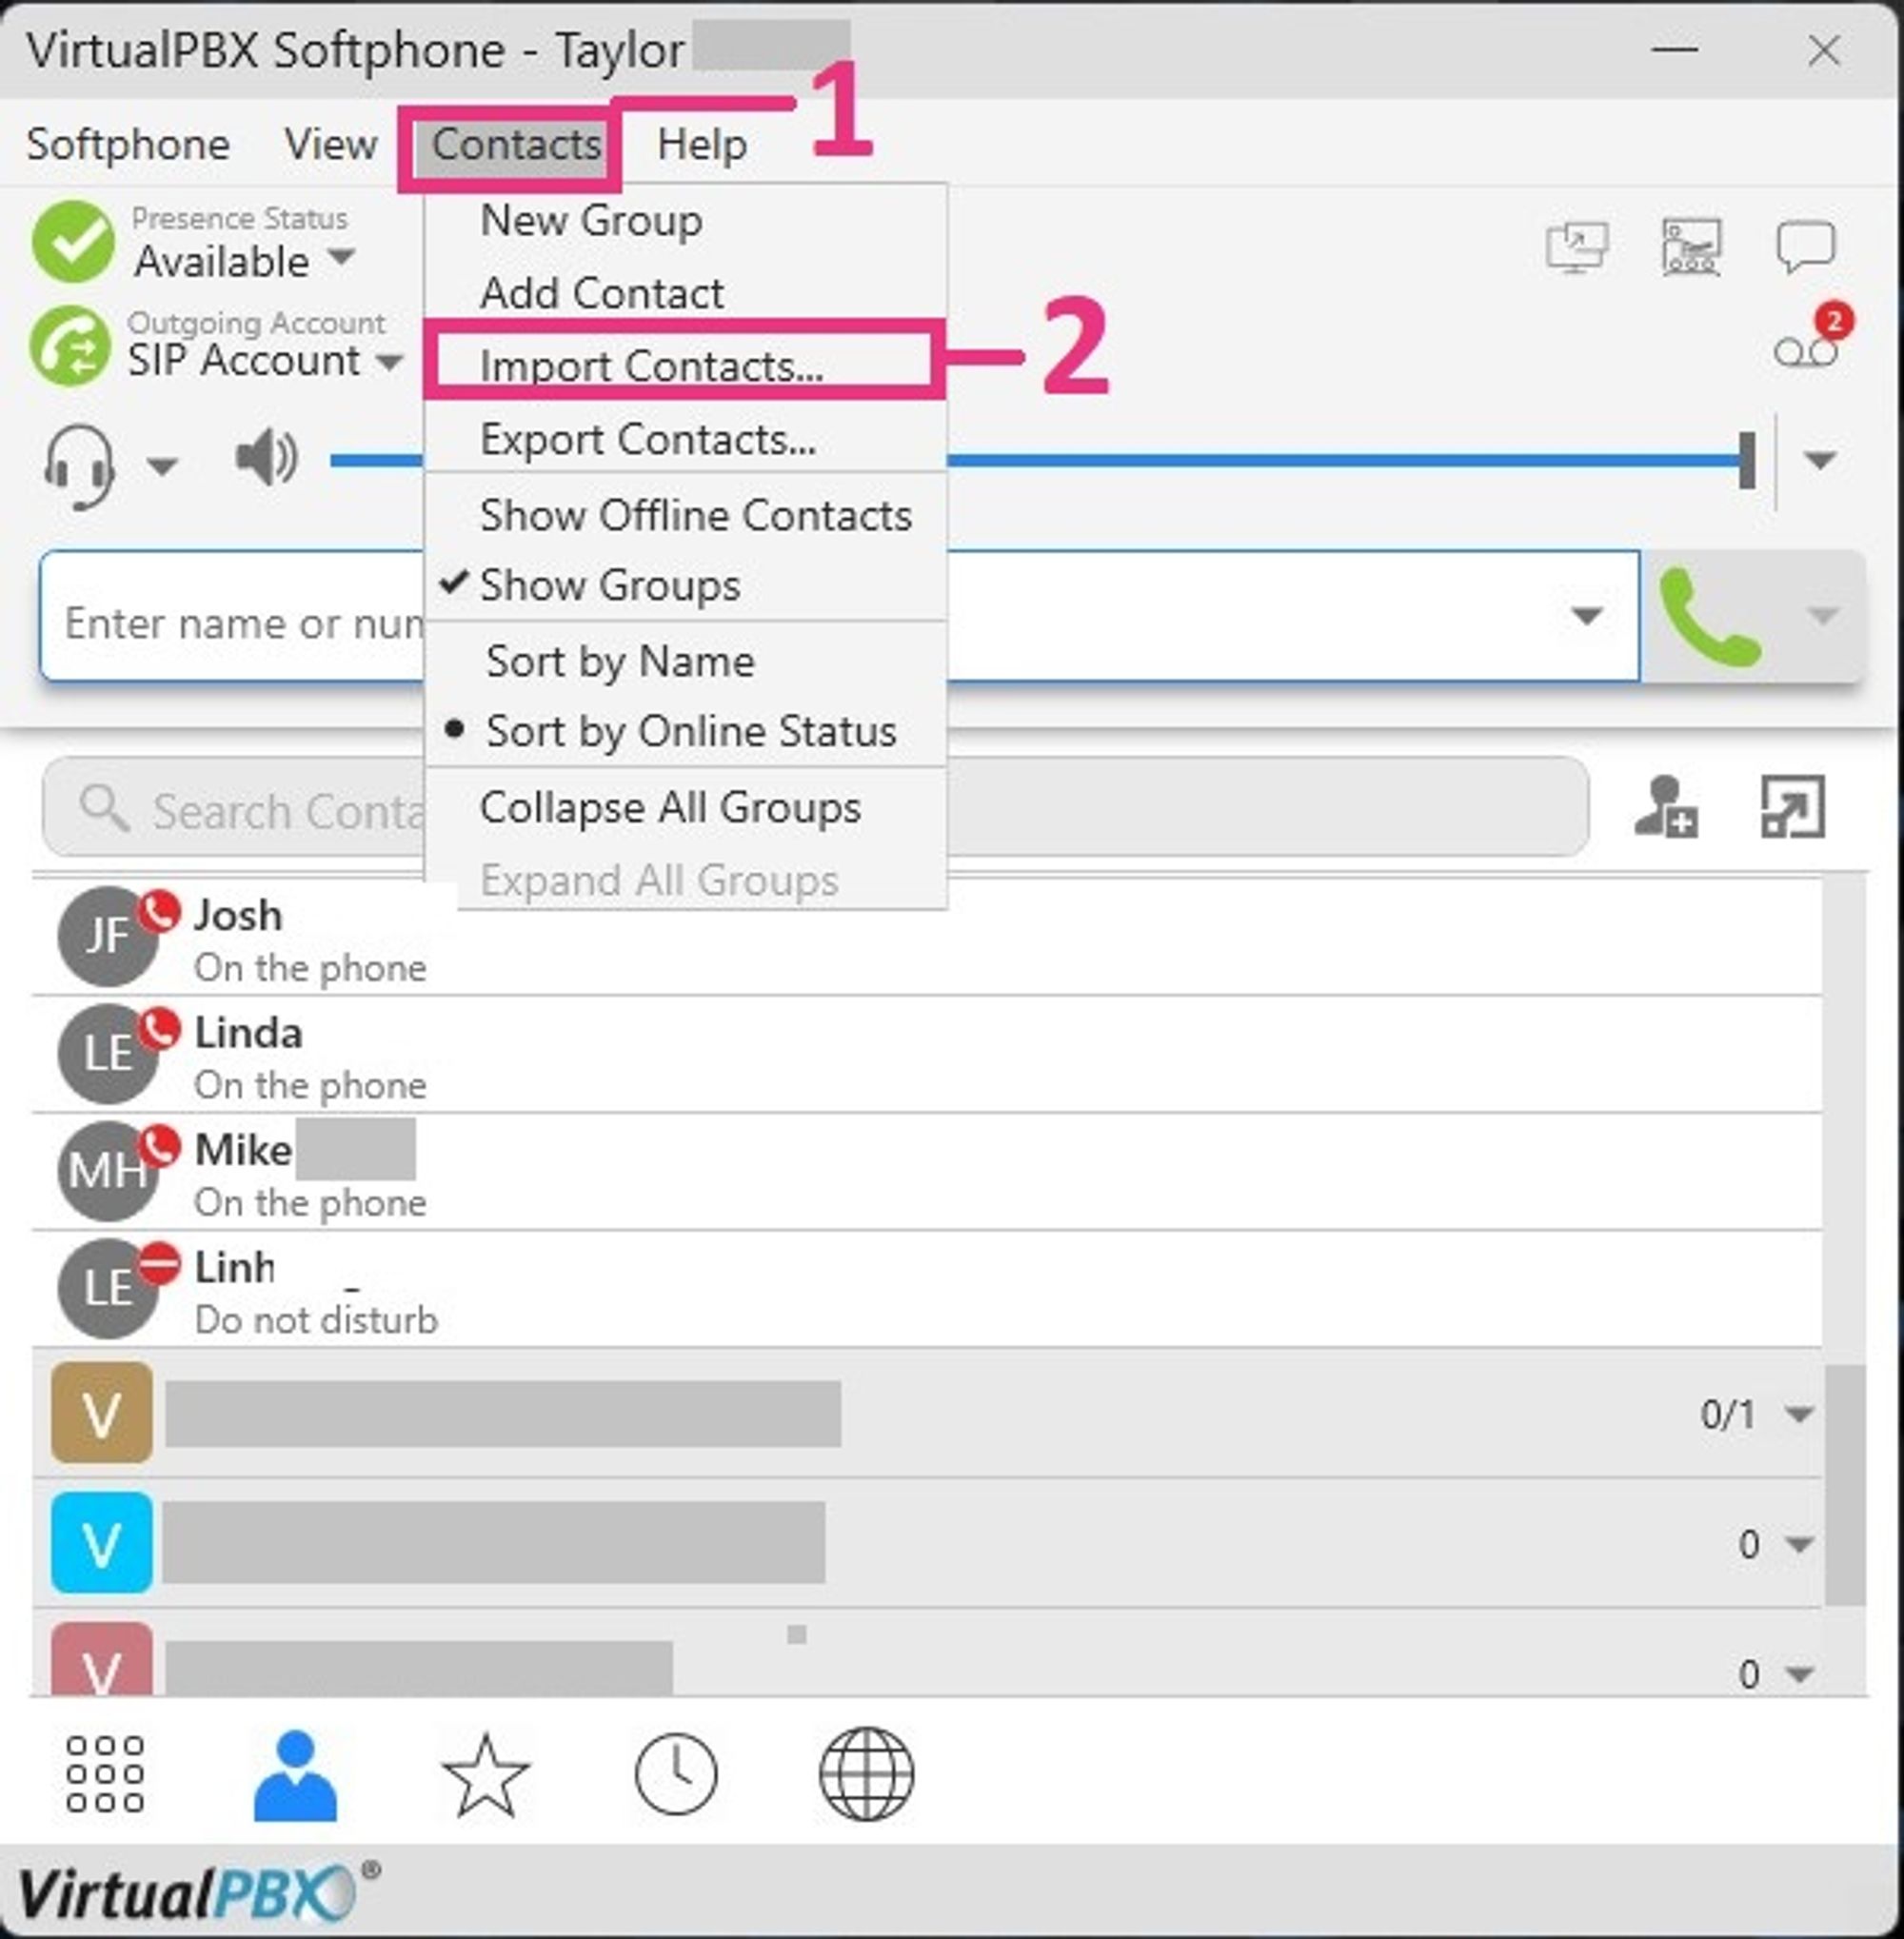
- Next, go to your VirtualPBX Desktop Softphone and click “Contacts”
- Click “Import Contacts”
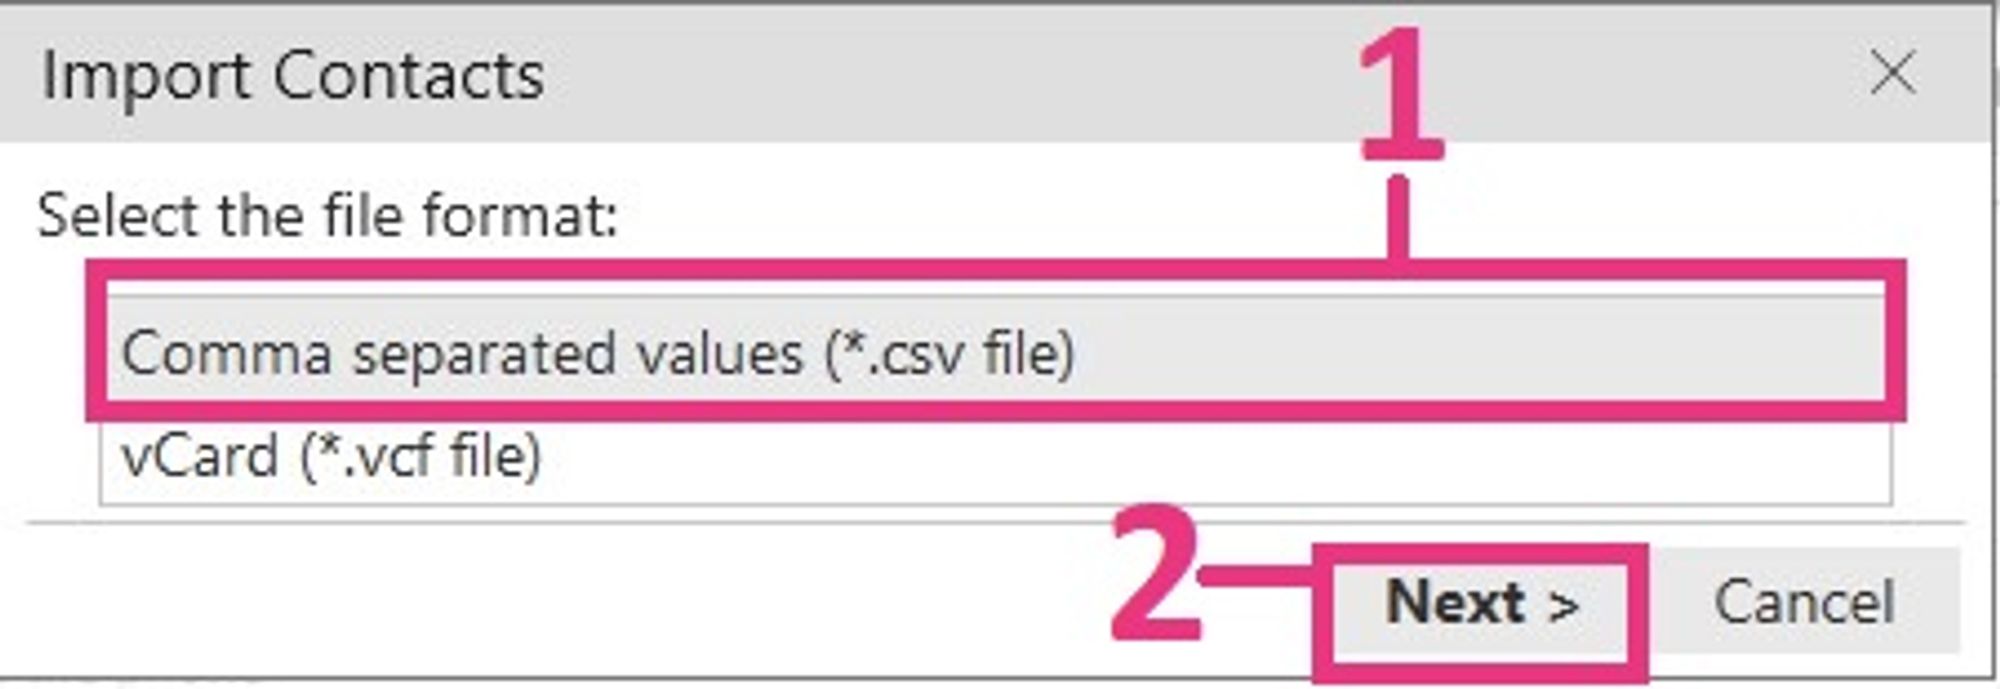
- Select ‘Comma separated values (*.csv file)
- Click “Next”
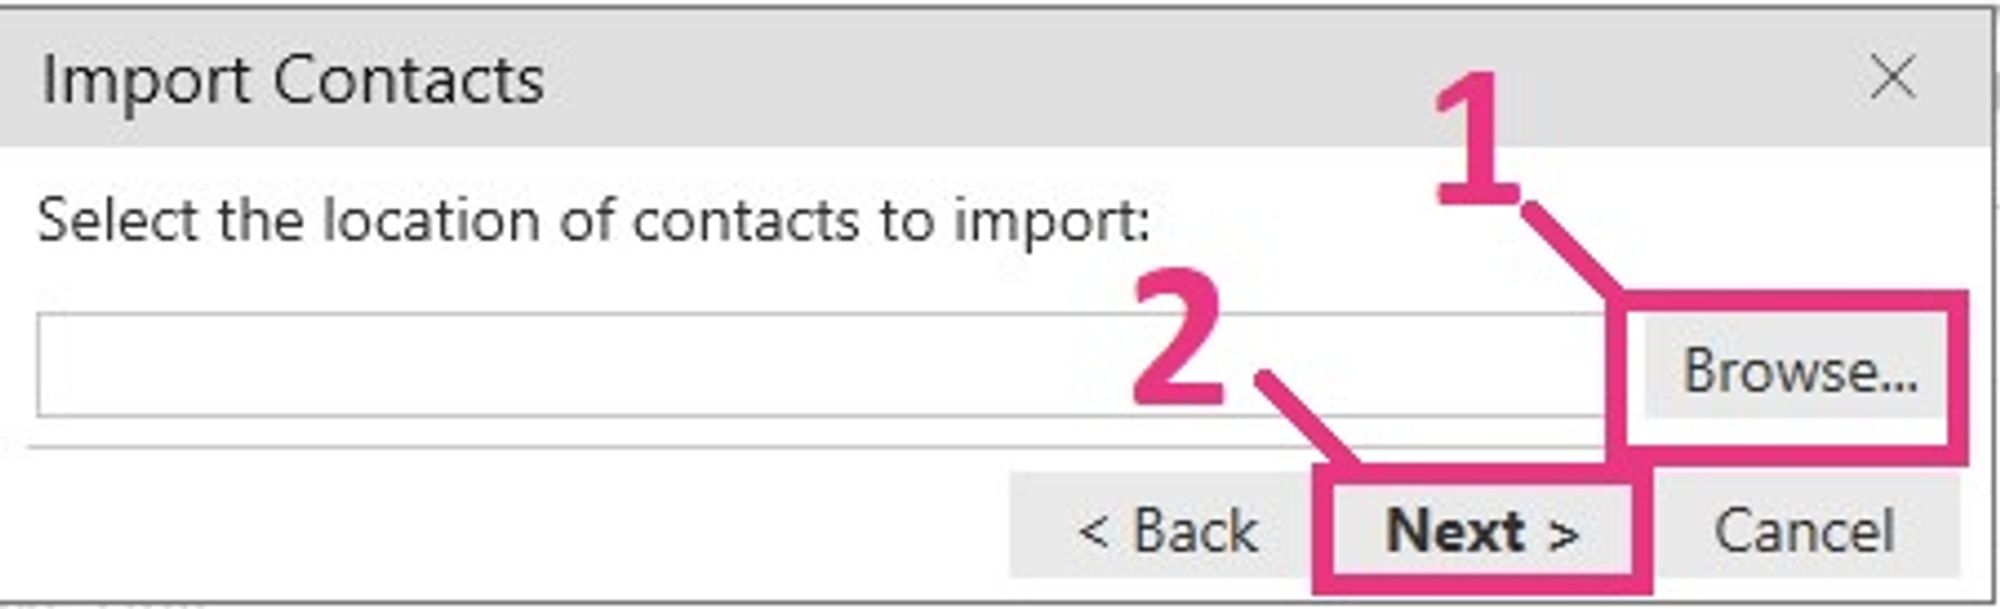
- Click “Browser” and select the softphone directory you downloaded from the Dashboard.
- Click Next
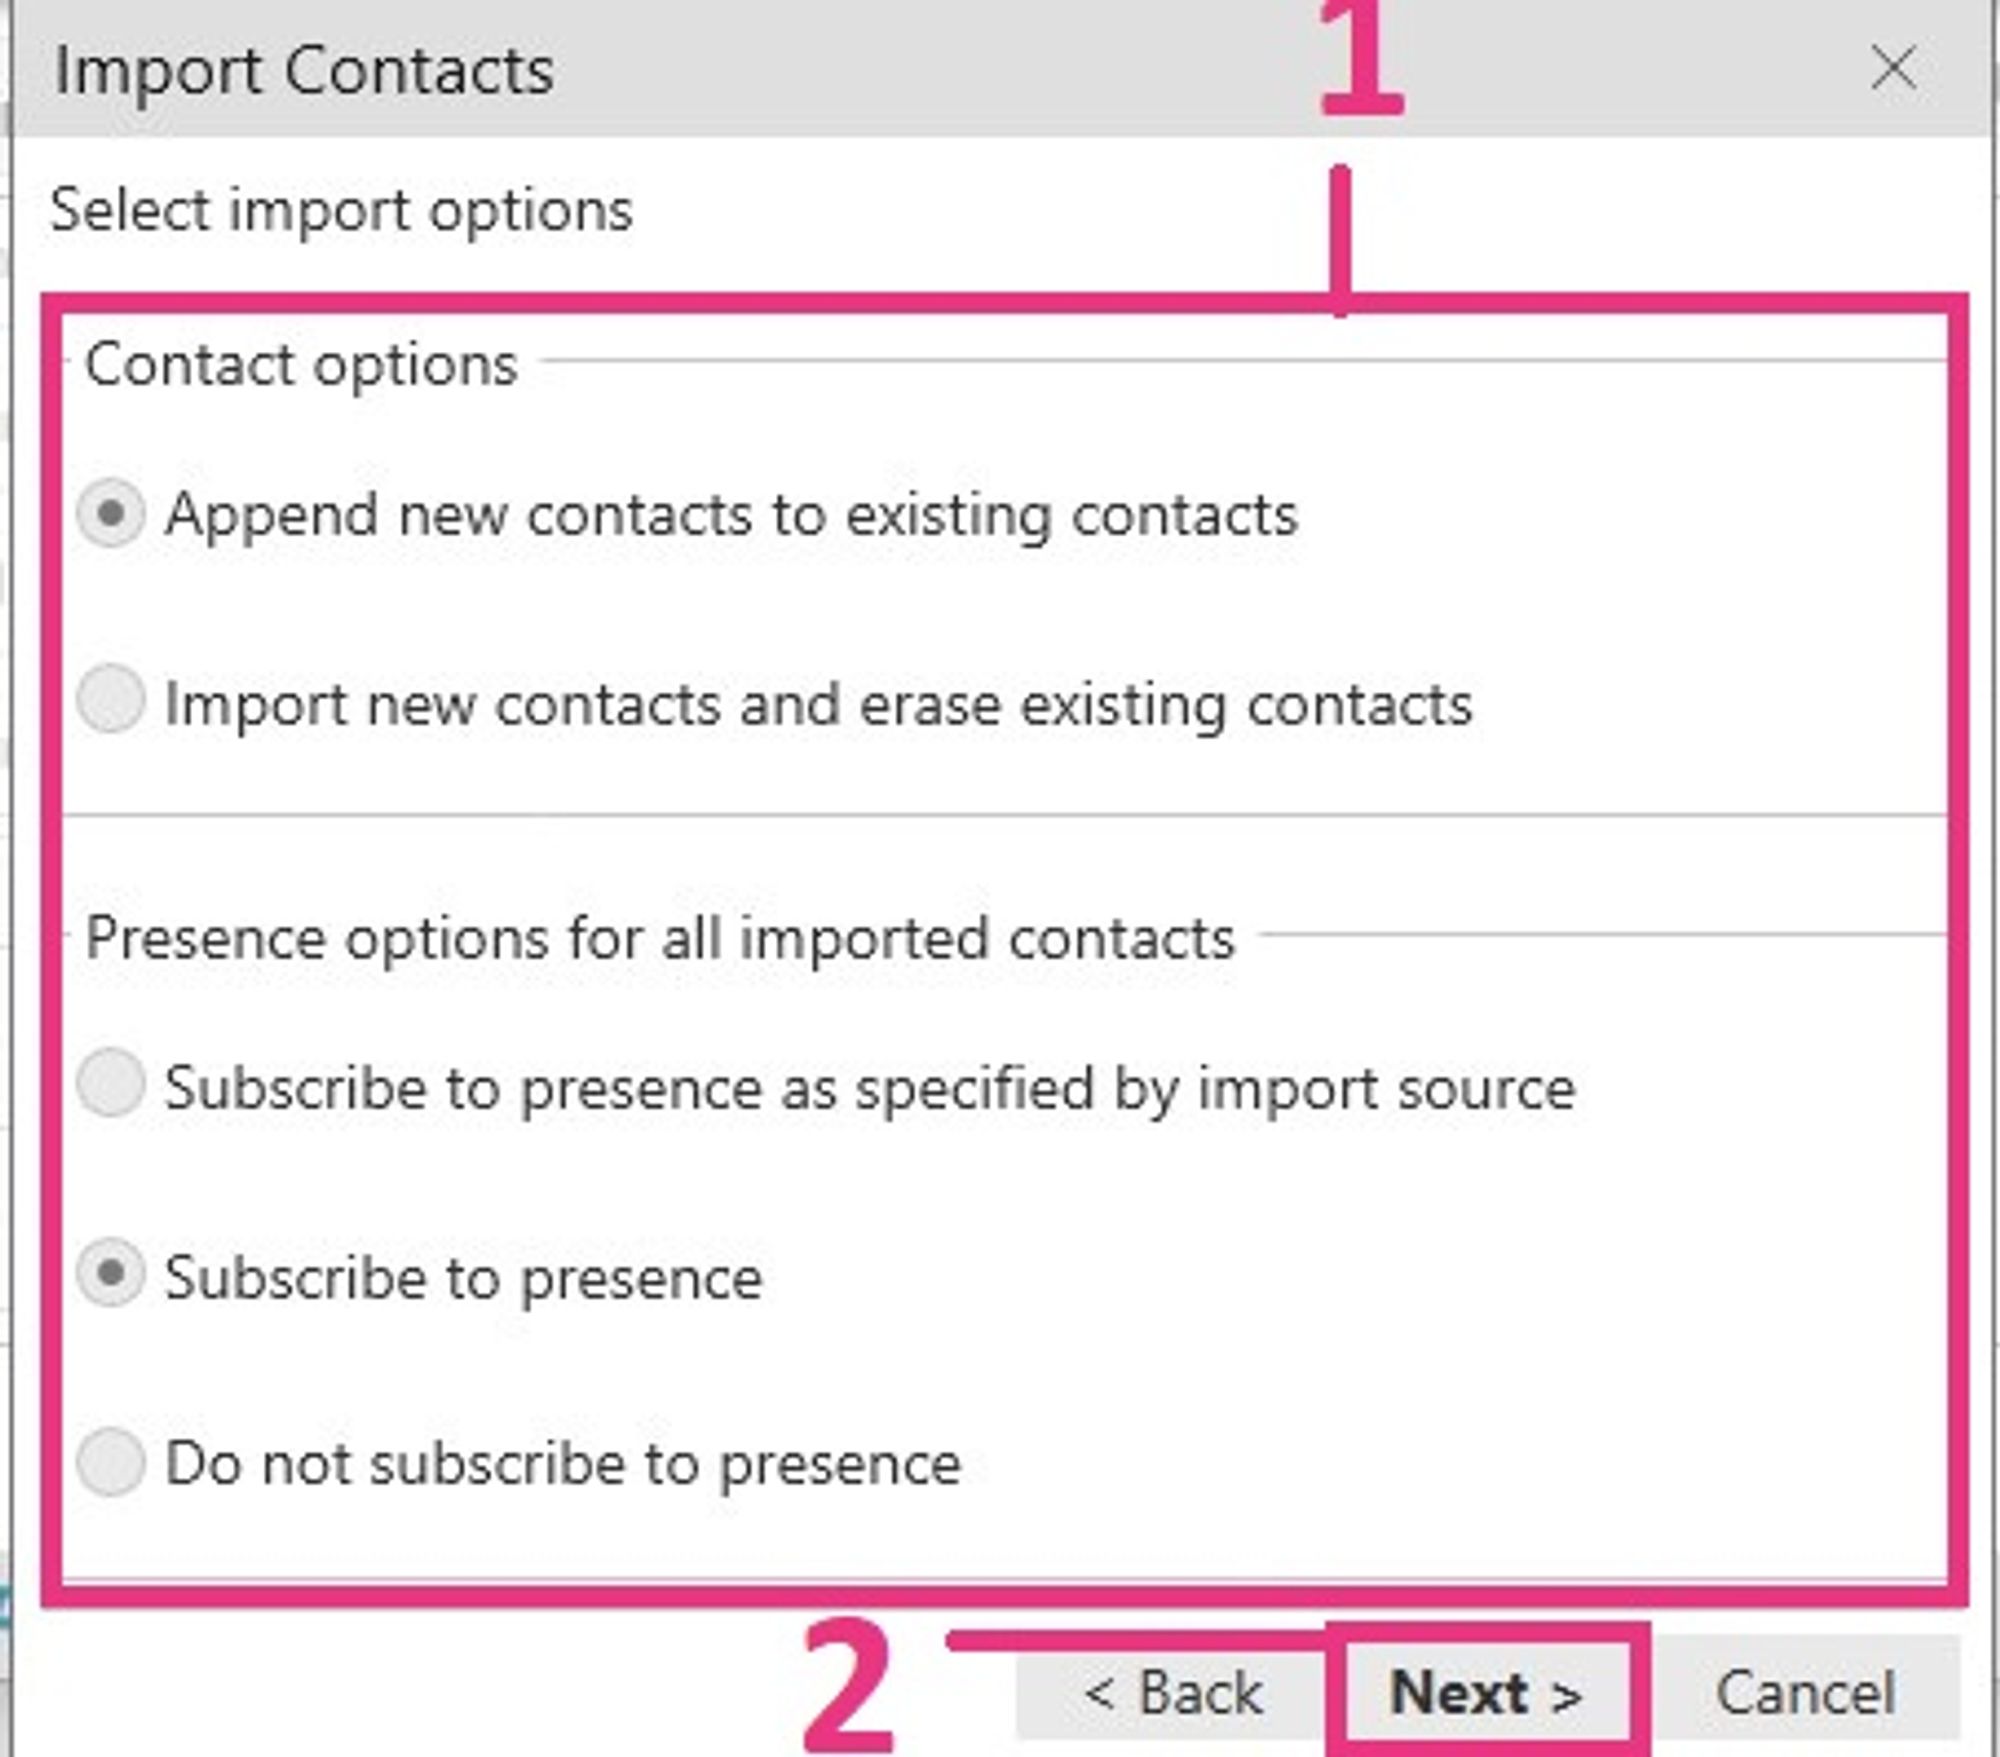
- Select whether you want the contacts to be added onto existing contacts, or to override existing contacts. You may also choose your presence option here, which is designed to show you the status of other users on the system.
- Click “Next”.
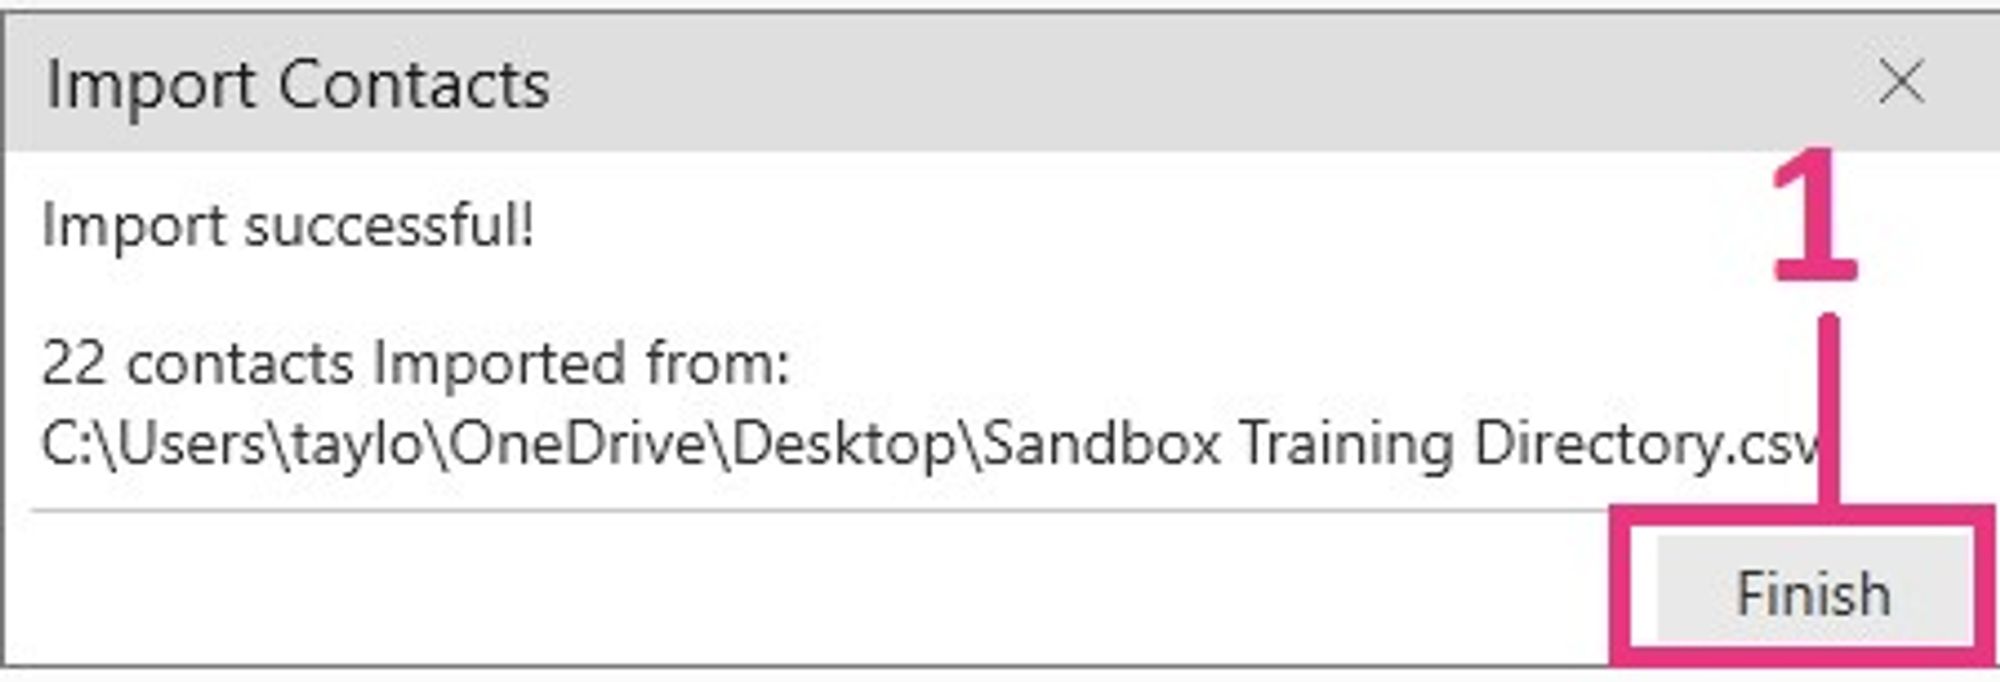
- Select “Finish”.
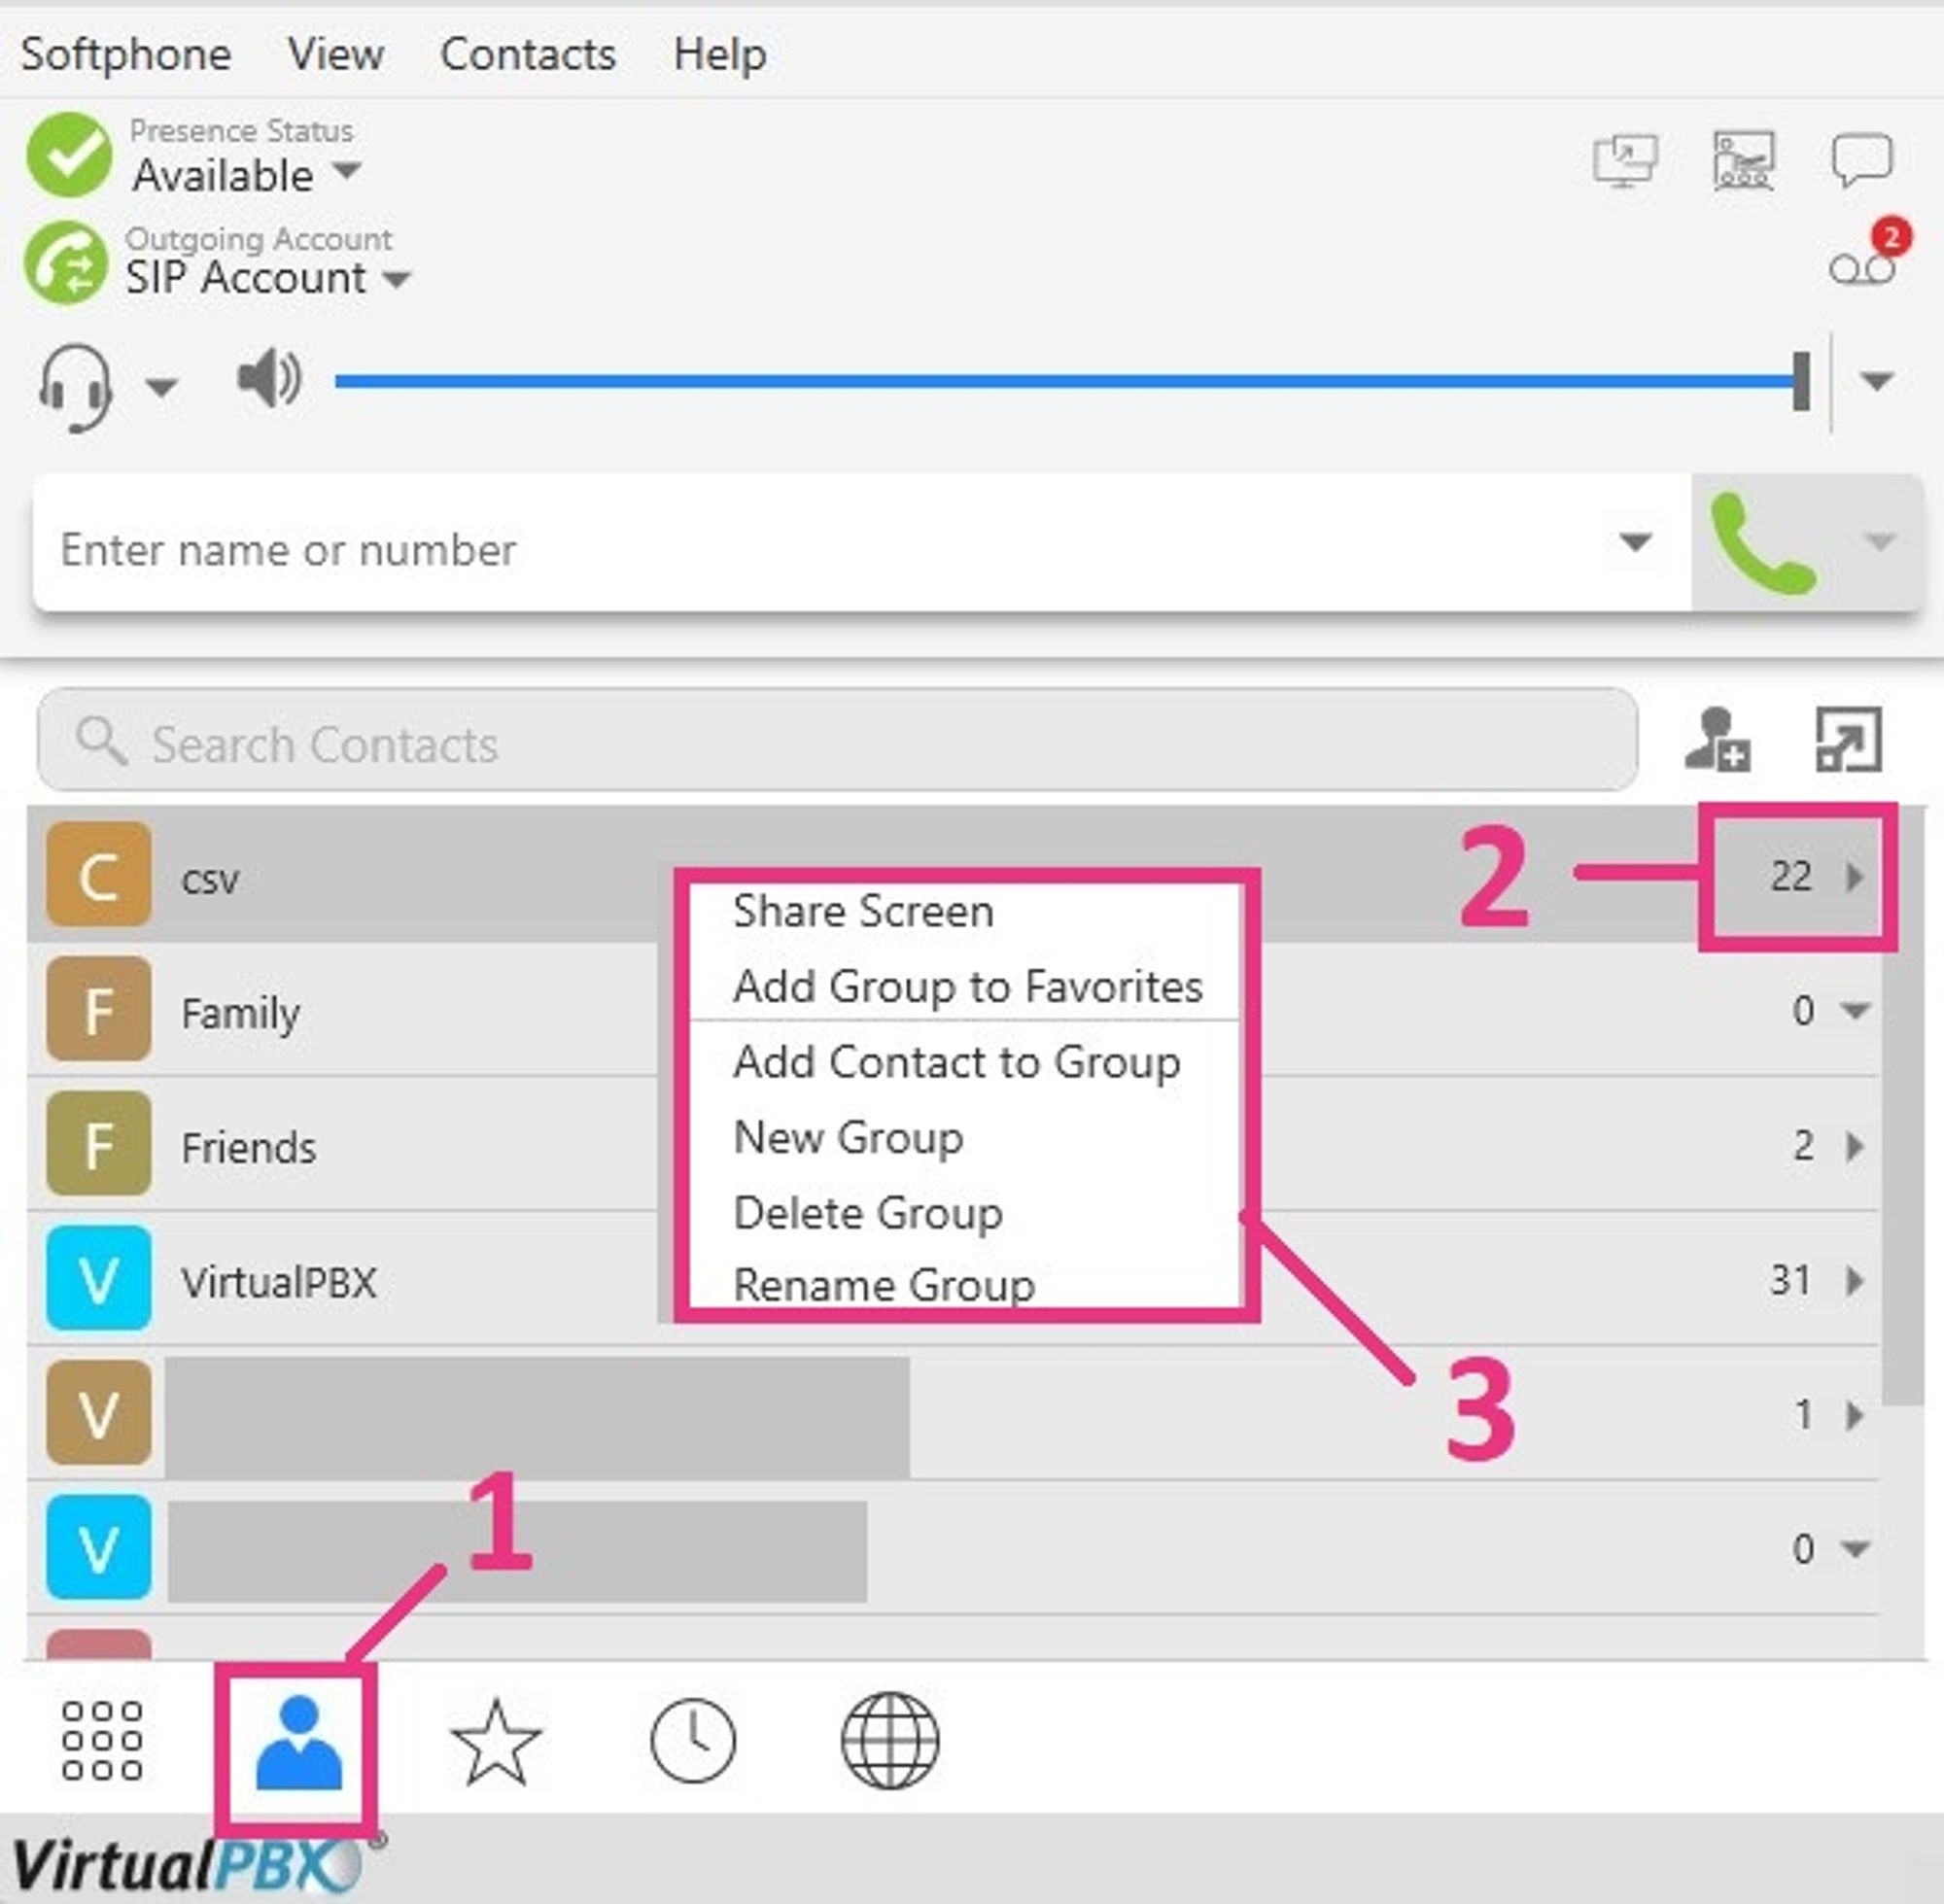
- Click on “Contacts”.
- You should see the imported contacts listed under “CSV”, and can be expanded with the arrow on the right side of the screen.
- You can right click the name of the directory for options to Share / Add to Favorites / Rename the group, etc.
Call History
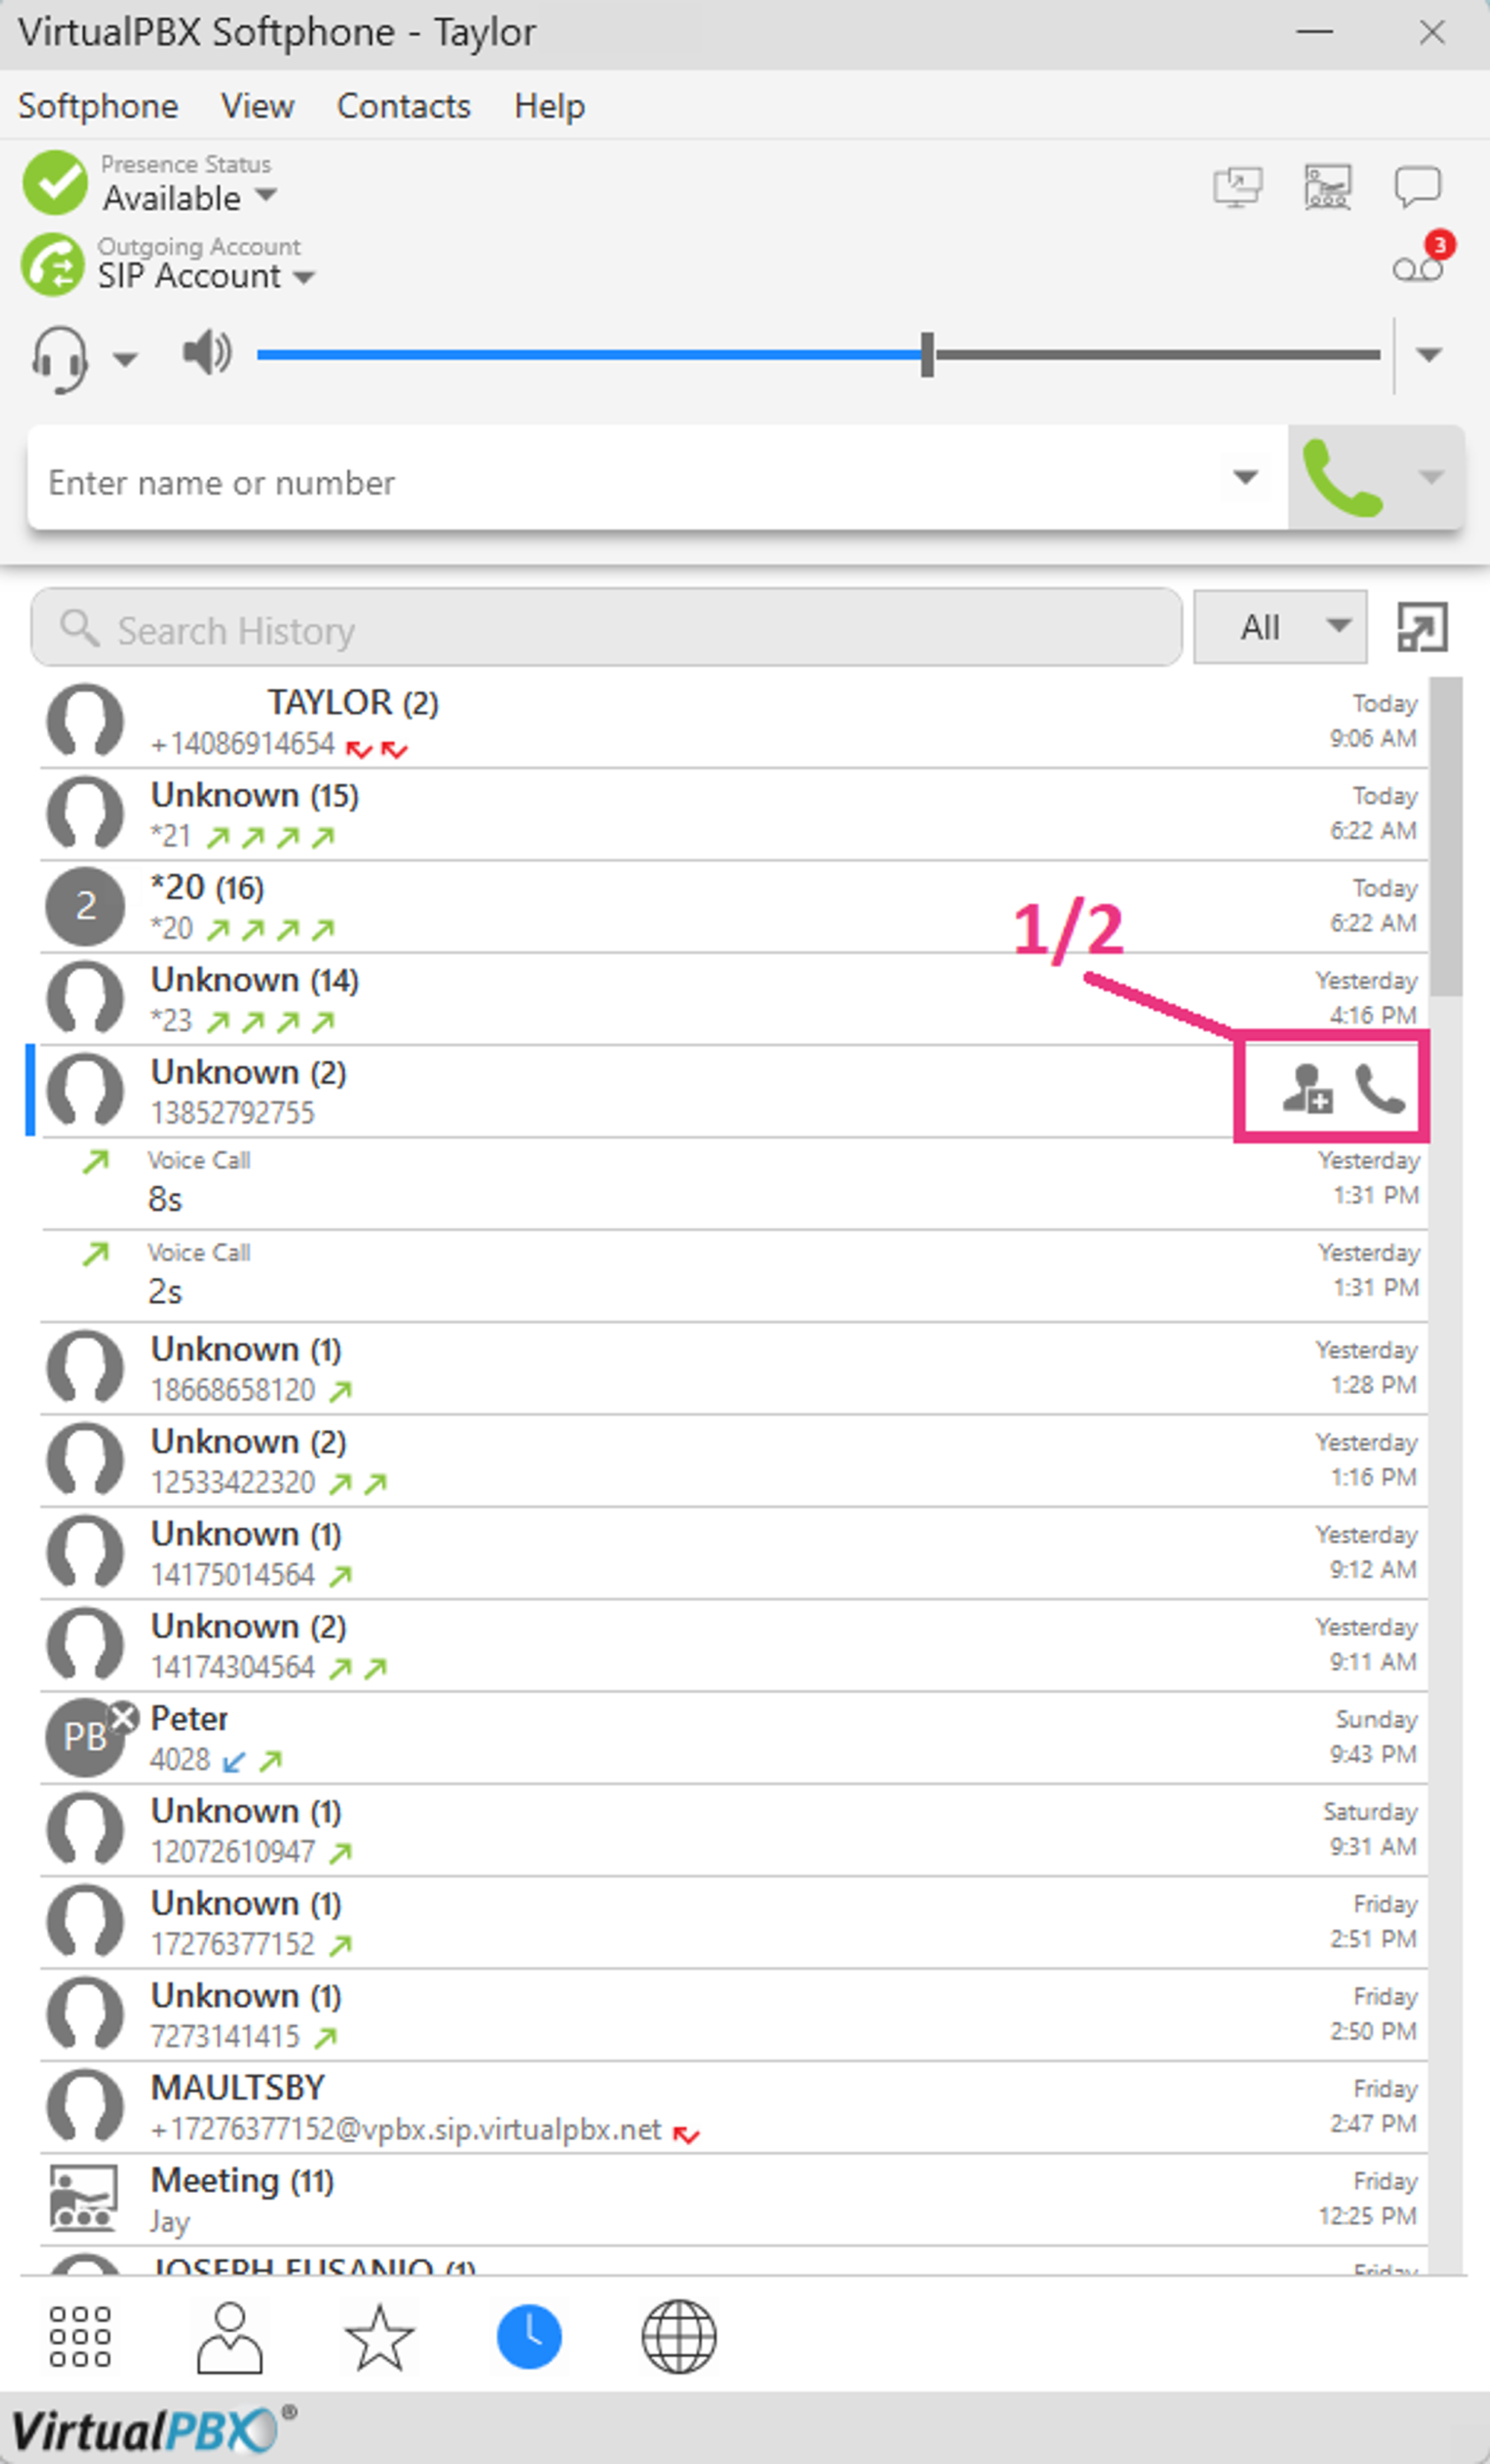
- Press the icon with the + sign to add this caller ID to your contacts
- Press the icon with the phone to call the person from your call history list.
Options on a call
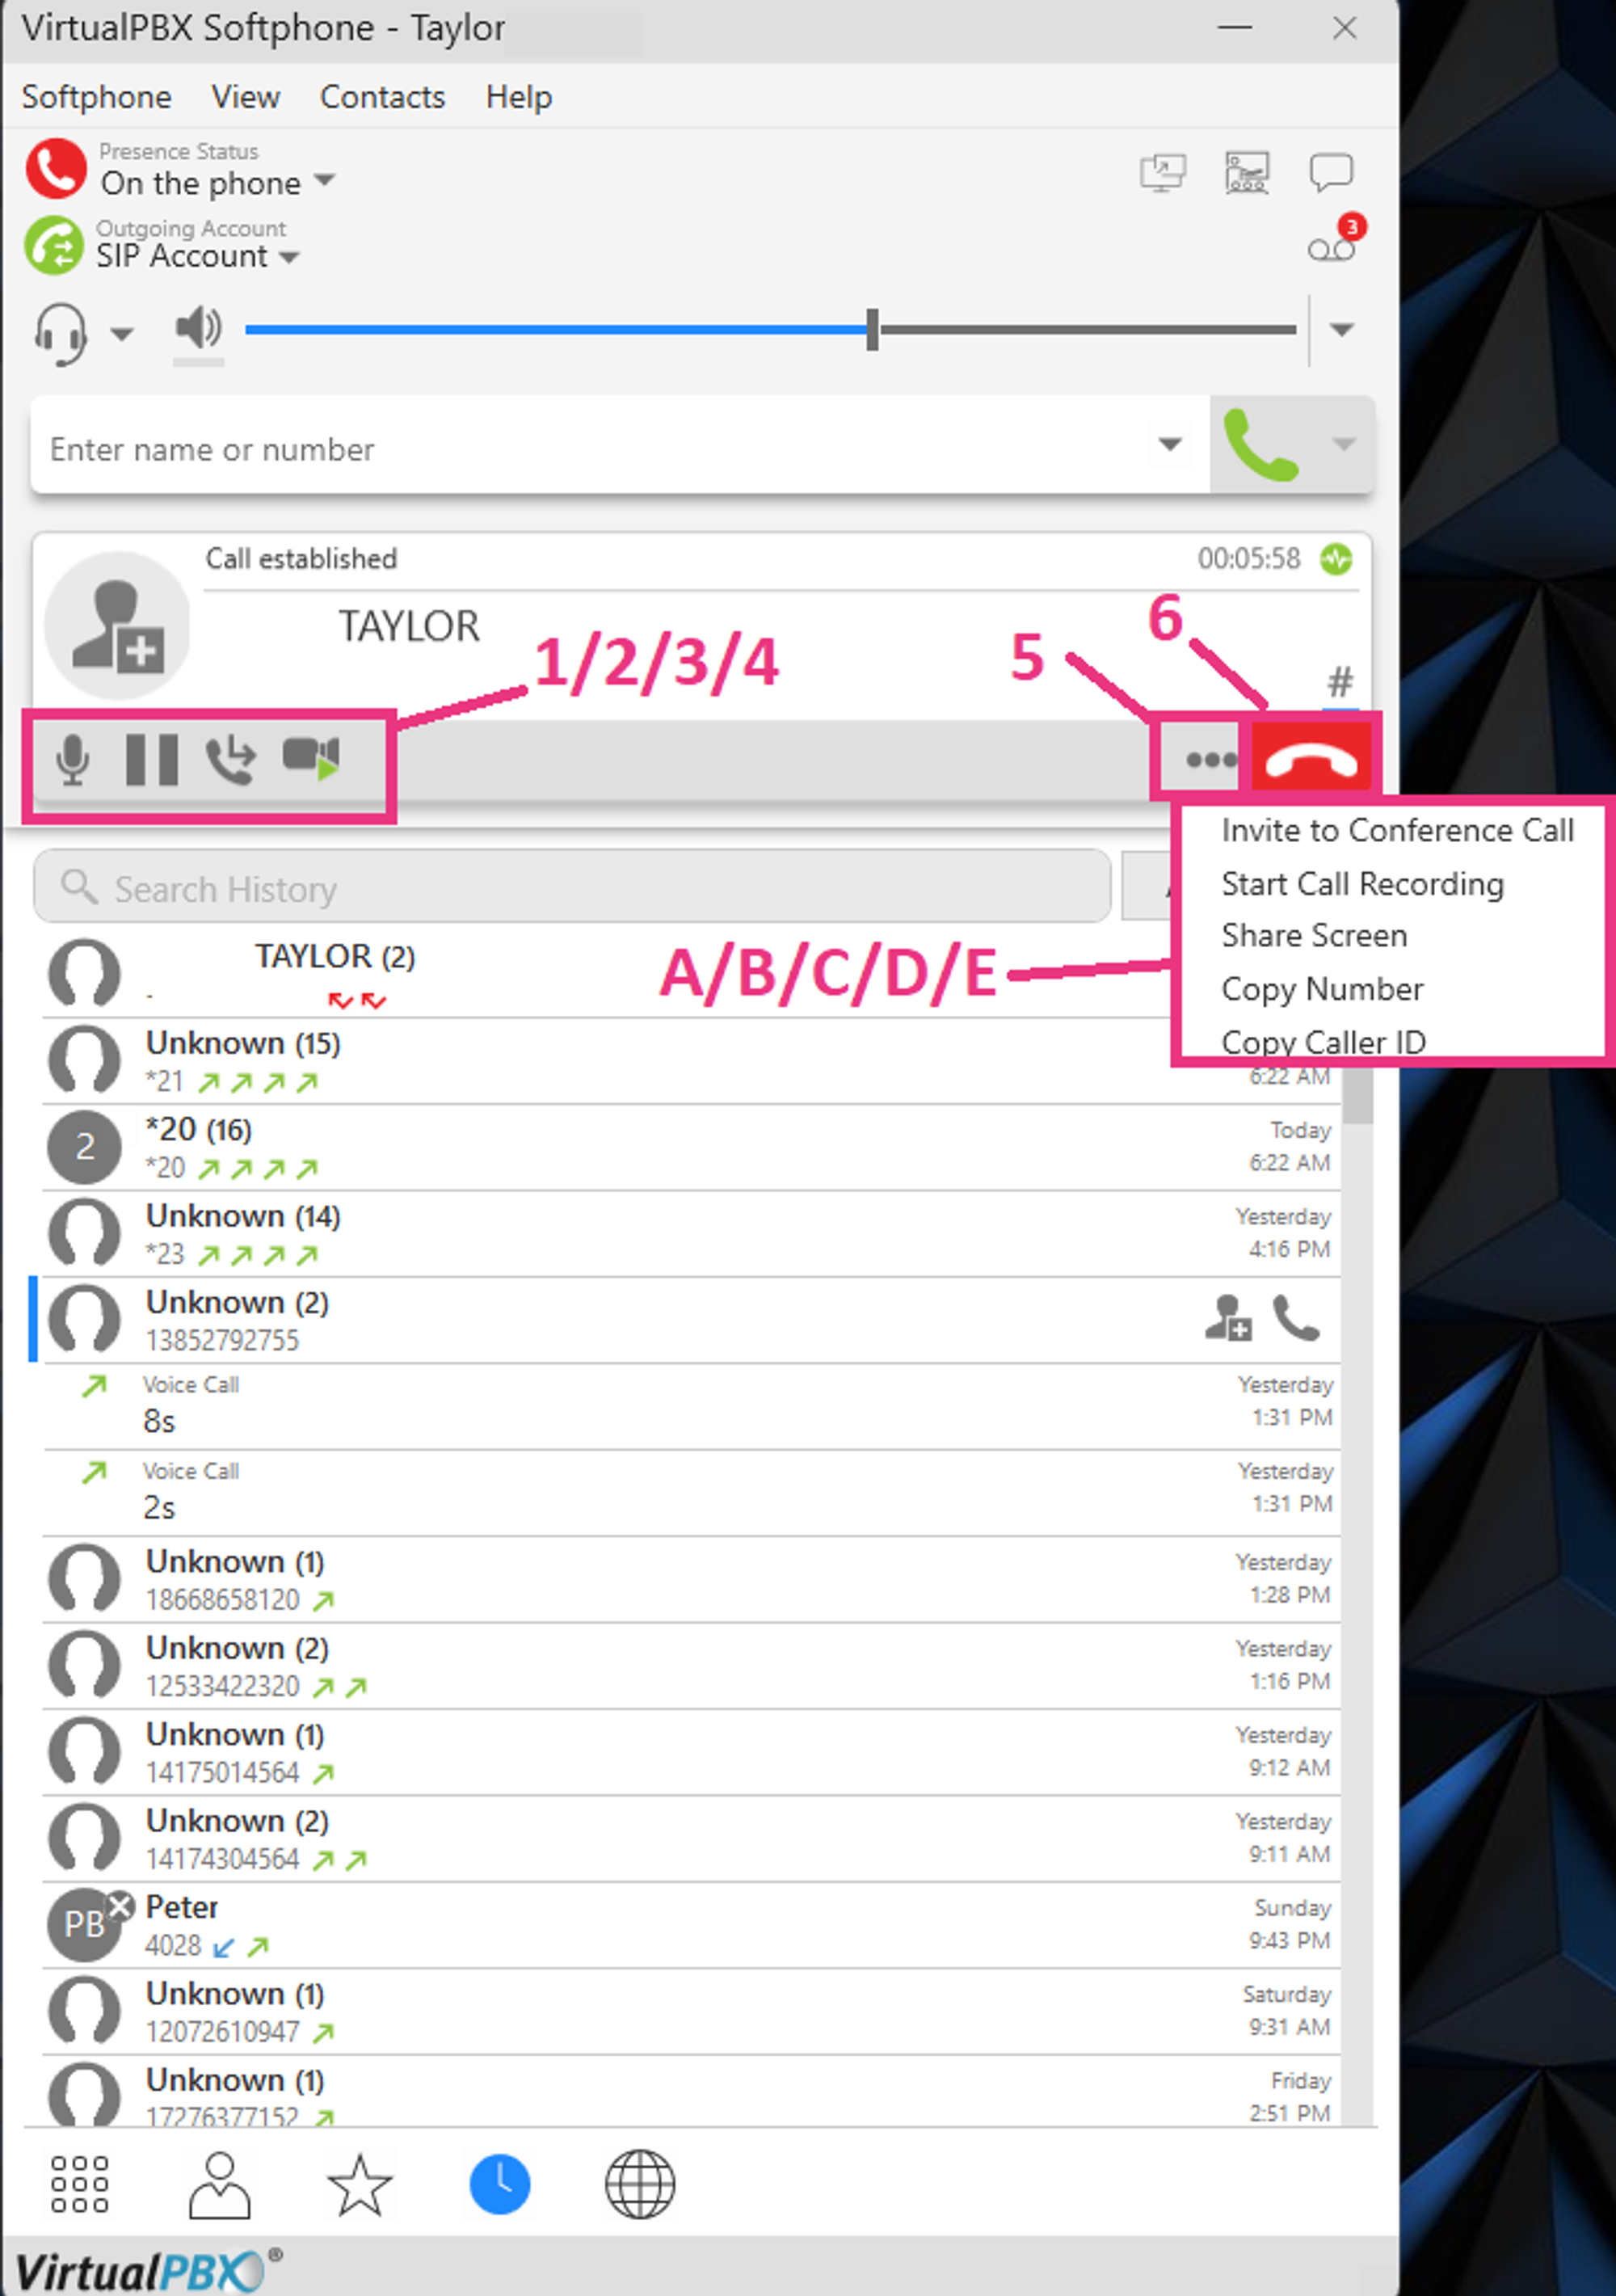
1: Mute/Unmute your microphone
2: Put the caller on hold
3: Transfer the Call
4: Start sending video/enable video call
5: Call options
A: Invite the current caller to a conference call
B: Start call recording for this call (Saved to local disk, not with VirtualPBX)
C: Share your screen with the caller (For use with VirtualPBX Softphone > VirtualPBX Softphone ONLY)
D: Copy the caller number to the clipboard
E: Copy caller ID to the clipboard
6: End the call
Call Transferring
After hitting the transfer key, the page will look similar to below:
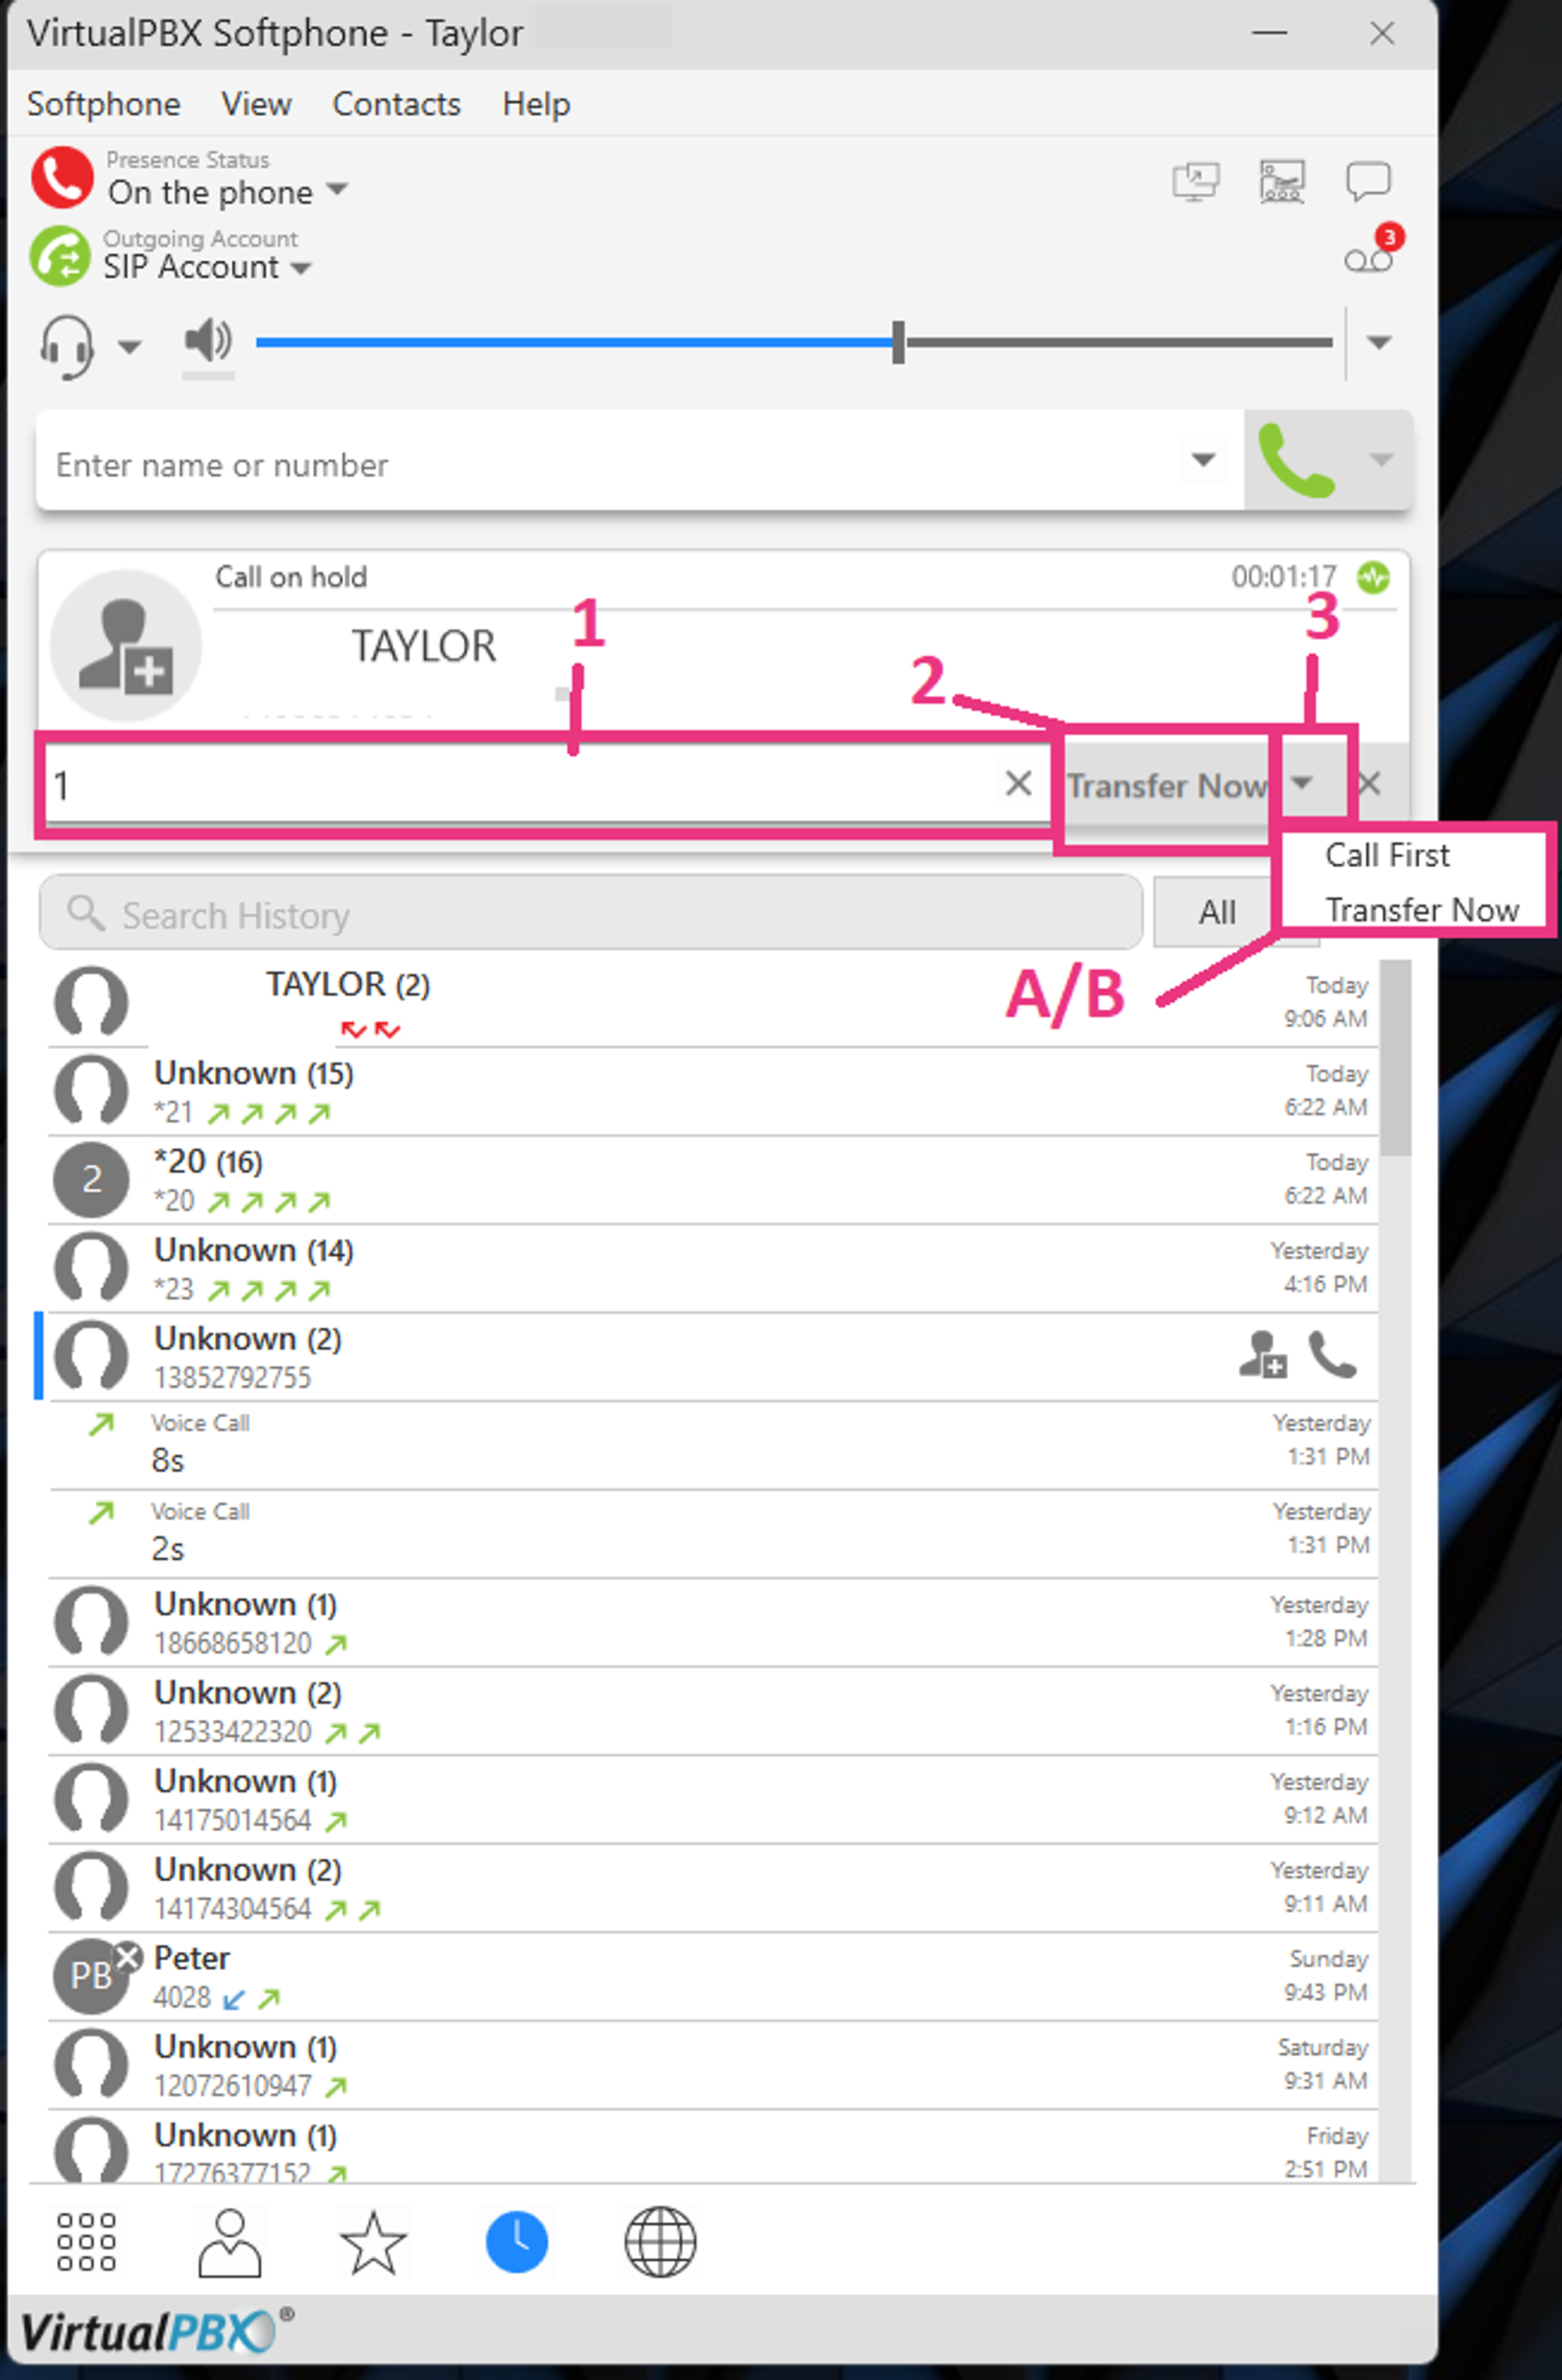
1: Enter the number or extension you want to transfer the call to
2: Press this button if you want to do a cold transfer (call is immediately transferred)
3: The arrow gives you two extra options for the transfer:
A: Call first - This is a ‘warm’ transfer; you can speak to the person receiving the transfer before completing the transfer.
B: Transfer Now - Cold transfer: Your call ends and your caller is connected with the transferee
User Portal
A new feature for the VirtualPBX softphone is access to the “User portal” where you can do things like change your password.
To open, click on the Globe icon on the bottom of the screen
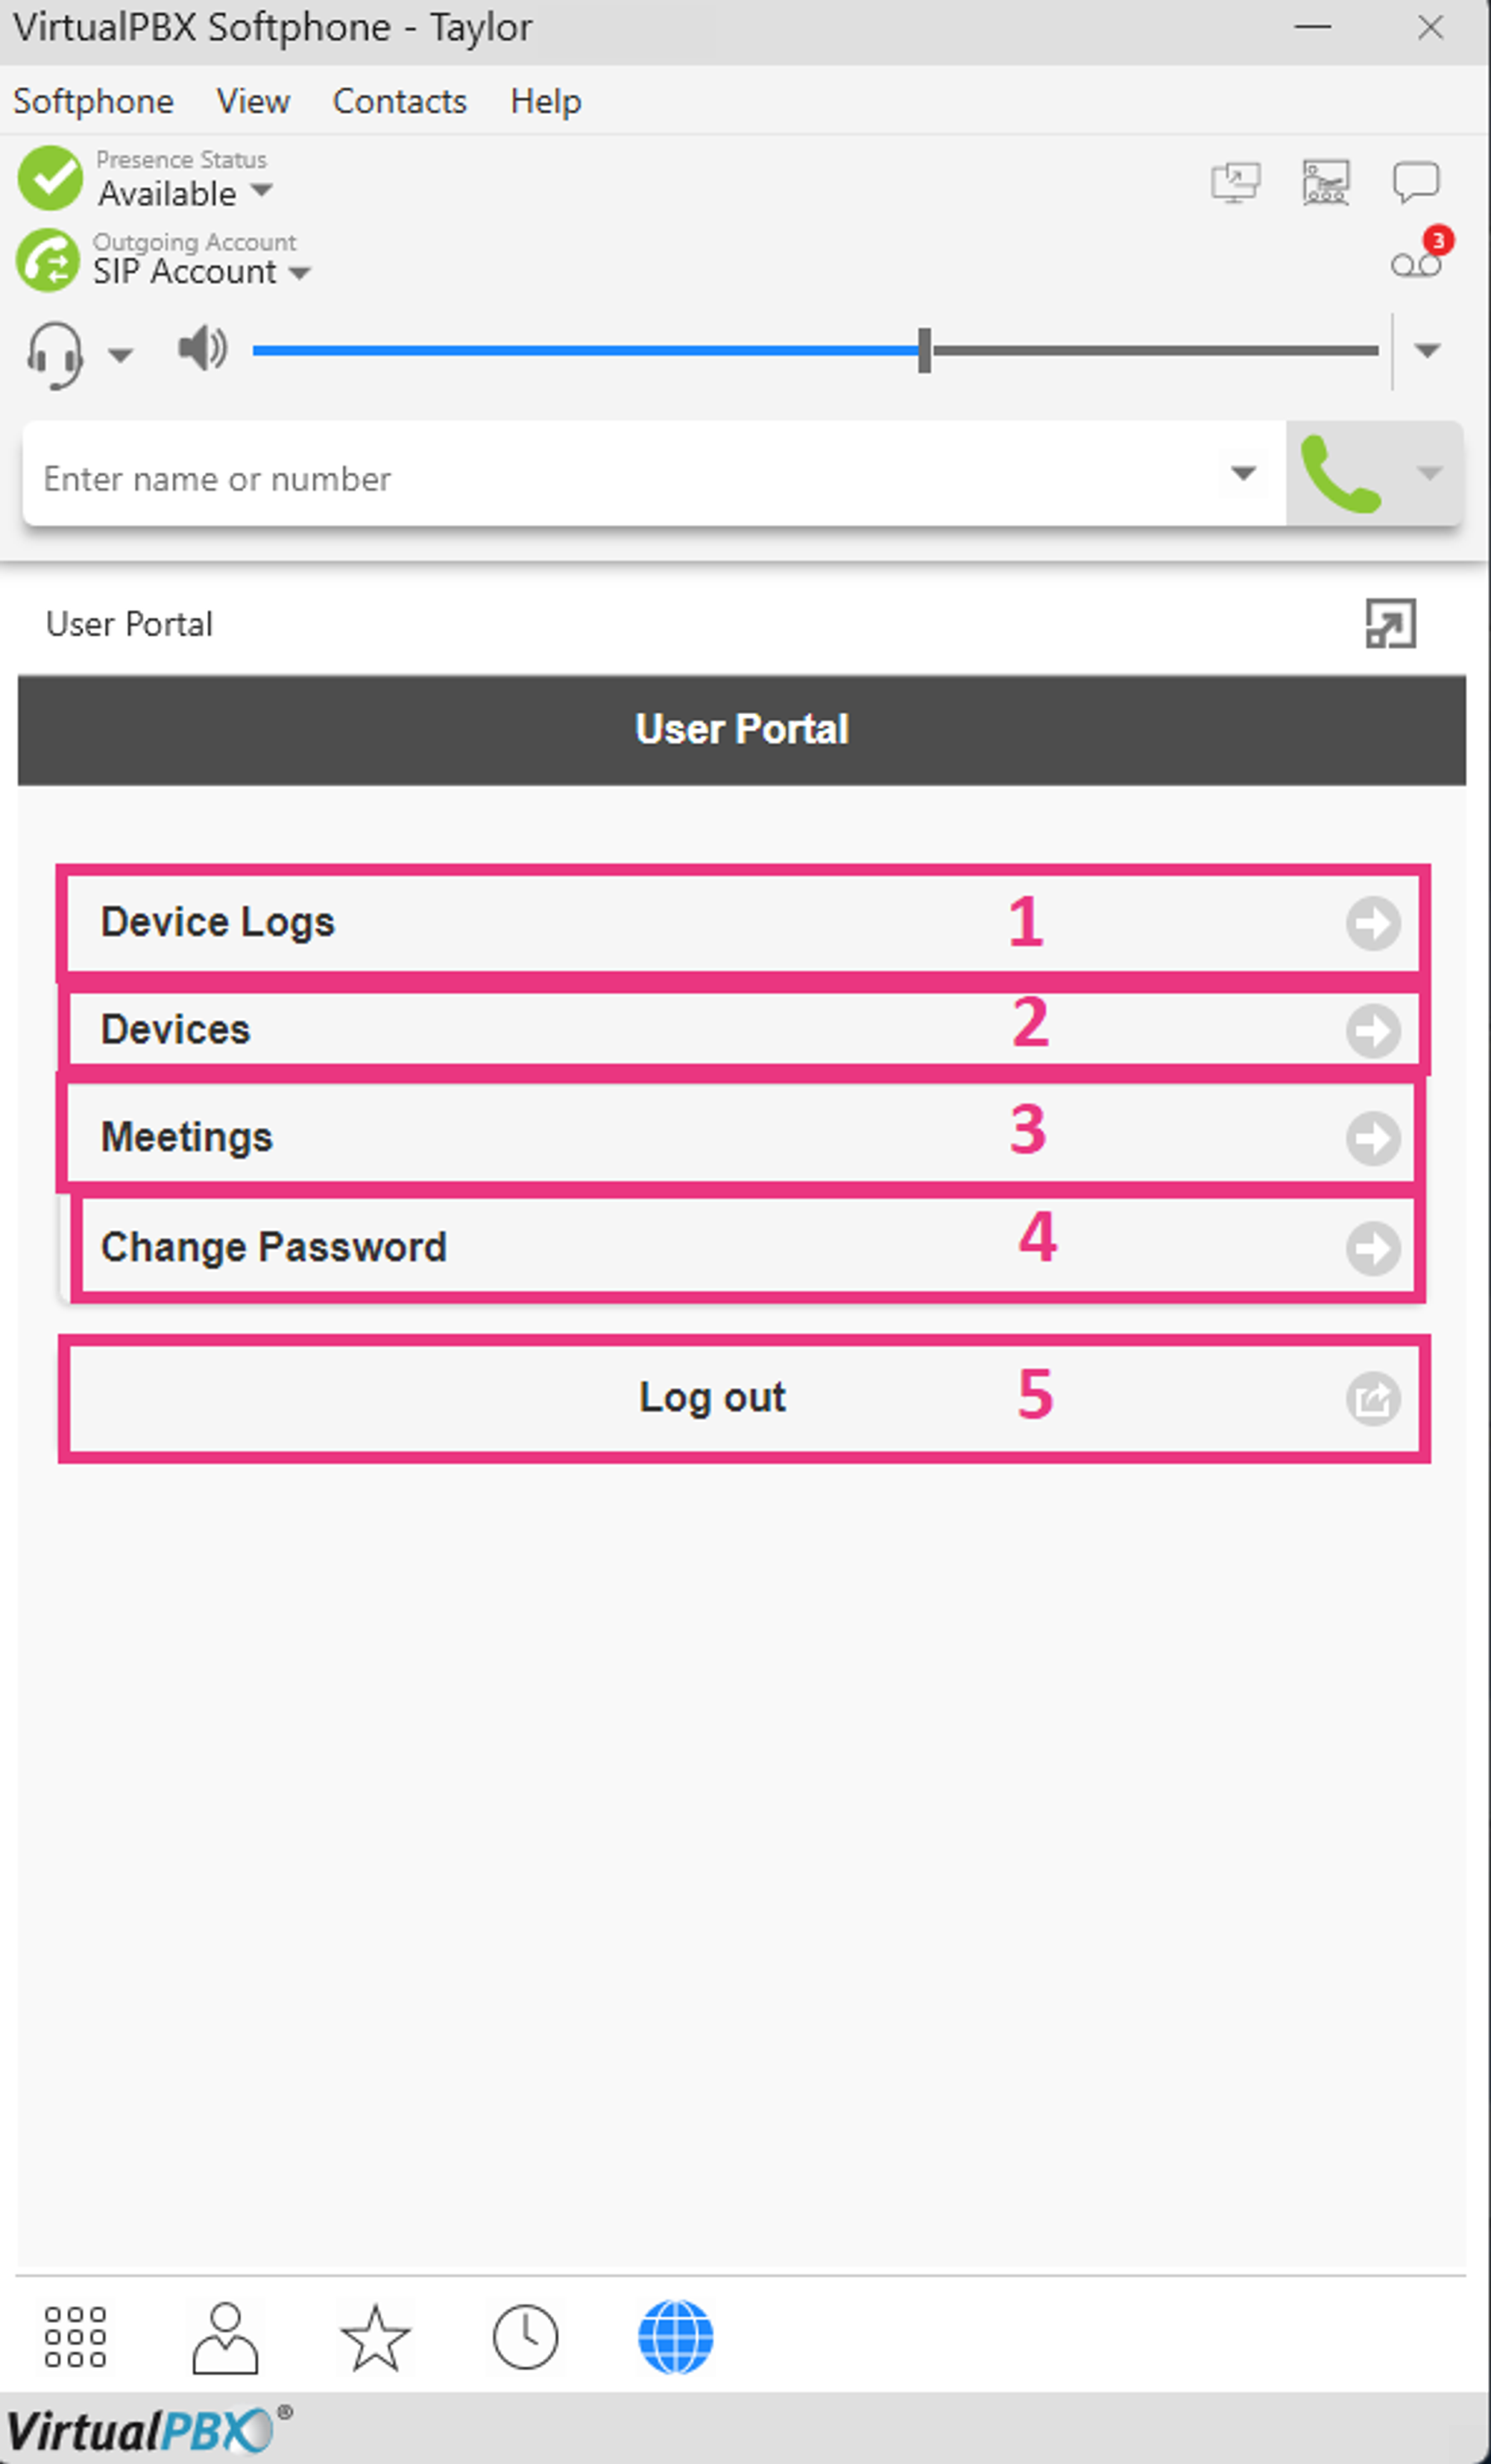
1: Device Logs: These logs are used by our support team when troubleshooting issues with the softphone - In most cases users will not need to navigate to this page. If they need to send logs, they should do so through Settings > Advanced Settings > Verbose Logging > Send Logs instead.
2: Devices: This is where you can see what devices you have logged into the softphone on, and delete logins if you receive a “Device activation limit reached” error.
3: Meeting: This is where you can configure settings for your user conference options on your softphone. Most users will not need to navigate to this page. The Conference bridge should be created and set on your Dash User features instead.
4: Change Password: This is where you can change the password for your softphone login
5: Logout - This will log you out of the user portal
Devices
If you are logging into the softphone on a new device and you receive the error, “Device Activation limit reached”, you can delete old instances of logins via the User Portal.
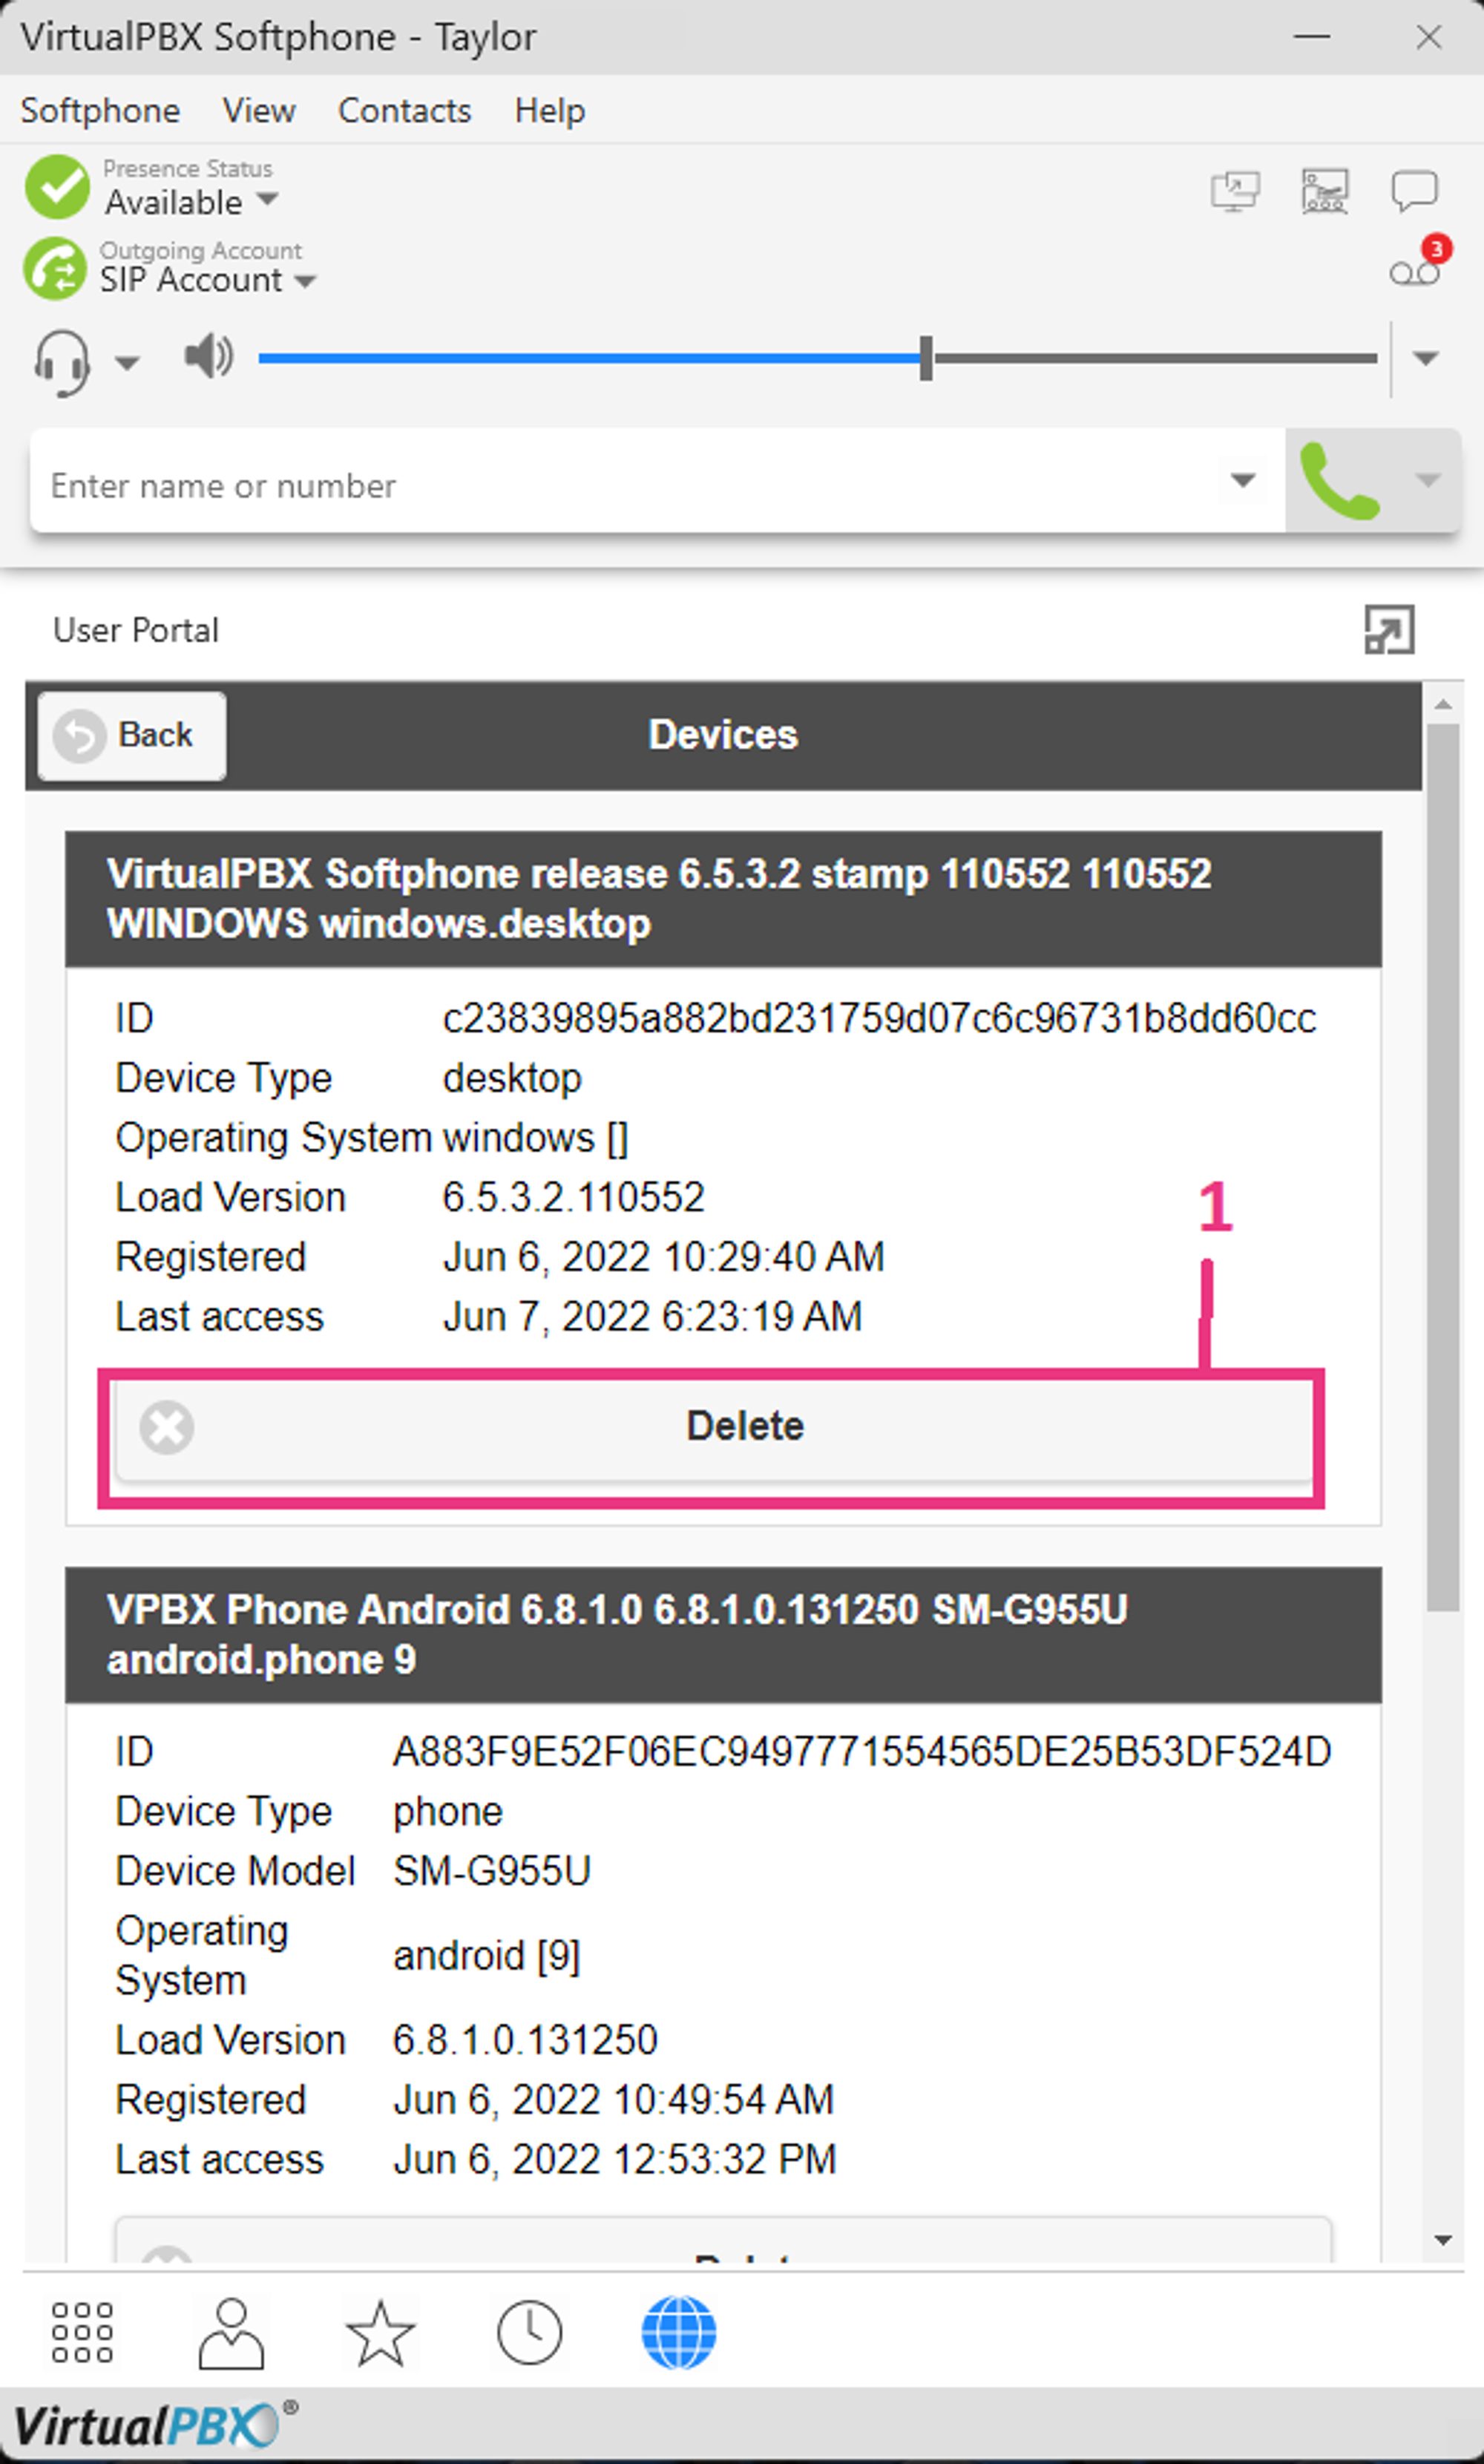
Click on the “Devices” tab:
1: Under that tab, you should see the instances of the softphone login, with a “delete” option below them. Click on Delete, and you should be able to log in on a new device.
If you continue to experience problems with logging in, please contact VirtualPBX Support.
Change Password
To change your softphone password, you will need to be logged in with your current password.

1: Input your current softphone password in the “Old password” field
2: Then, enter your new password in the “New Password” and the “Confirm” box.
3: Hit “Save Changes”: This will complete the password change.