Wire your Cloud Business Phone System to your Business Workflow
Your phone system no longer needs to be a silo of information about your voice communications. In this webhook example we are going to show you how to use the Webhooks feature available on Dash Business Phone Plans with Zapier to better integrate and inform you and your team about critical metrics.
The following is a real webhook example that we have put into action at Iamfine.com allowing the reception of Slack notifications when:
- a call enters your system
- a user makes an outbound call
Webhook Example: Receive a Slack Notification Displaying Caller ID
Before we get started you will need:
Phase 1: Prepare a Slack Channel to Receive Notifications

- Log into your Slack account and create a new channel by clicking on the + at the top of your Channels list.
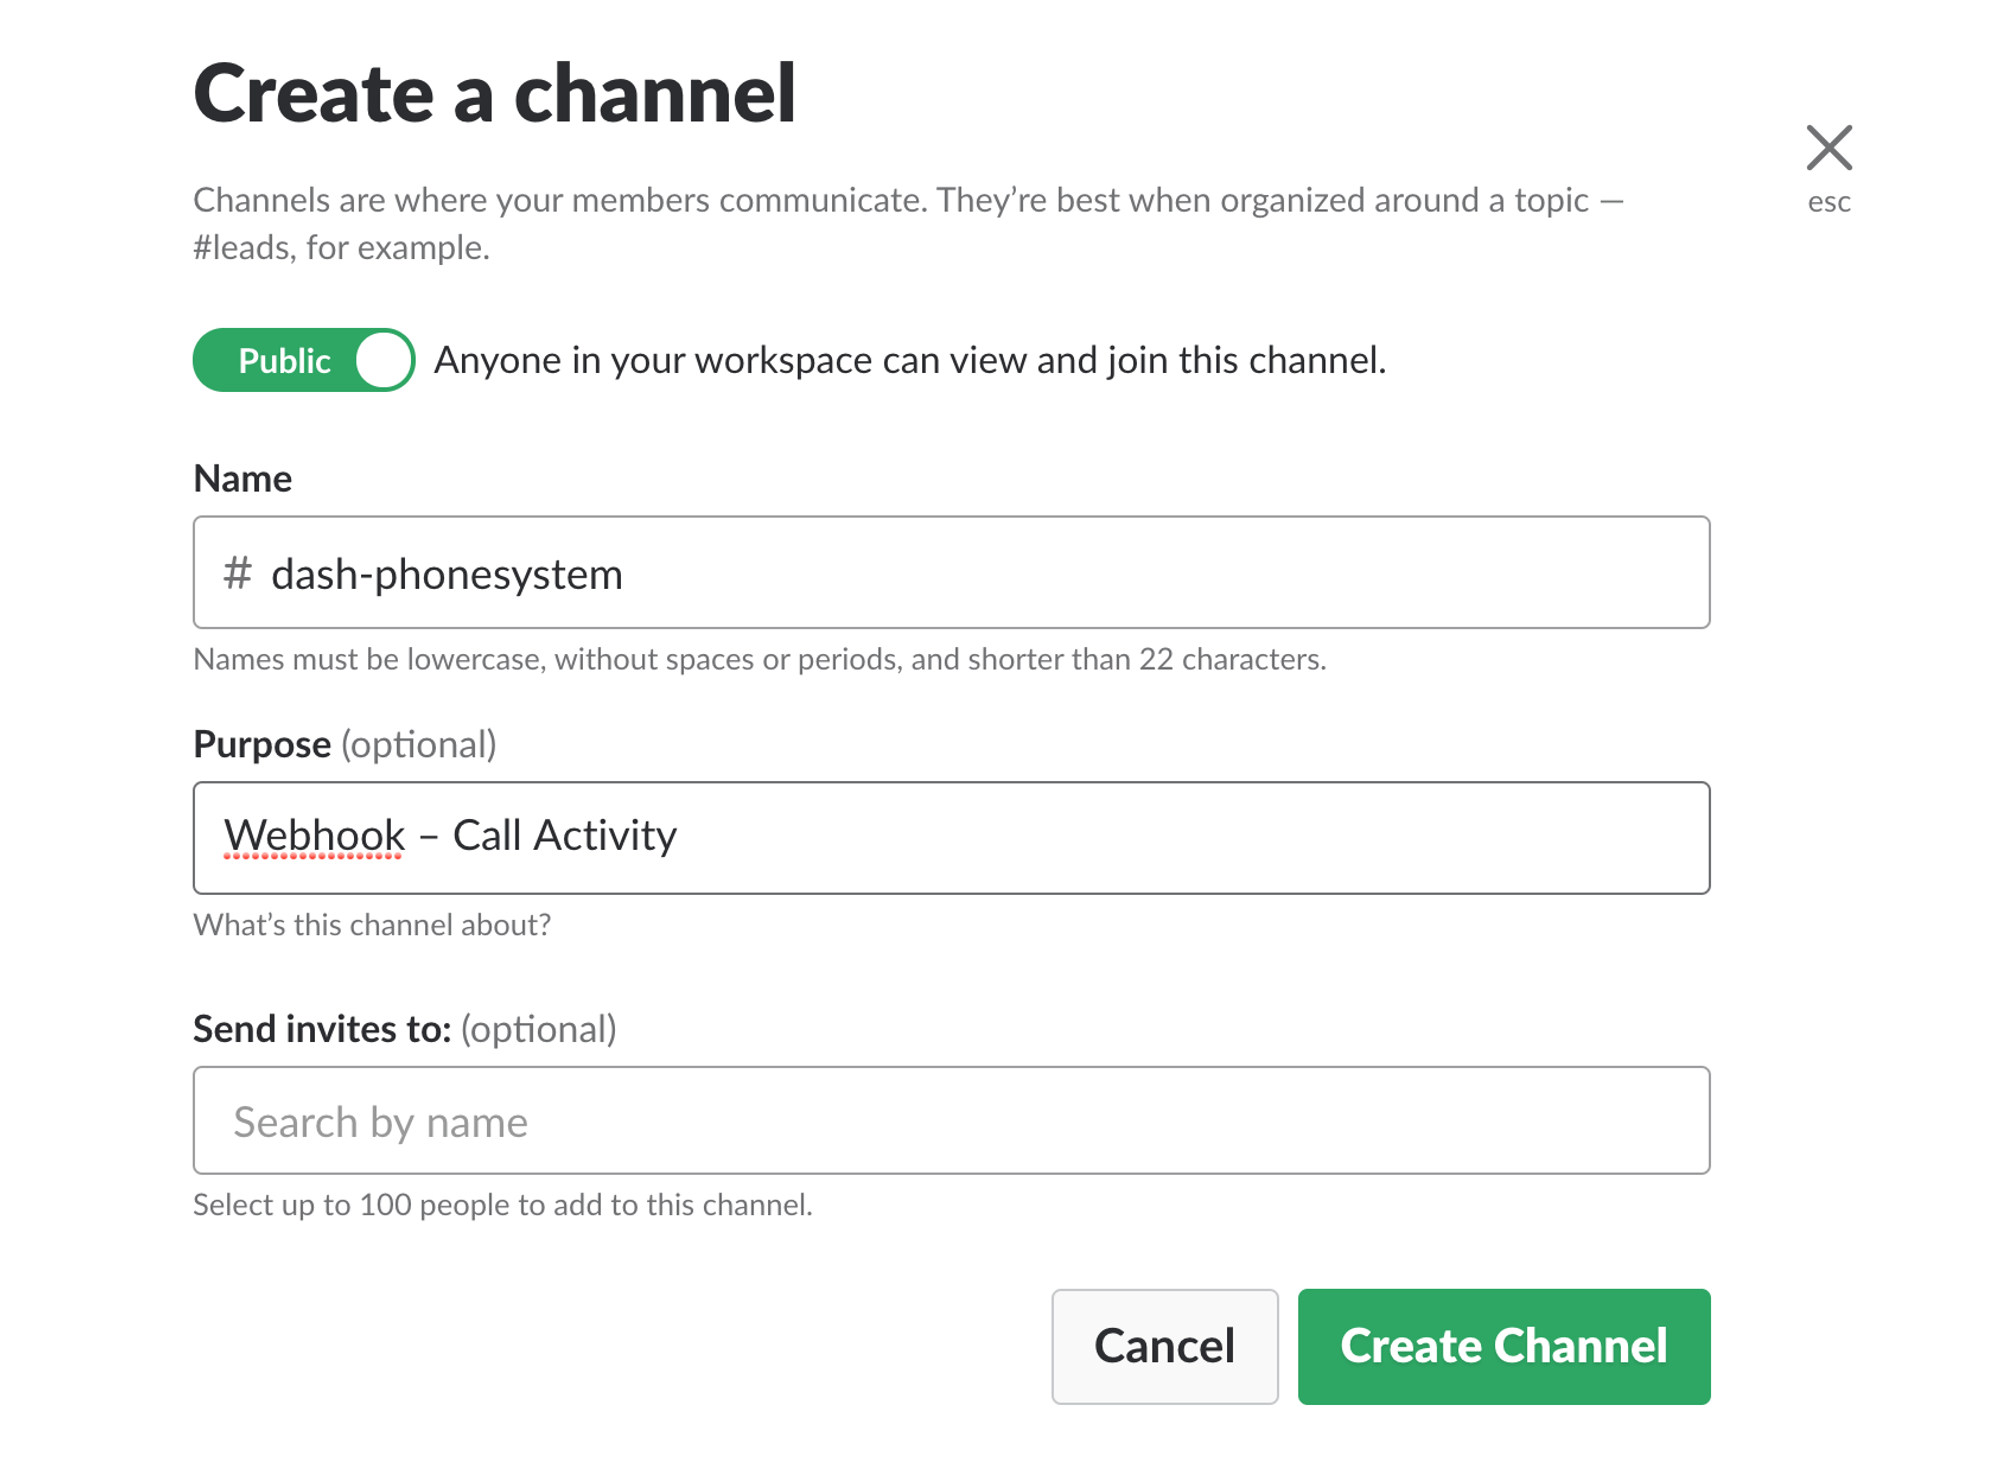
- Give your channel a name (in this example, we will be using “dash-phonesystem”) keeping note that the title must be all lowercase and contain no spaces, mark it public or private, set the channel’s purpose (optional), and invite team members (optional). When you are finished, click Create Channel.
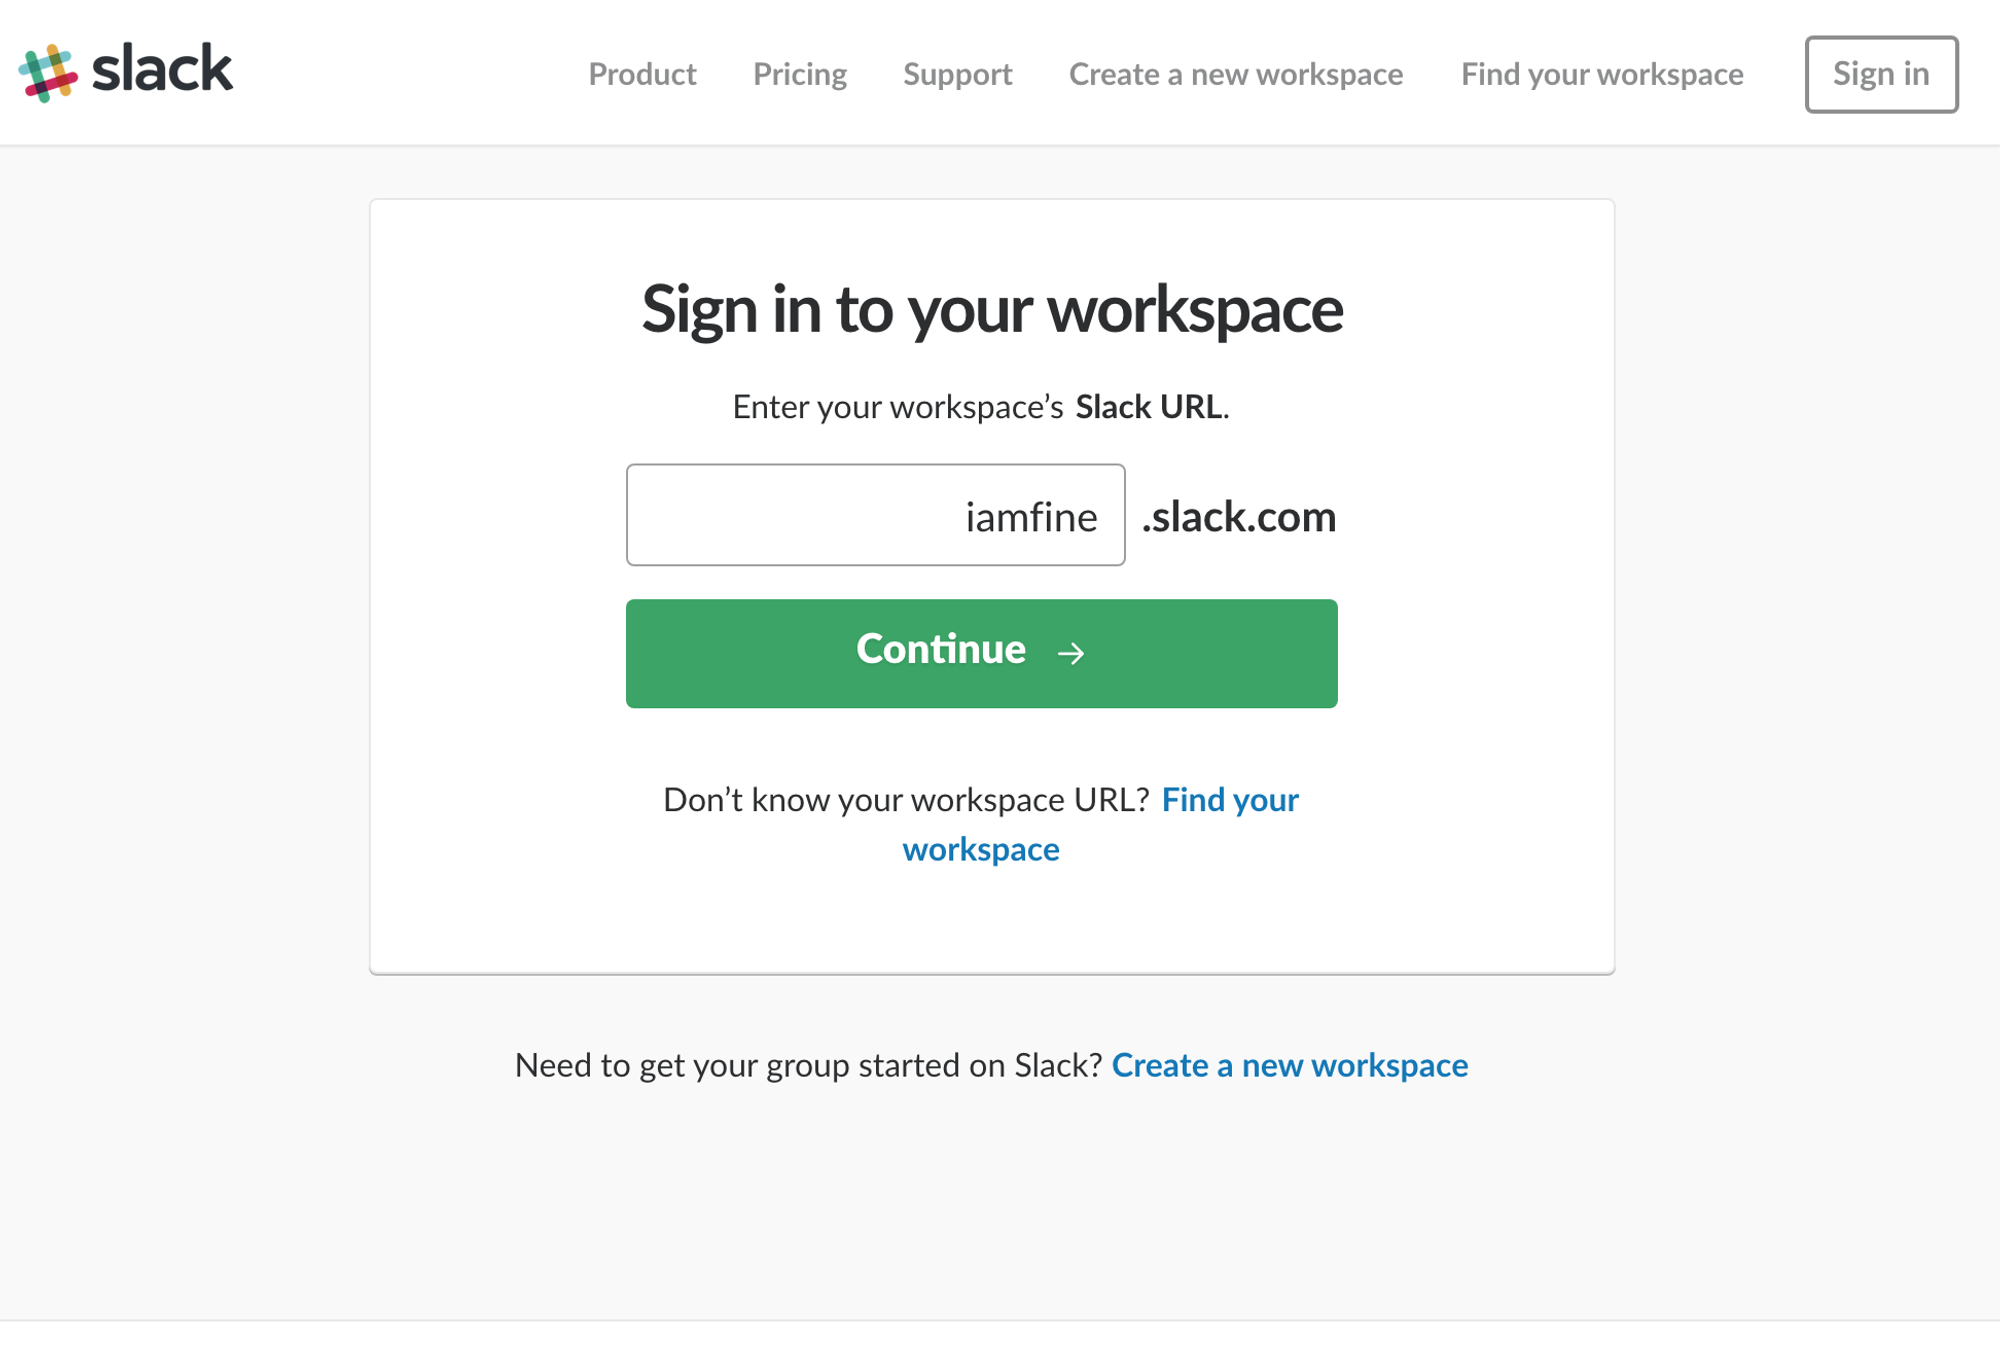
- Next, log into Zapier and select Slack from “Connected Accounts”. Complete the authentication steps to connect Slack to Zapier.
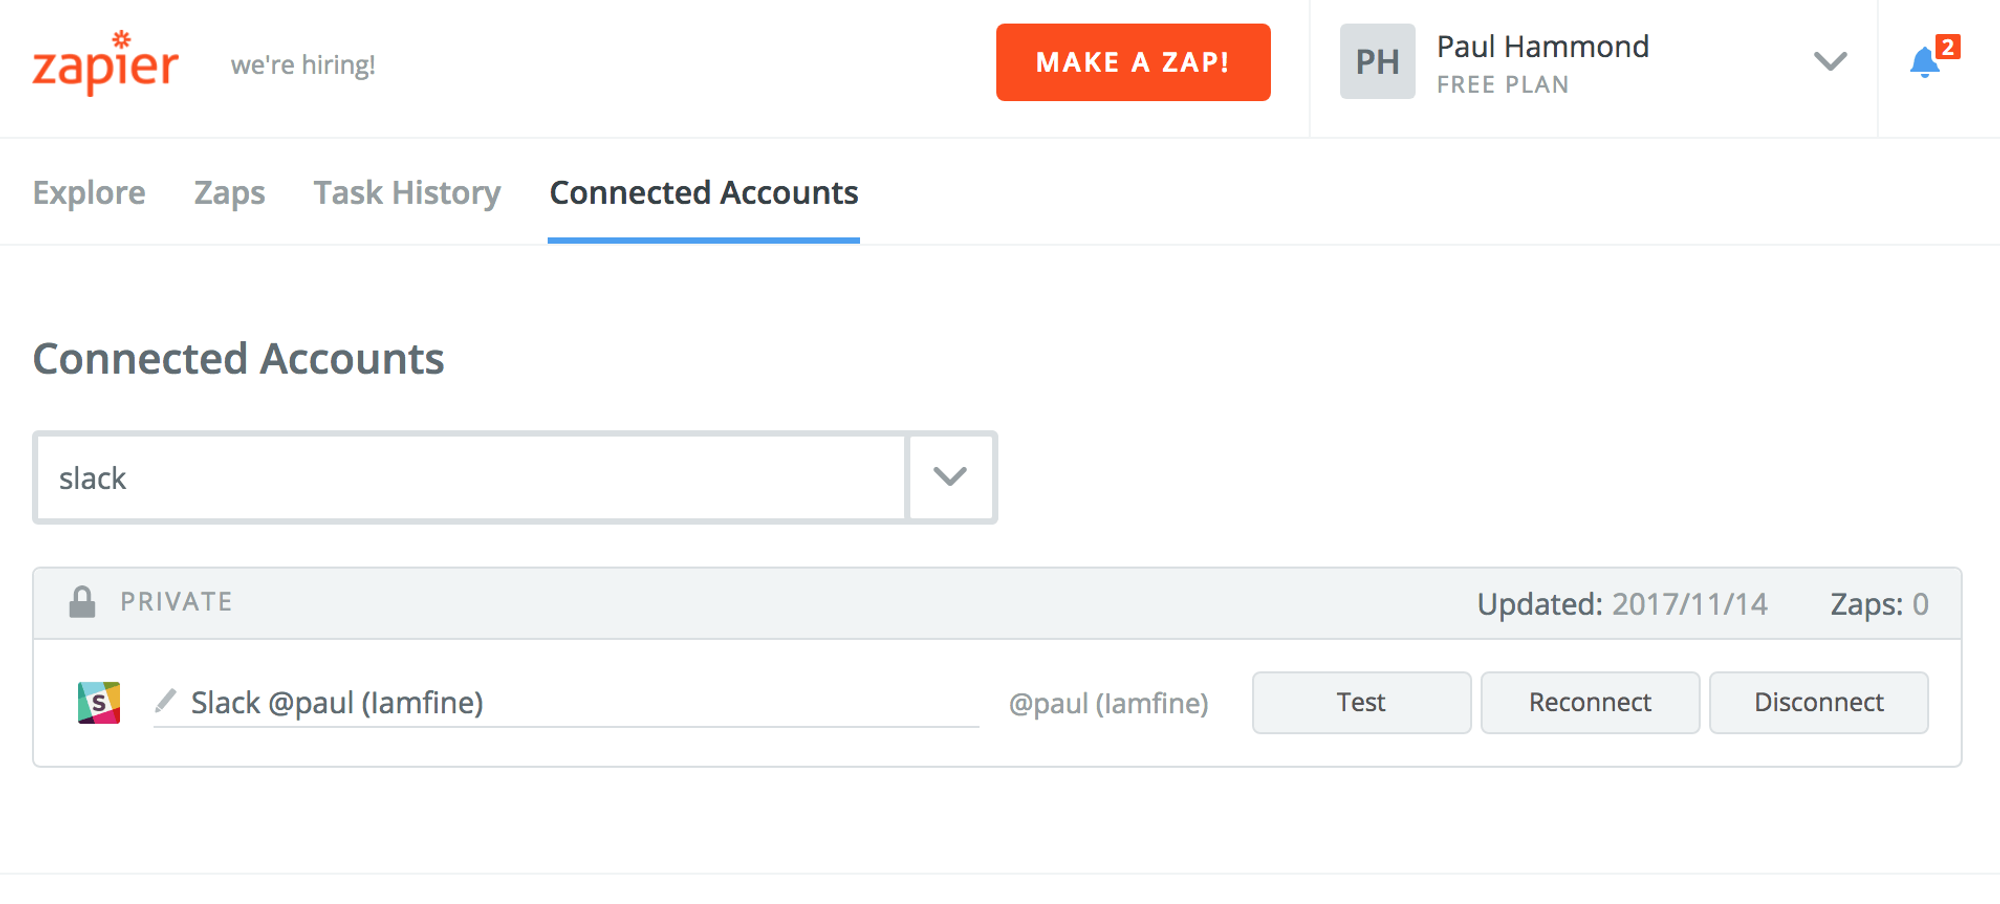
- Once your account has been authorized, you will see Slack in your list of connected accounts.
Phase 2: Configure Zapier to Accept a Webhook from Dash
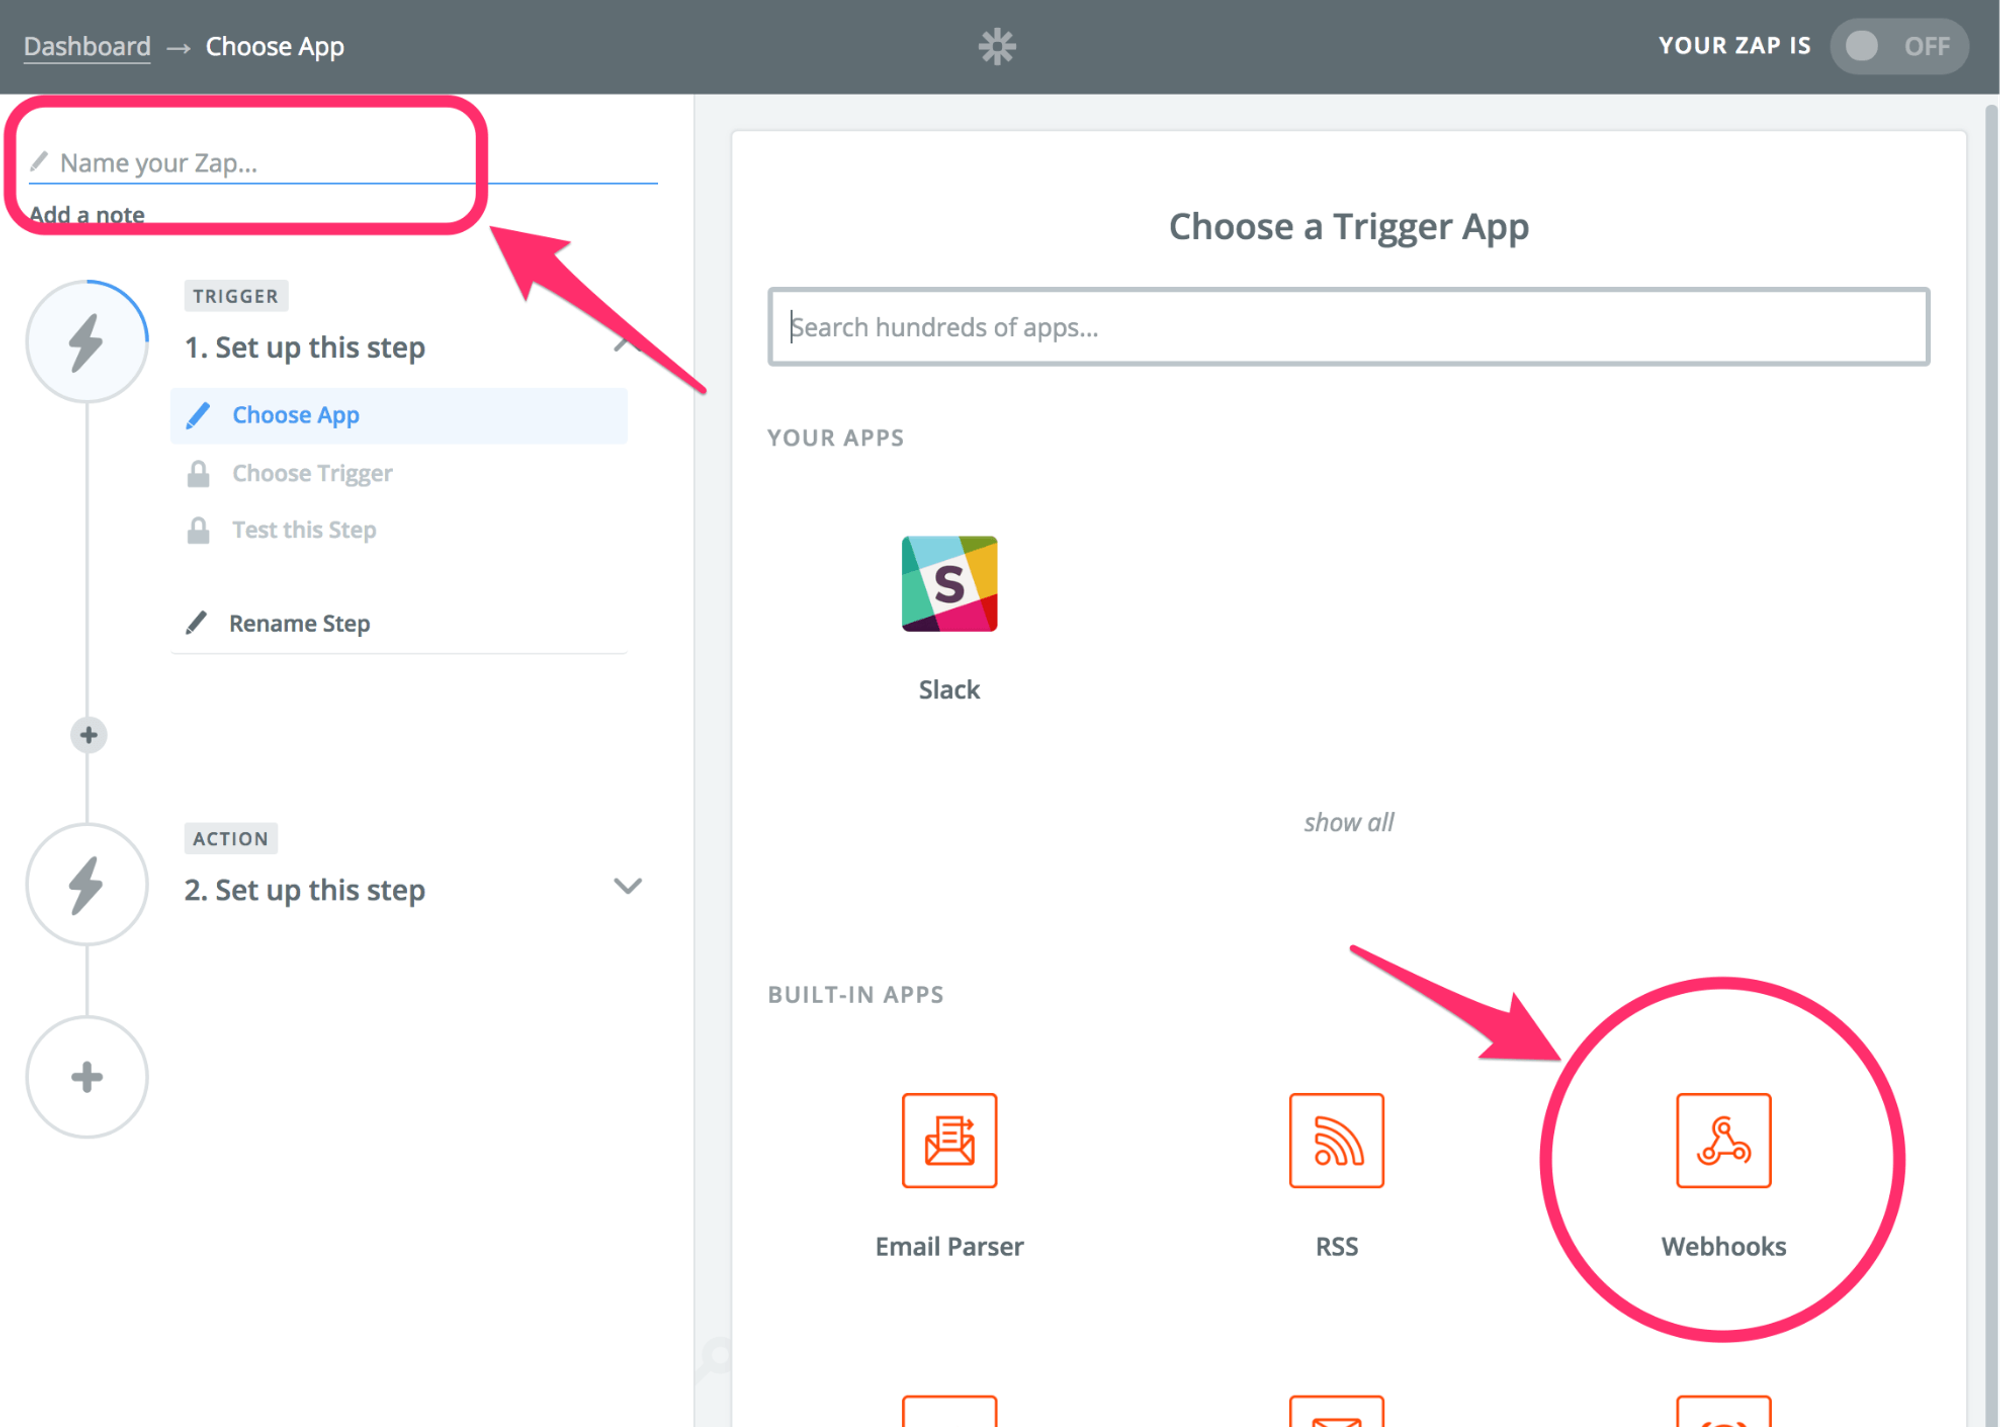
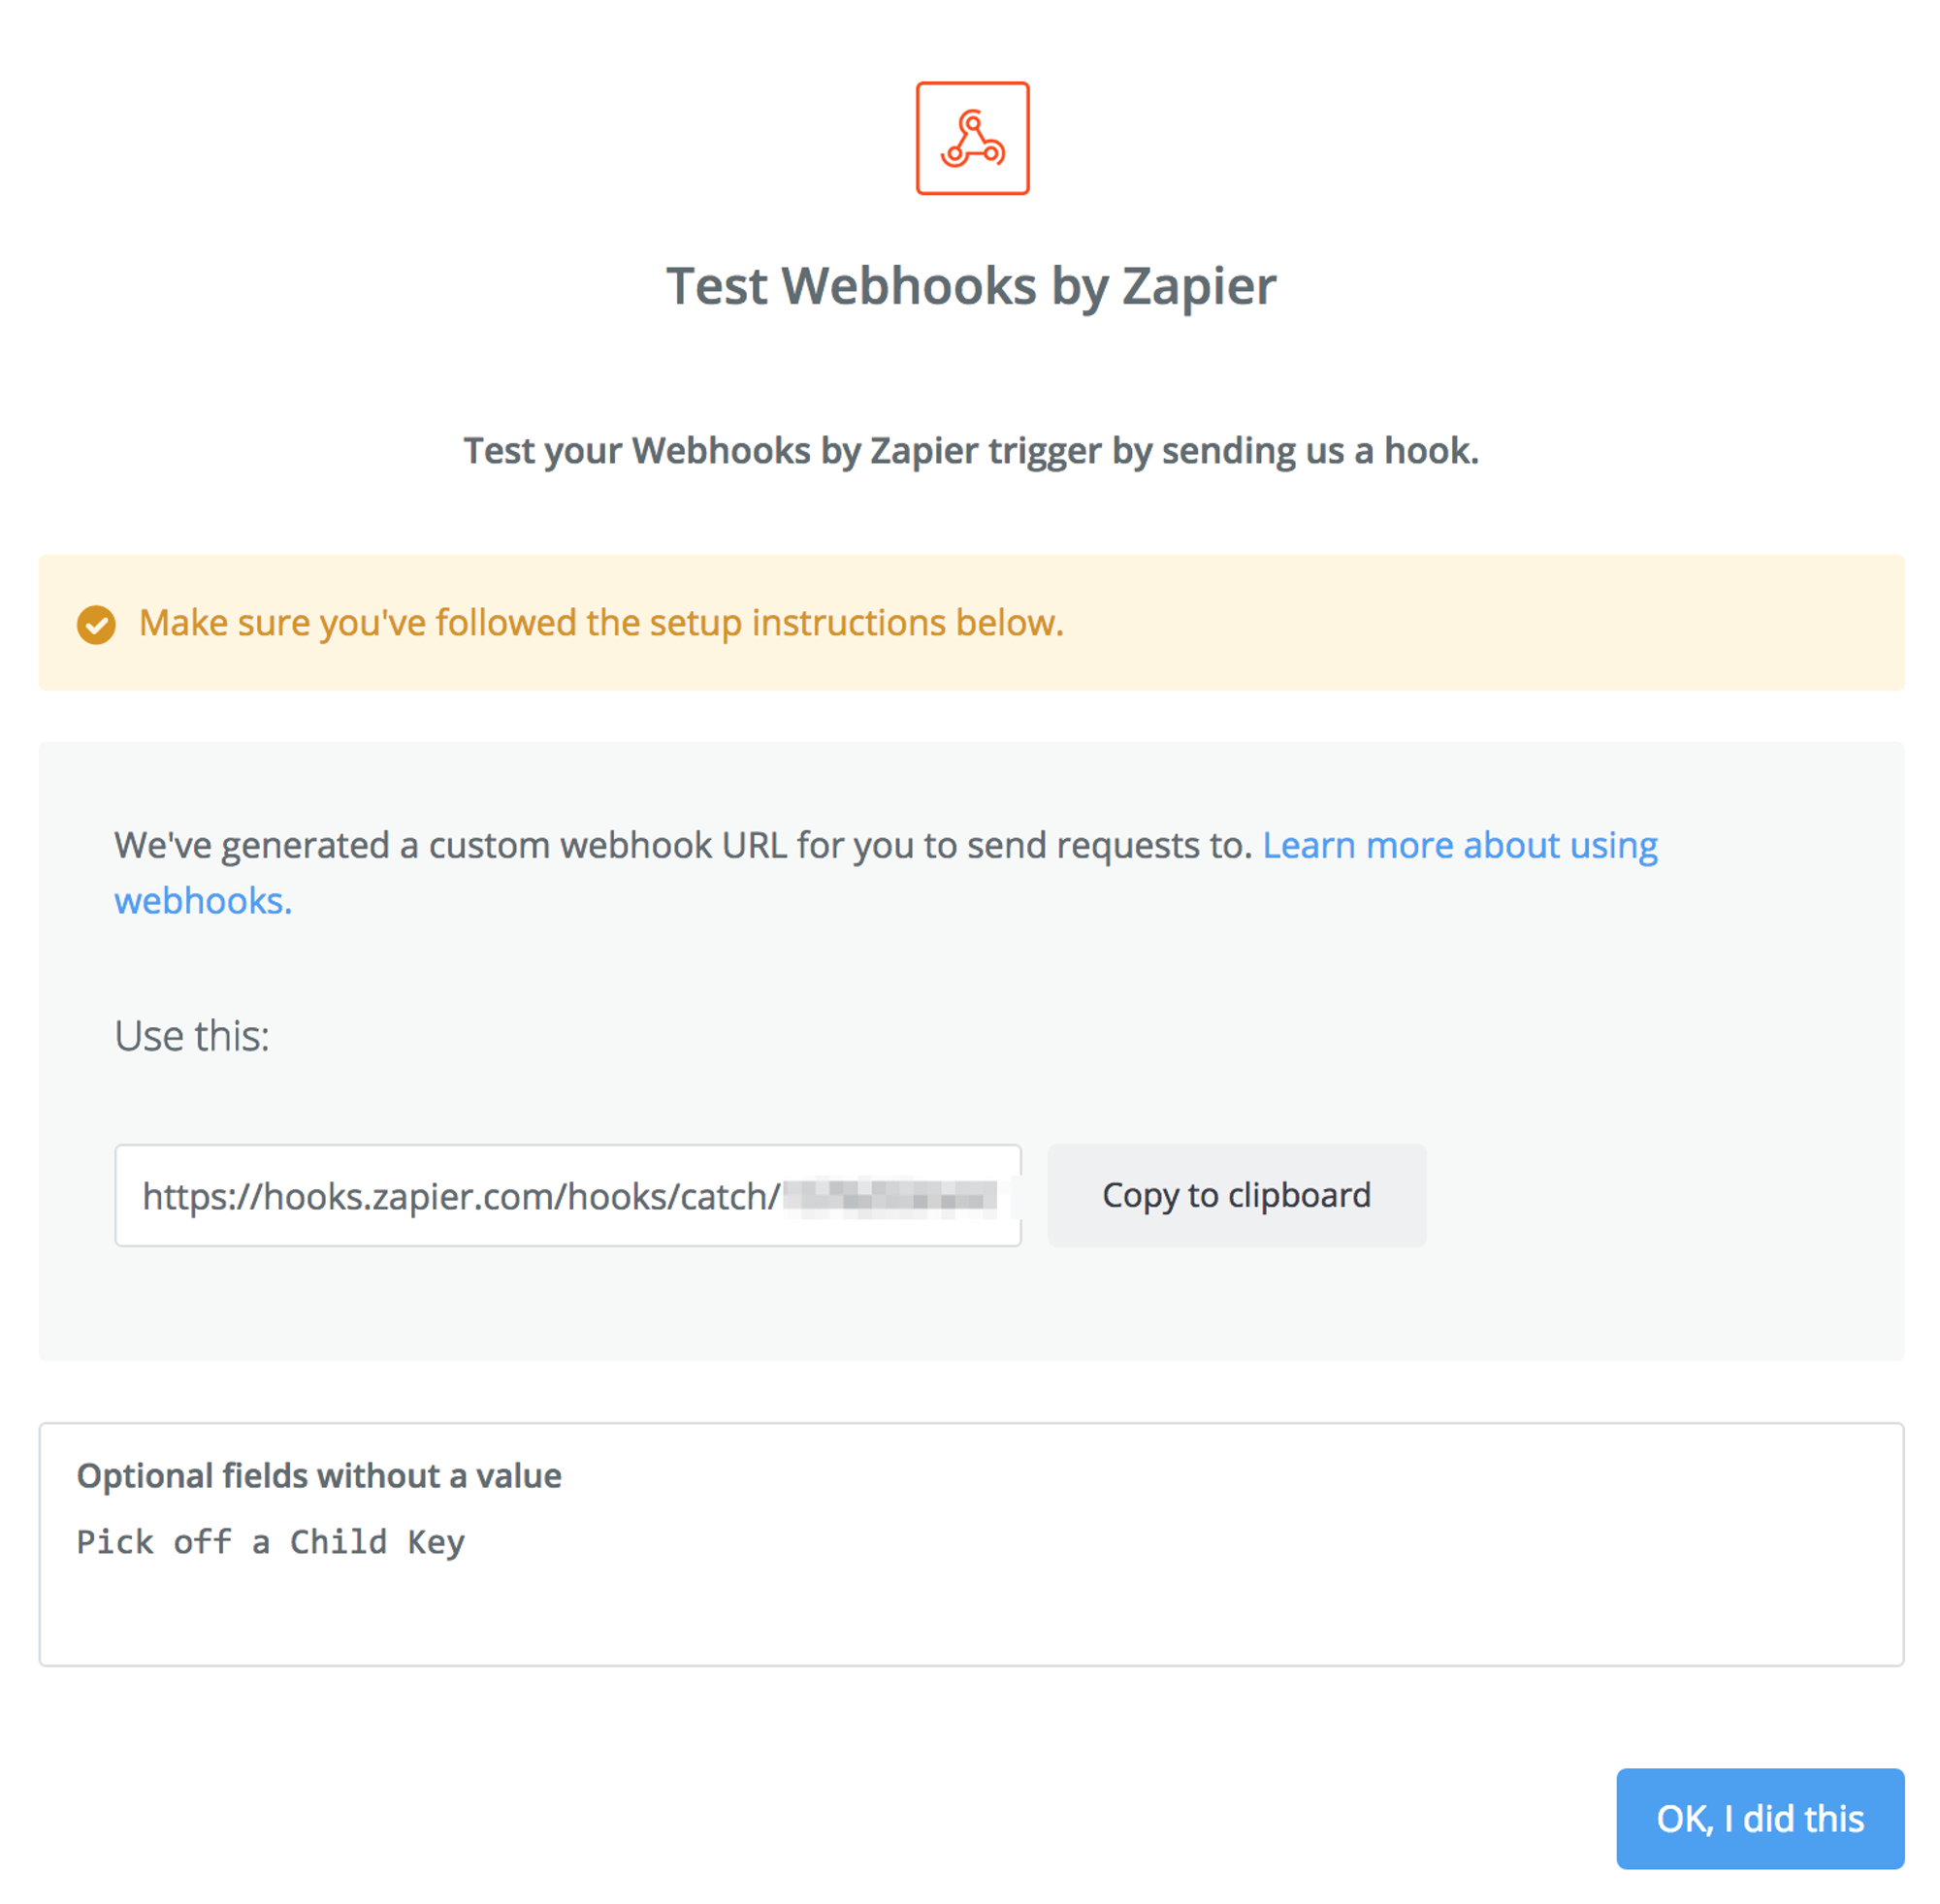
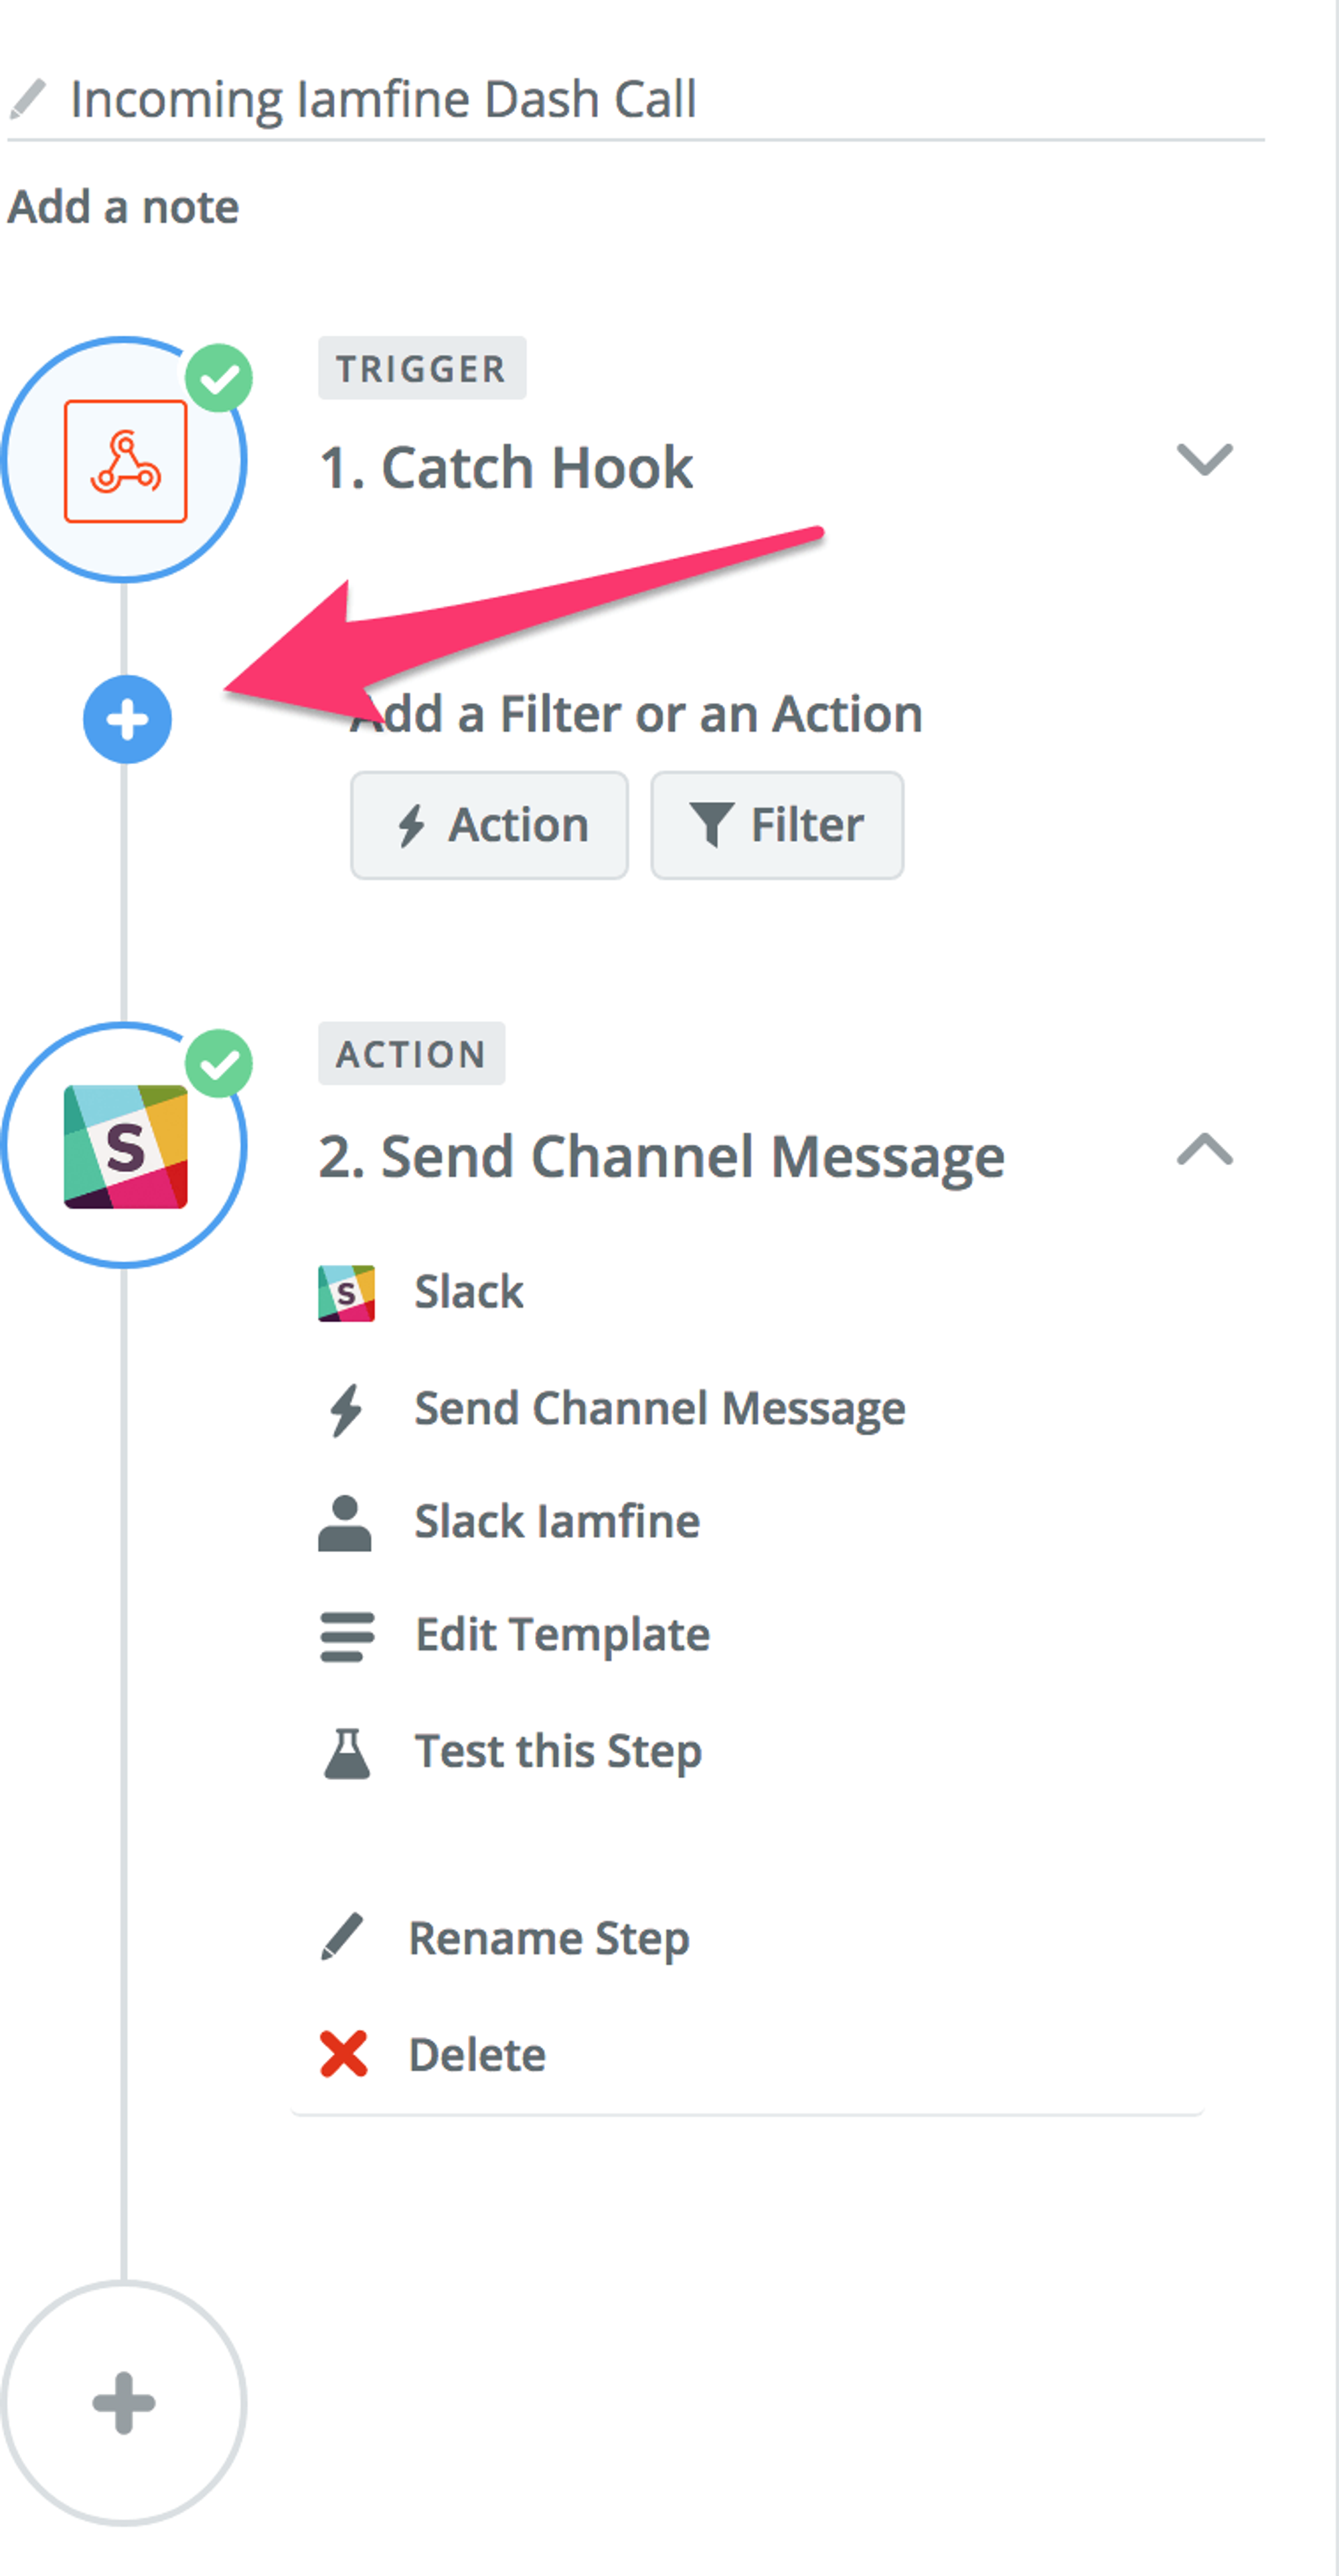
- Select “Make a Zap”, name your Zap, and select Webhooks
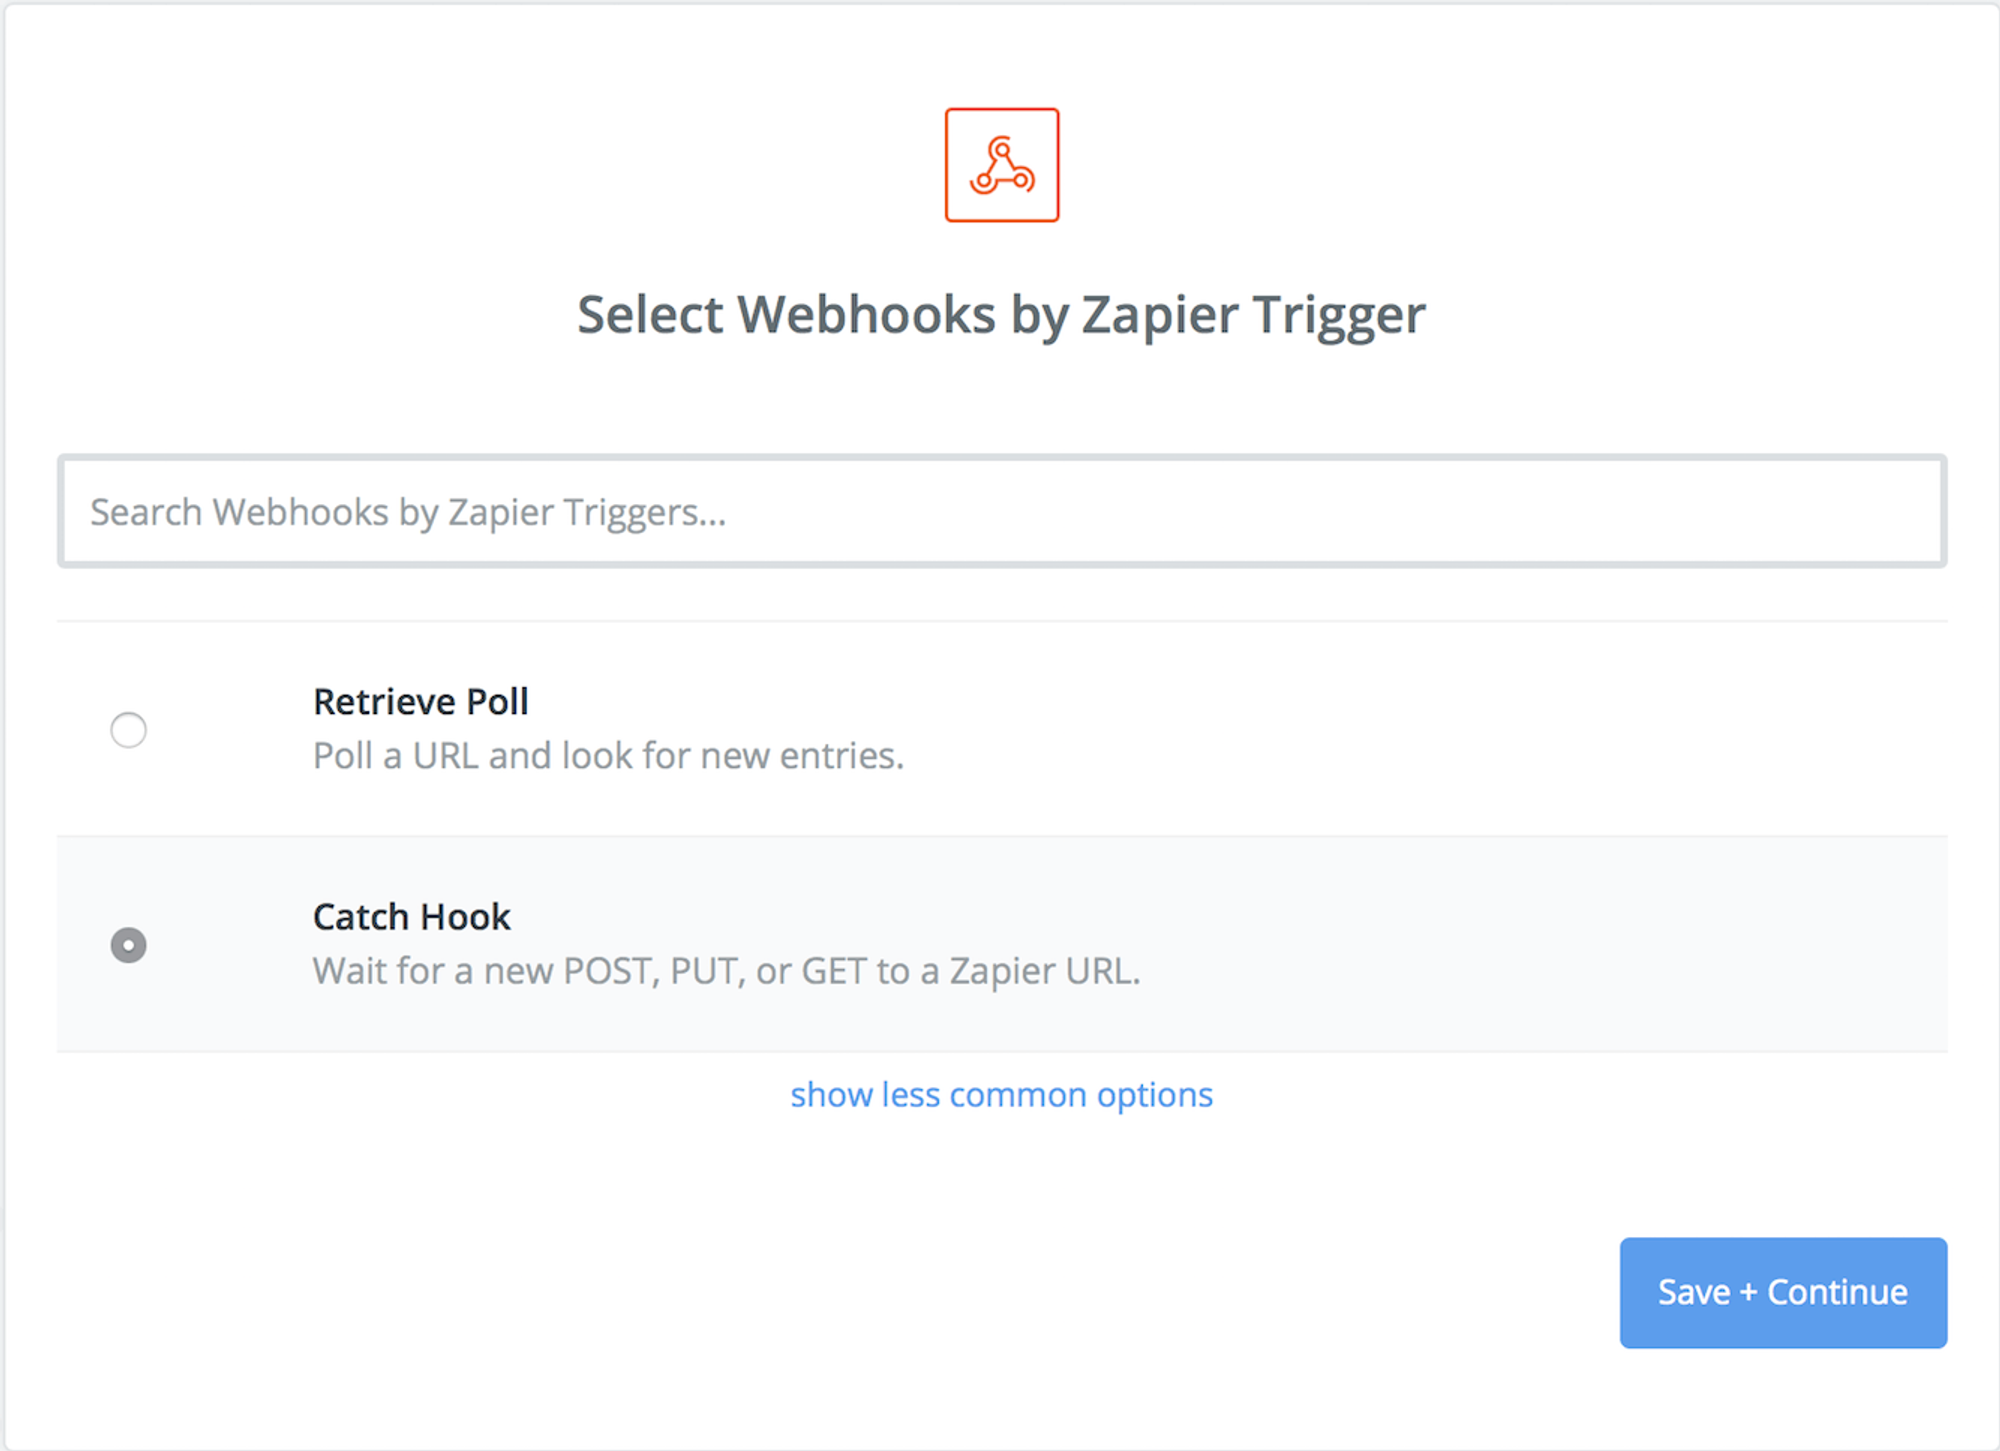
- Select “Catch Hook”
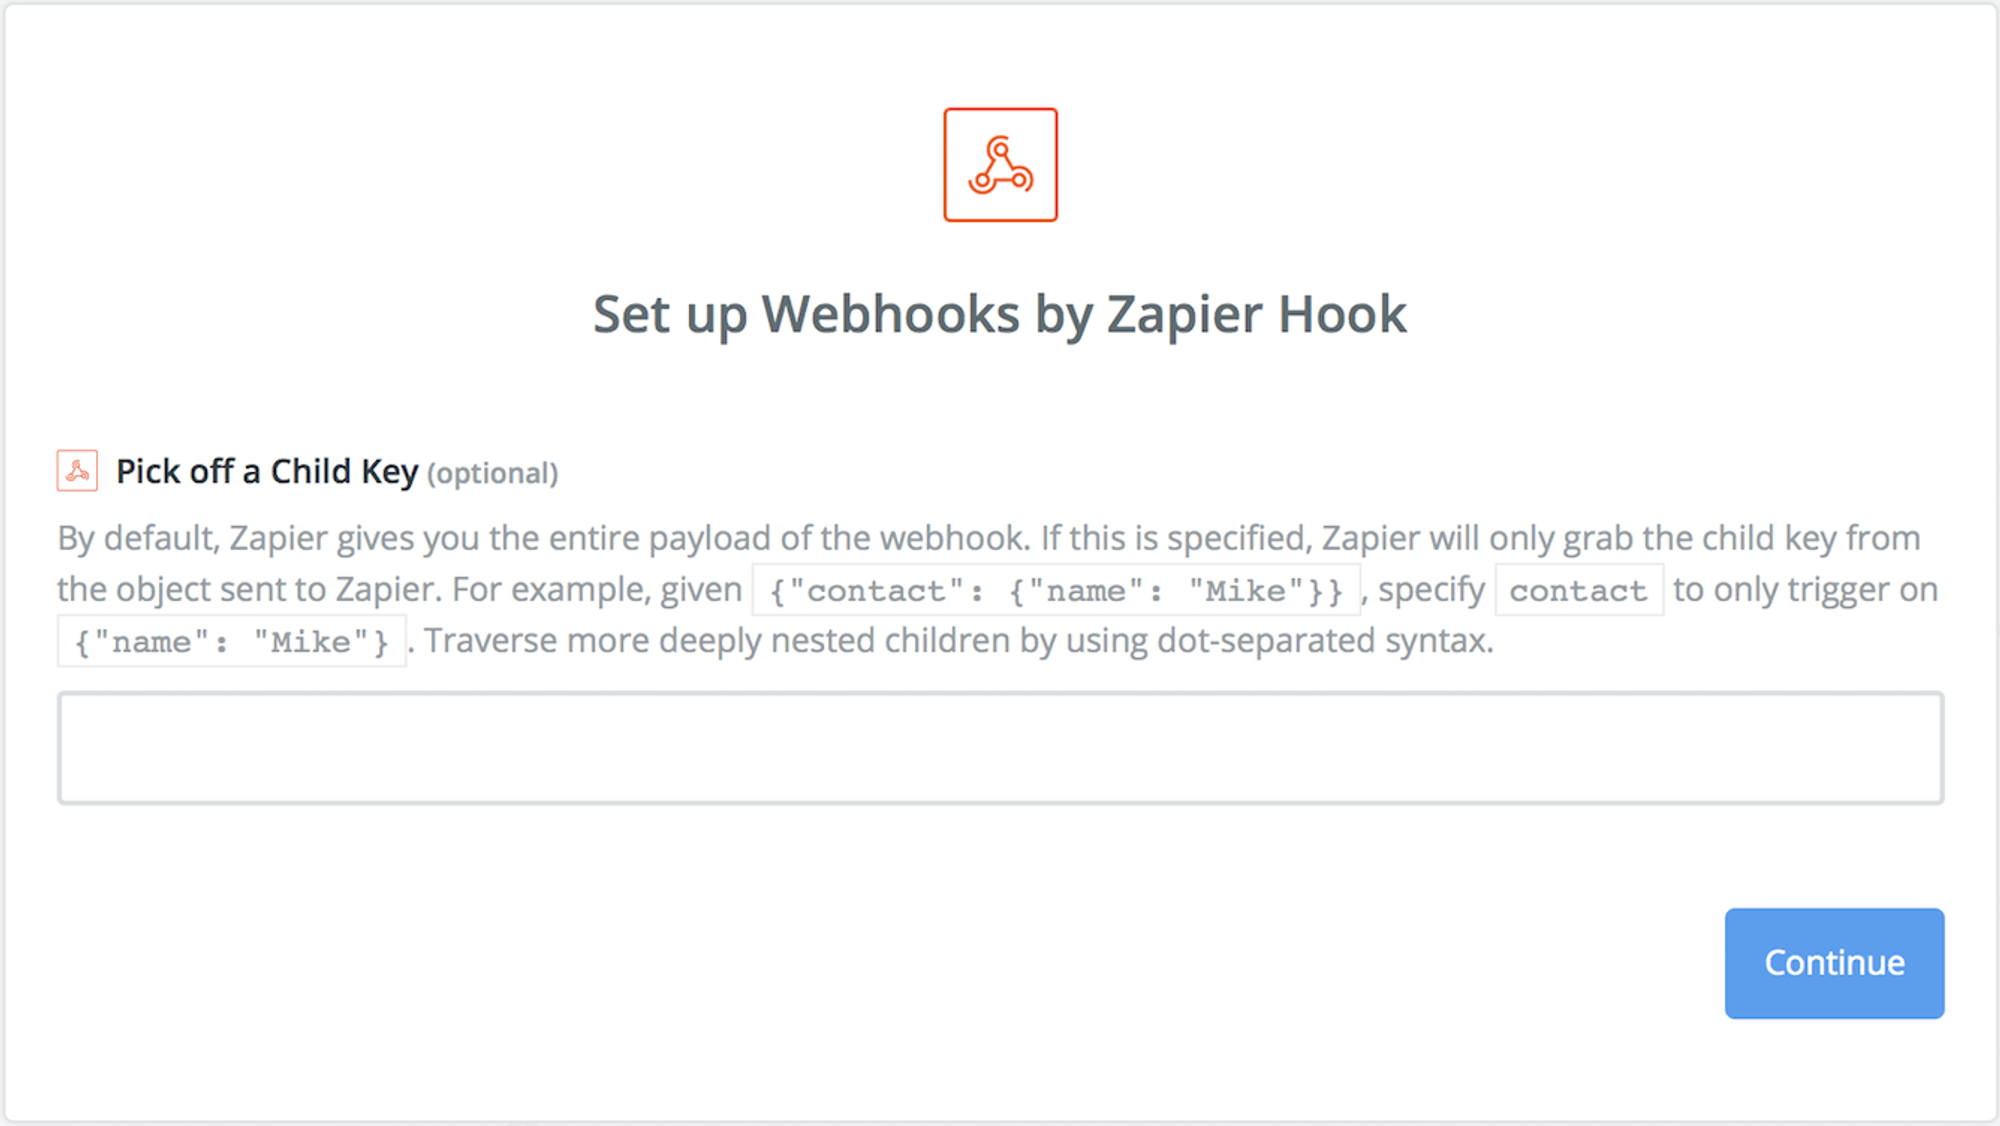
- “Pick off a Child Key” should remain empty to capture all data delivered
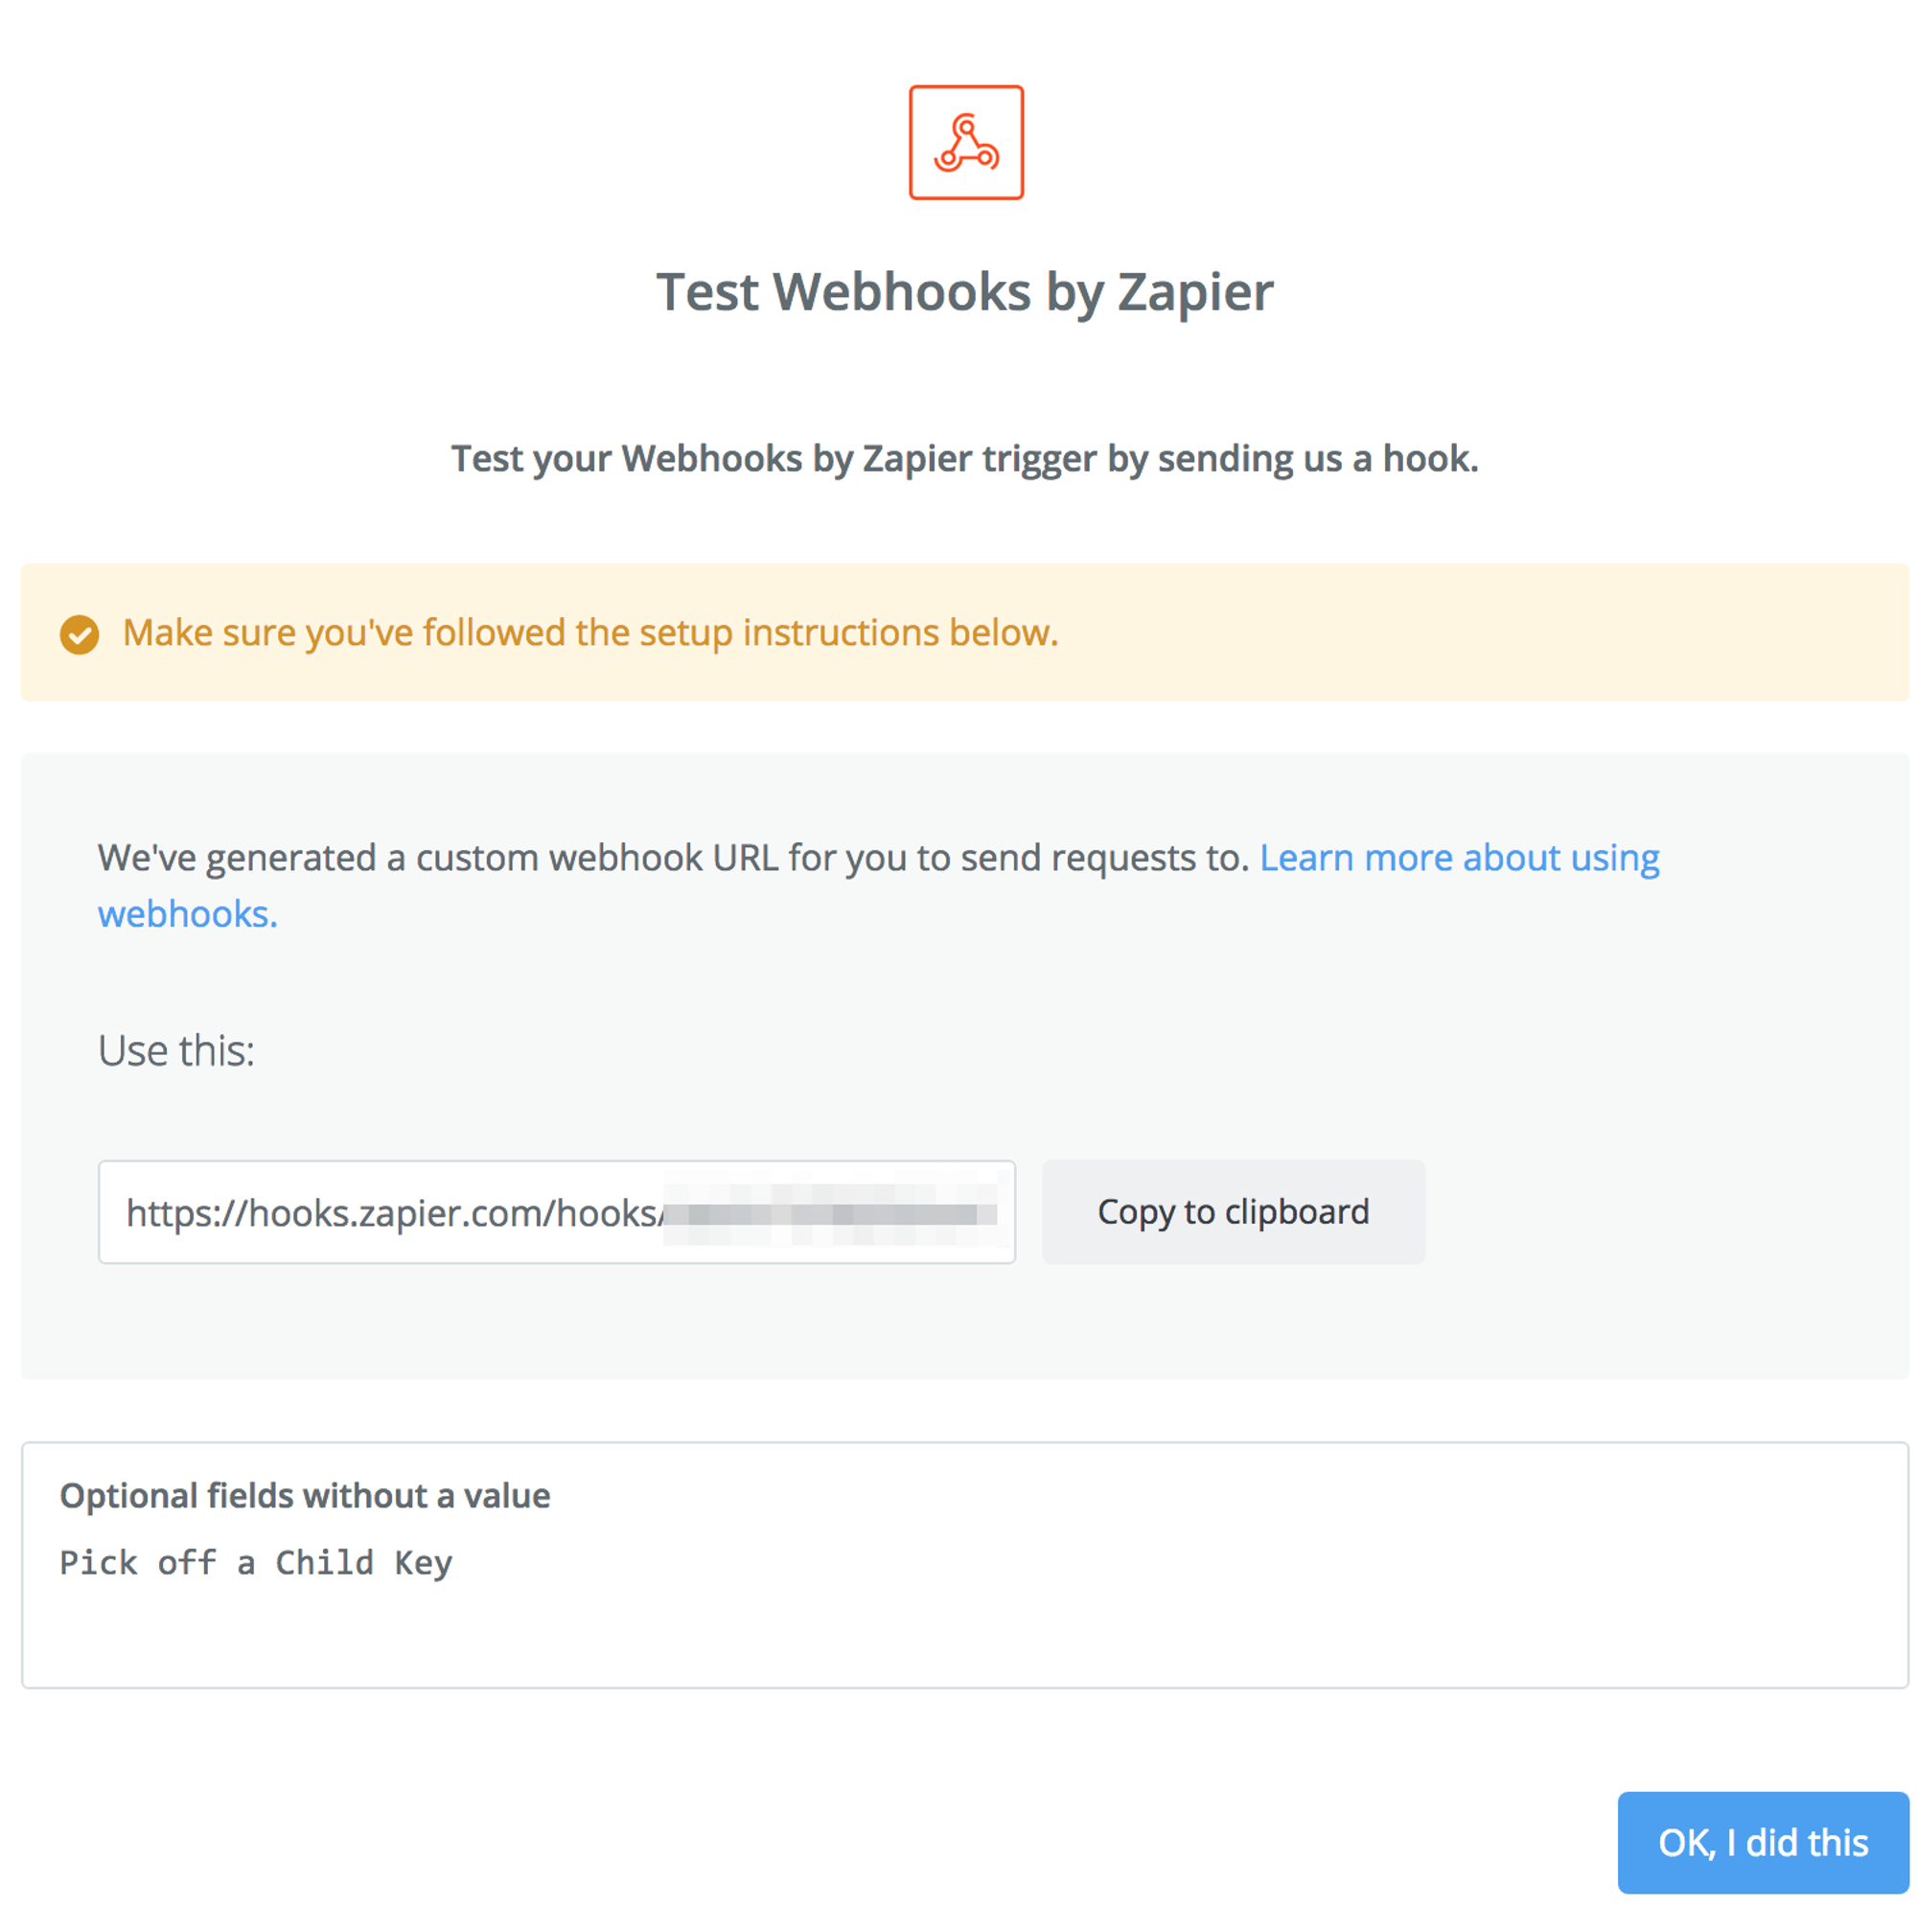
- Next, copy the Webhook URL. It is needed to create the Webhook on Dash
- Zapier is now ready and waiting for a Webhook to be sent to the URL. Stay logged into Zapier. In a new browser window, log into your Dash account.
Phase 3: Configuring Dash to send the Webhook to Zapier
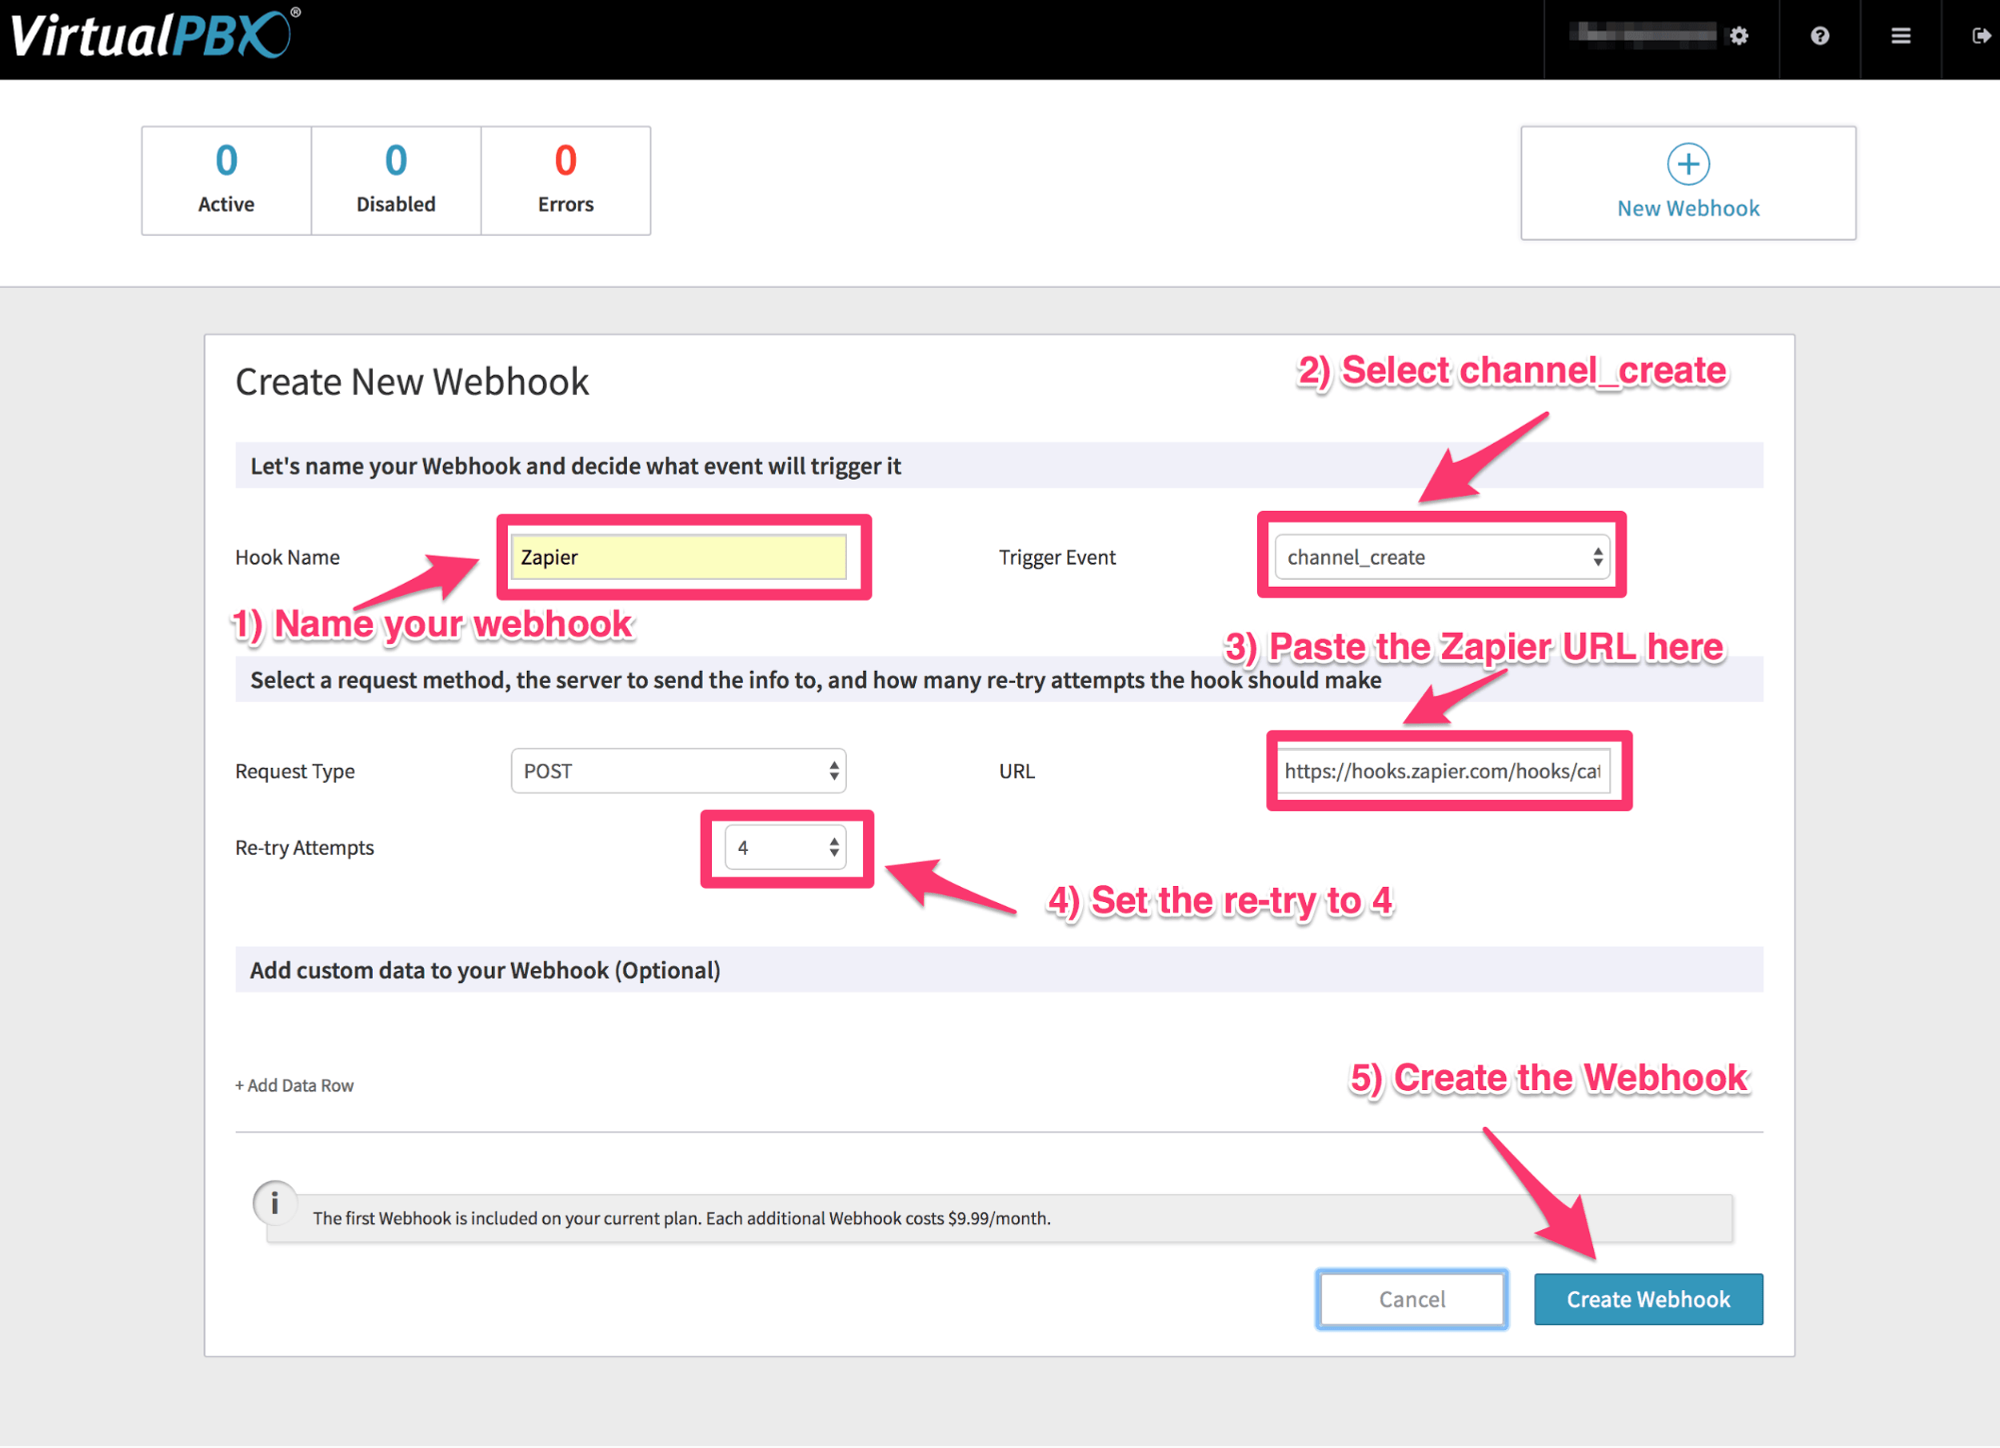
- In your Dash account, select Webhooks from the dropdown hamburger menu in the upper right of your screen.
- Name the Webhook (in this example, we will be using “Zapier”), select the trigger as “channel_create”, set the re-try attempts to 4, enter the URL we just got from Zapier, and click “Create Webhook”.

- The Webhook will now appear in your Webhooks list – make sure it’s toggled on.
- Now it’s time to test the Webhook. Go back to the Zapier Zap configuration where we left off. Press the “OK, I did this” button and now place a call into your VirtualPBX Dash System.
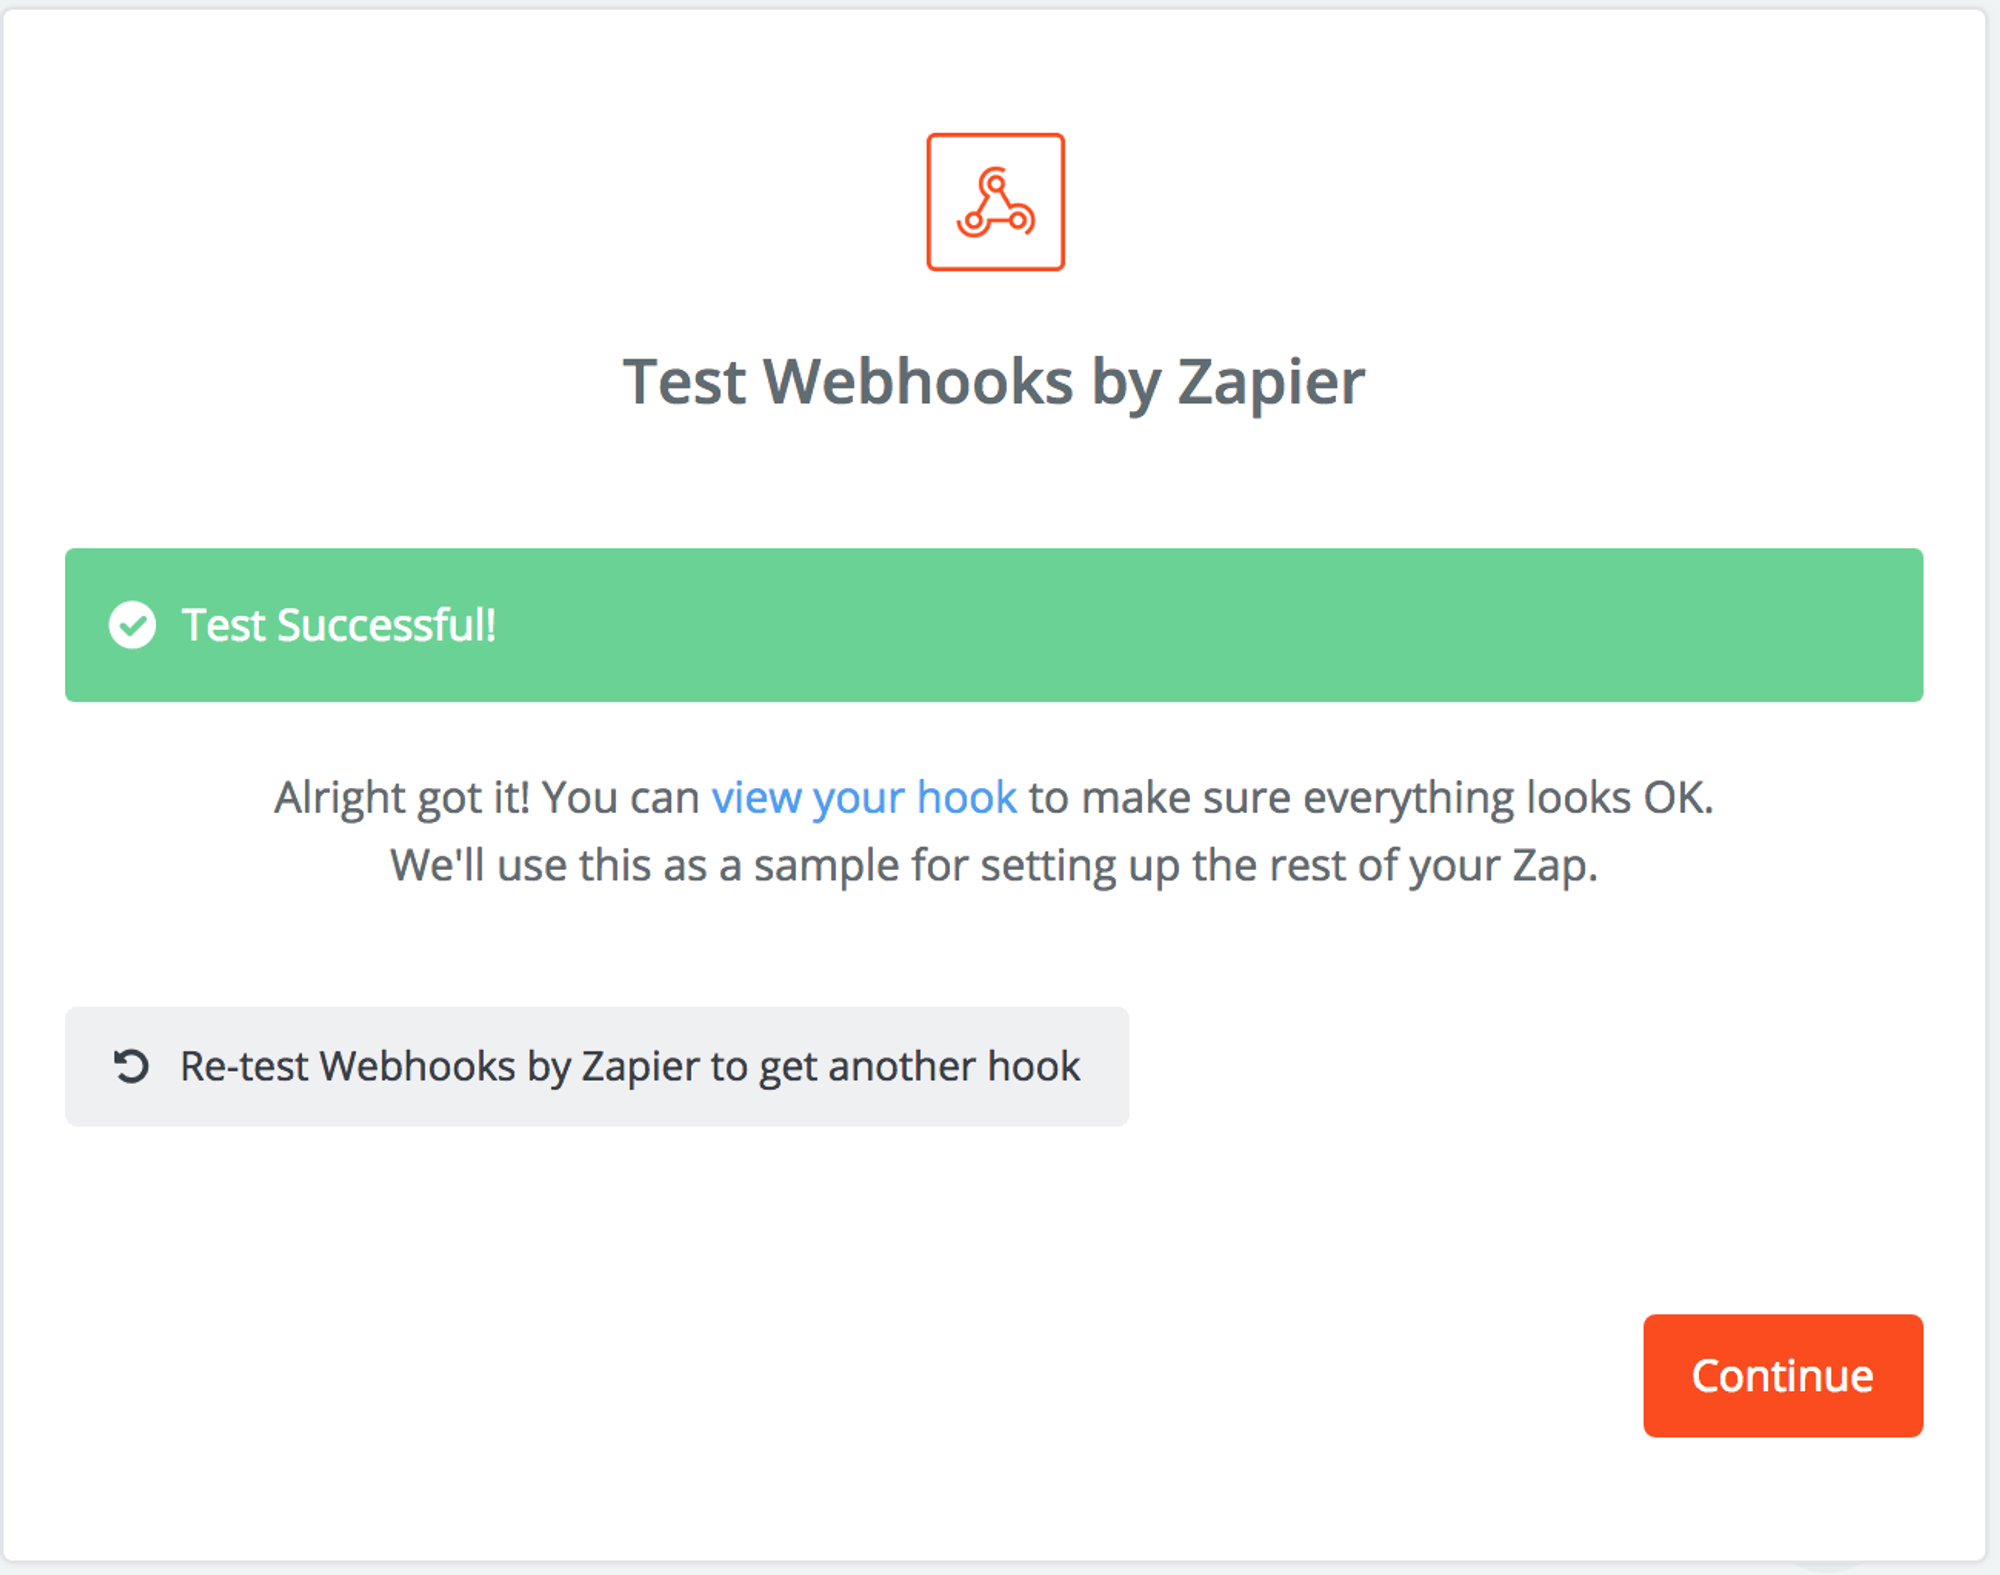
- If everything is working, you should see the page change to show that Zapier caught the Dash Webhook successfully.
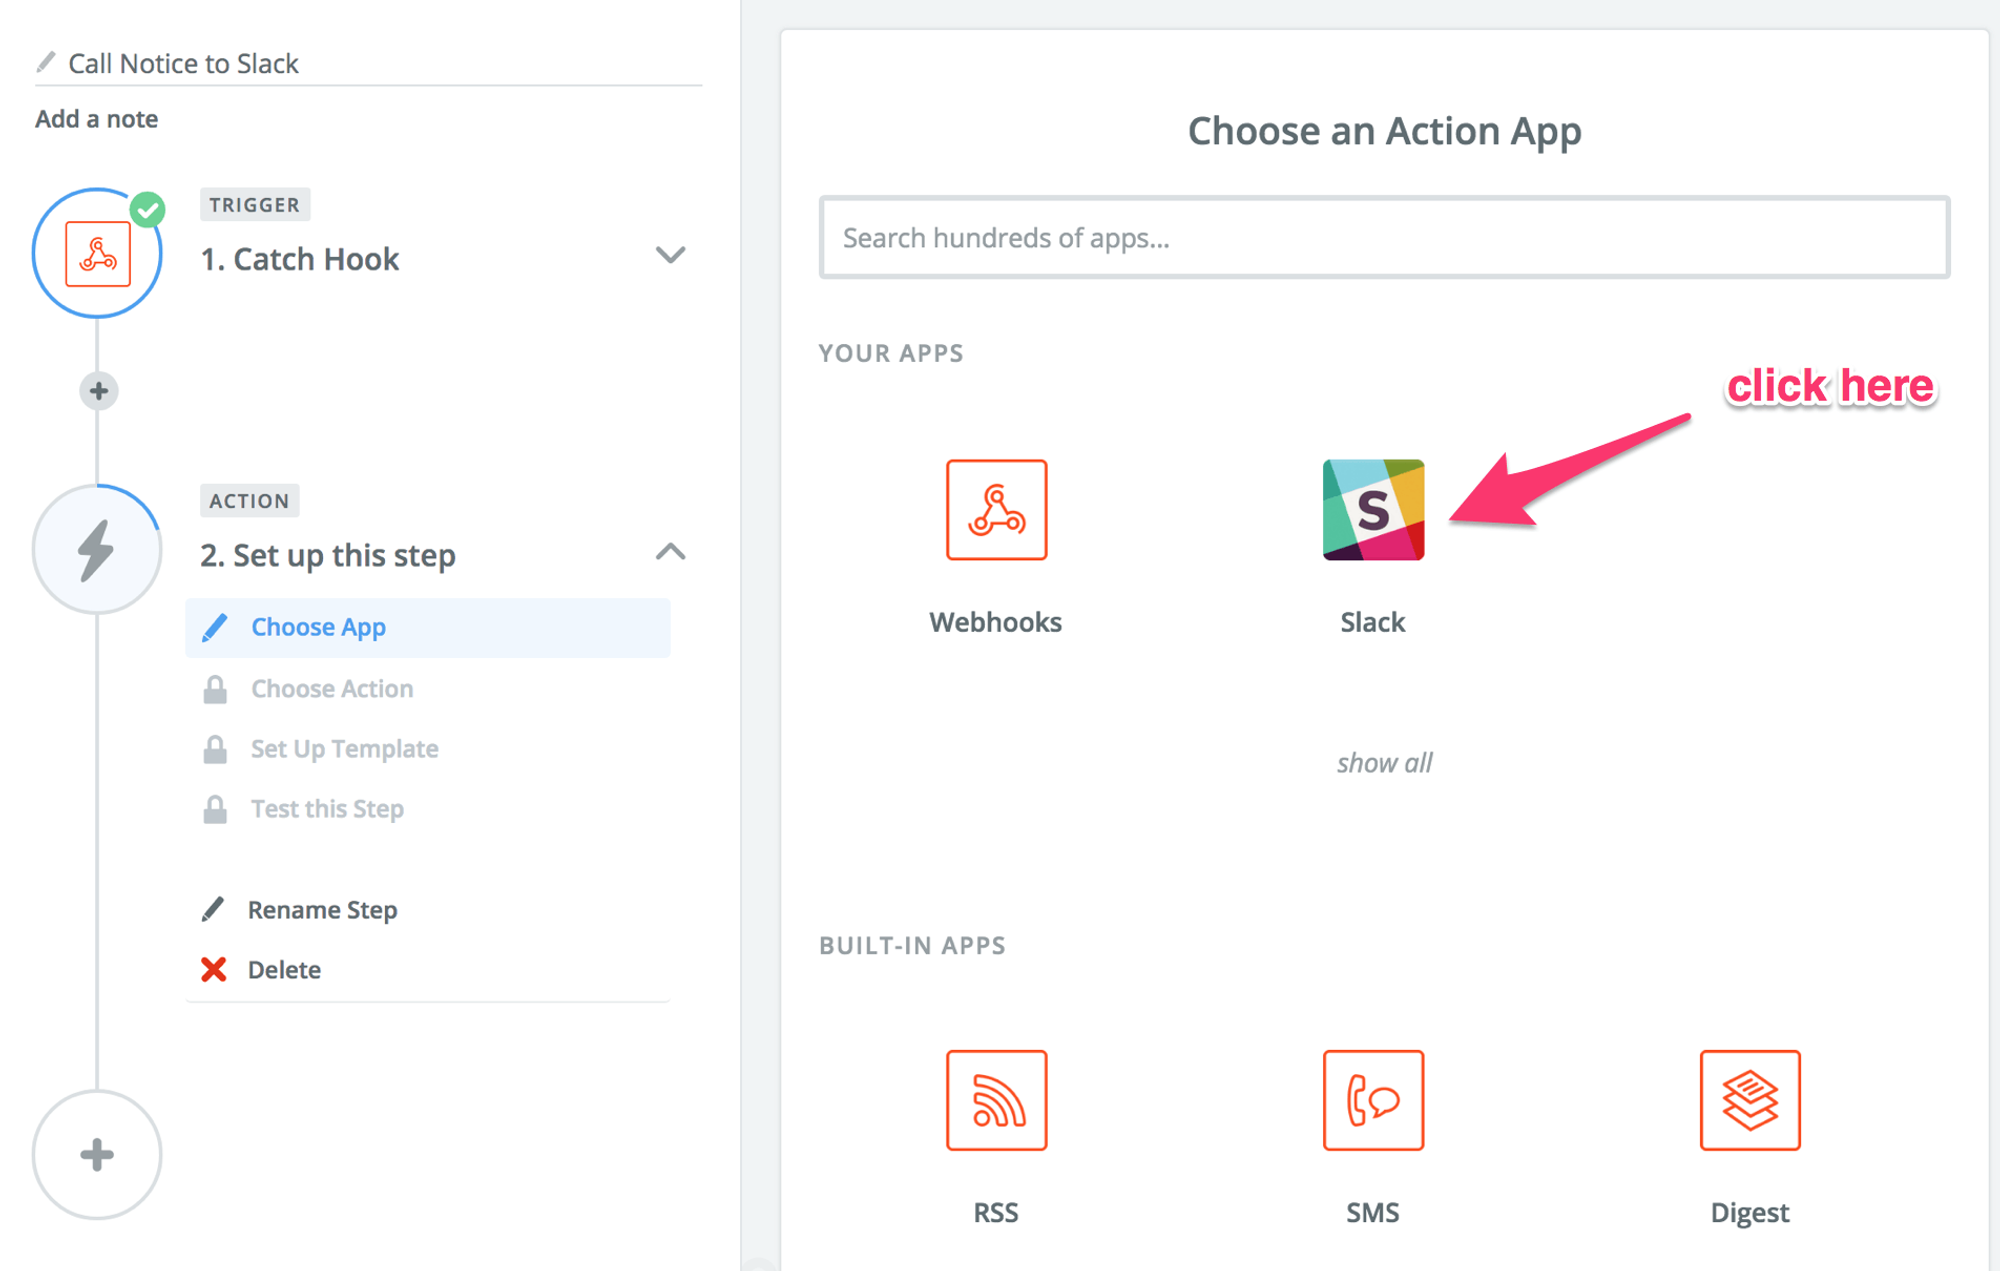
- Now let’s set Zapier up to send this new data to our Slack channel. Choose Slack from your list of apps to continue.
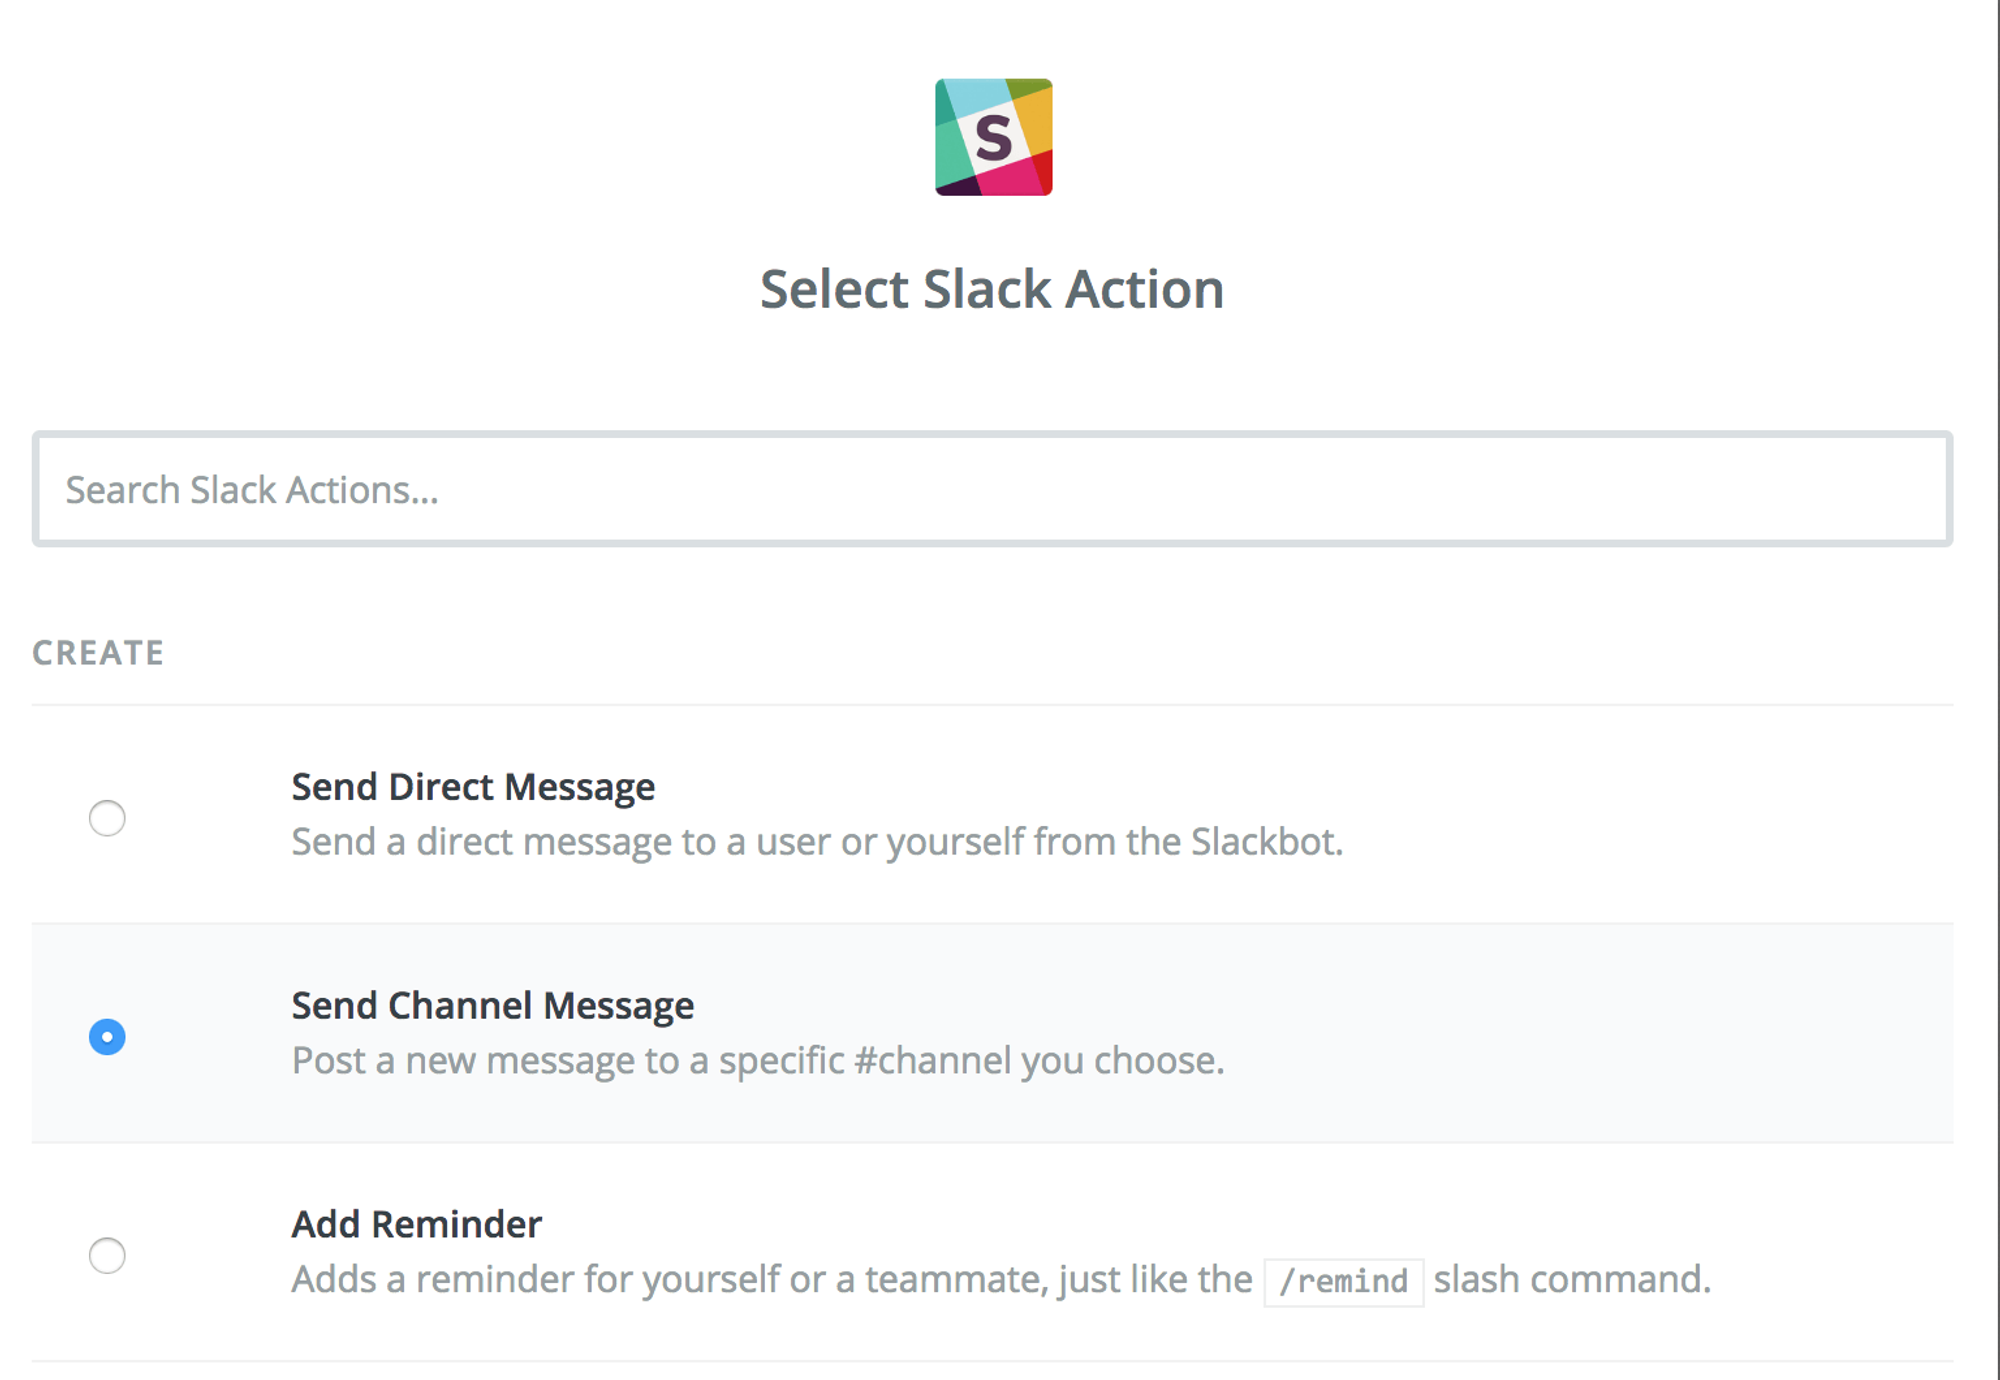
- Select “Send Channel Message”.
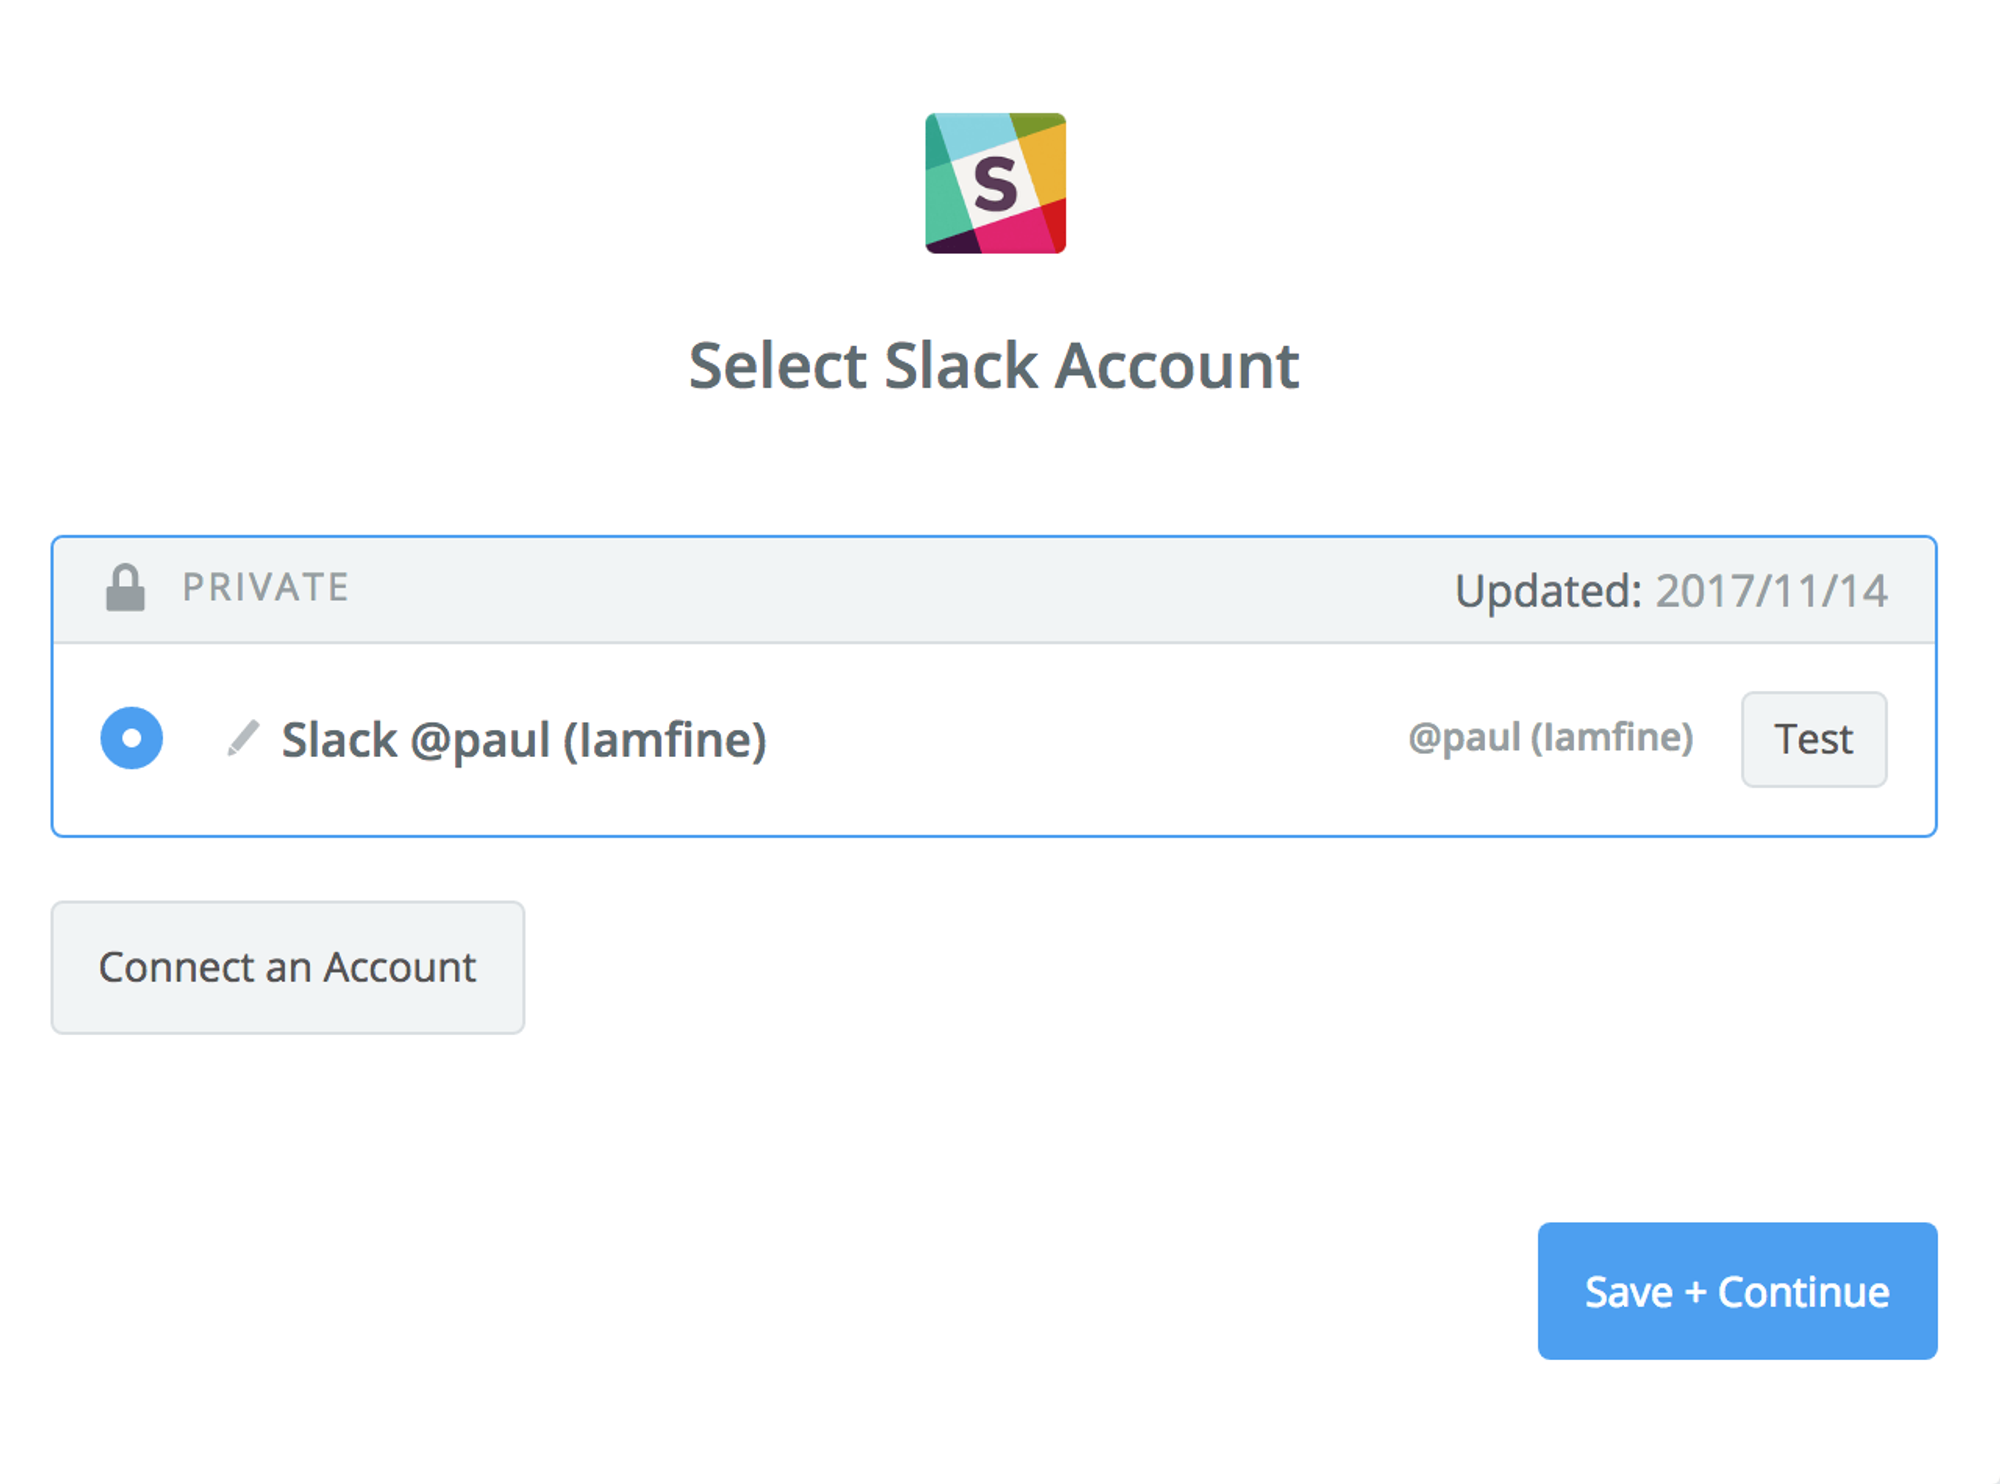
- Select your Slack account and click “Save + Continue”.
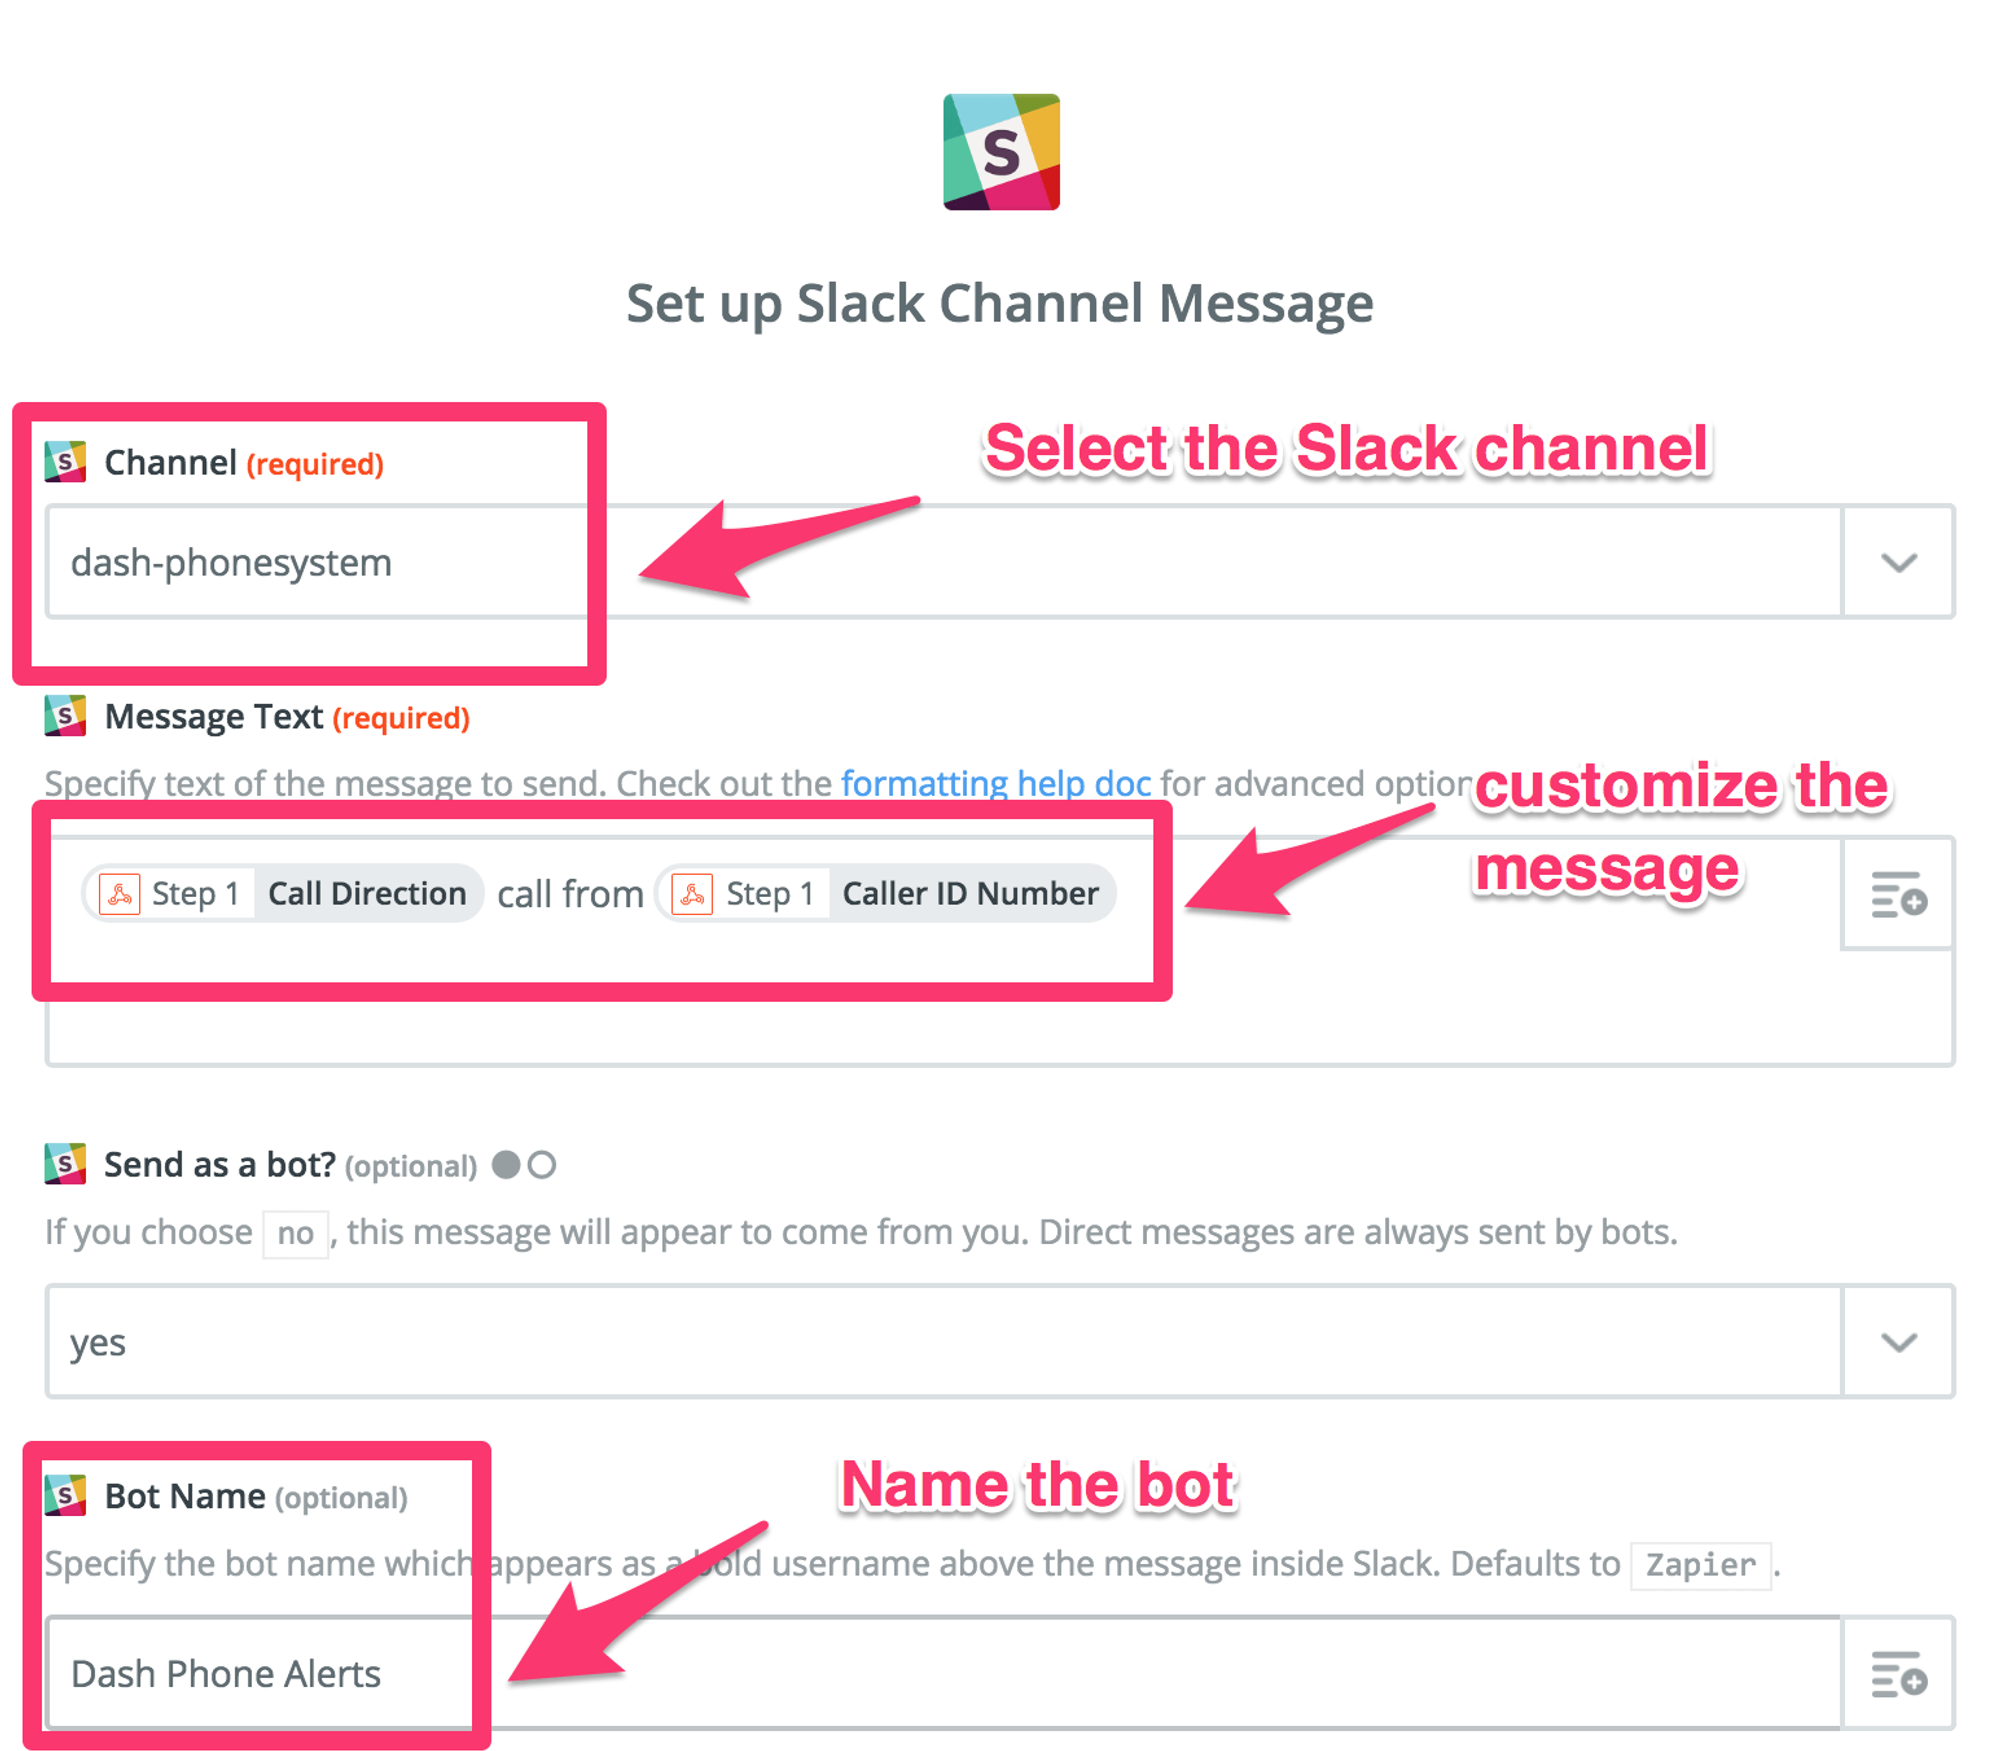
- Now we’ll configure the message that gets sent to Slack: select the Slack channel created earlier, customize your message, and name the bot. You may return to this page later to tailor the slack message with icons, threaded messages, and other options. Press Continue at the bottom of the page when you are finished.
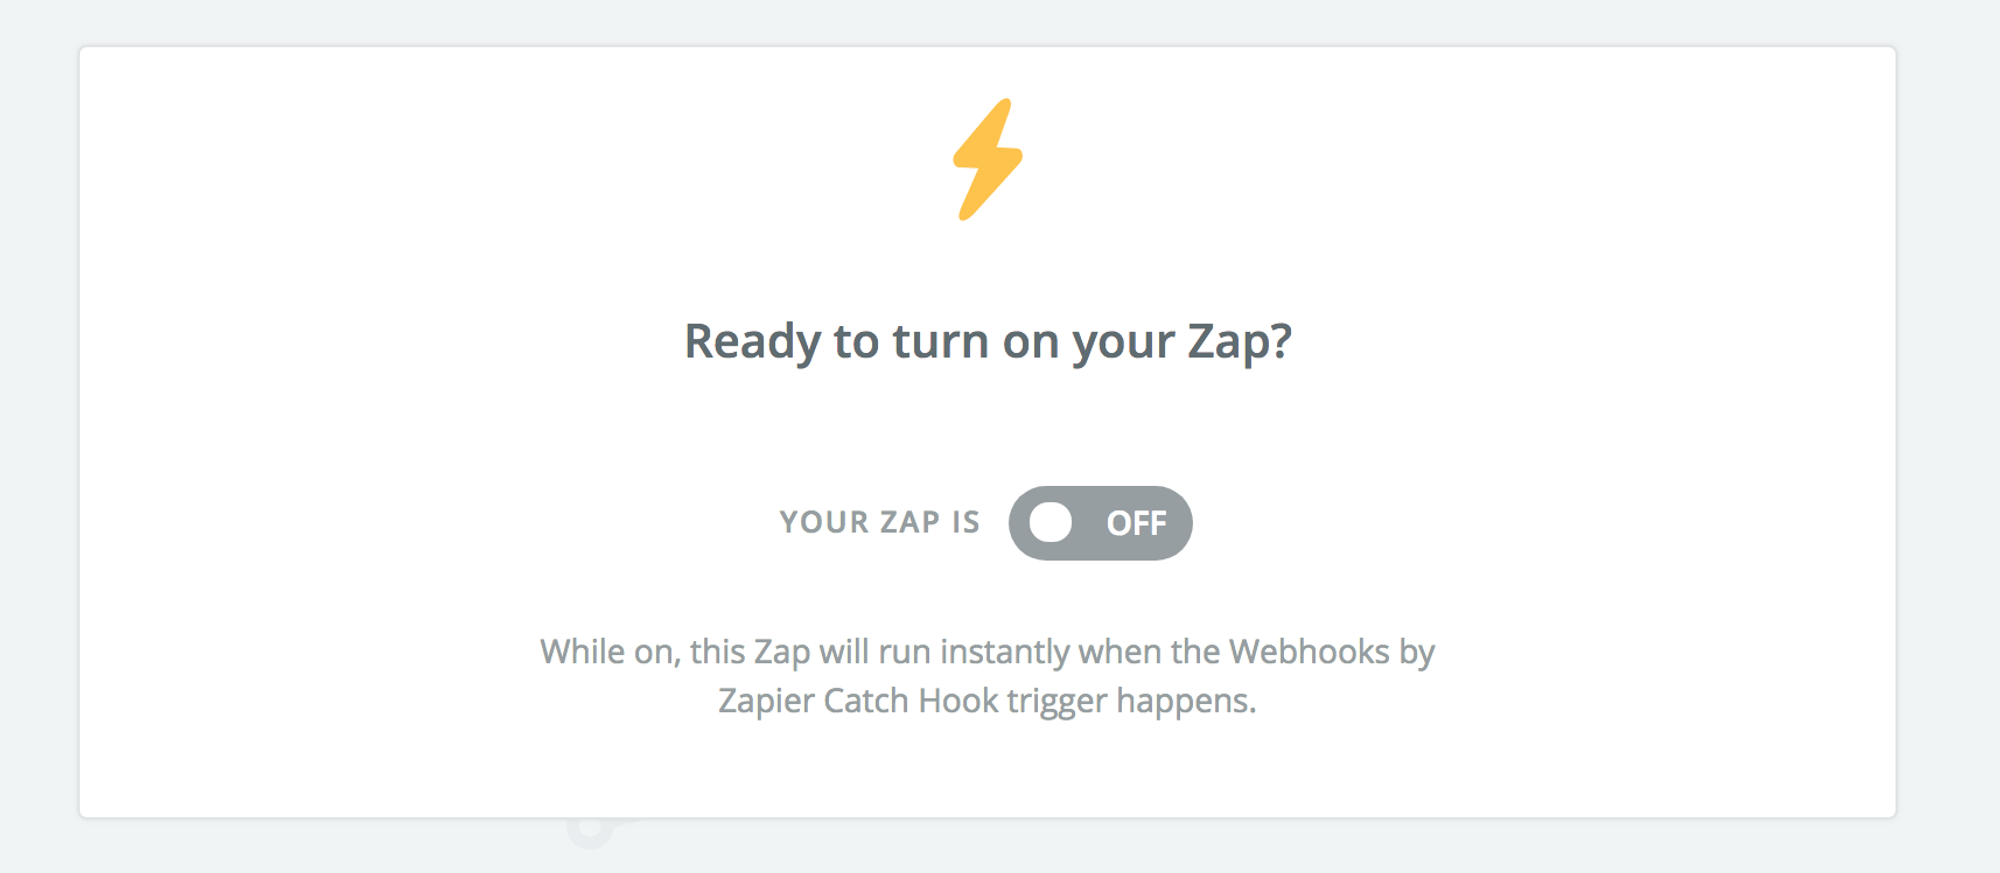
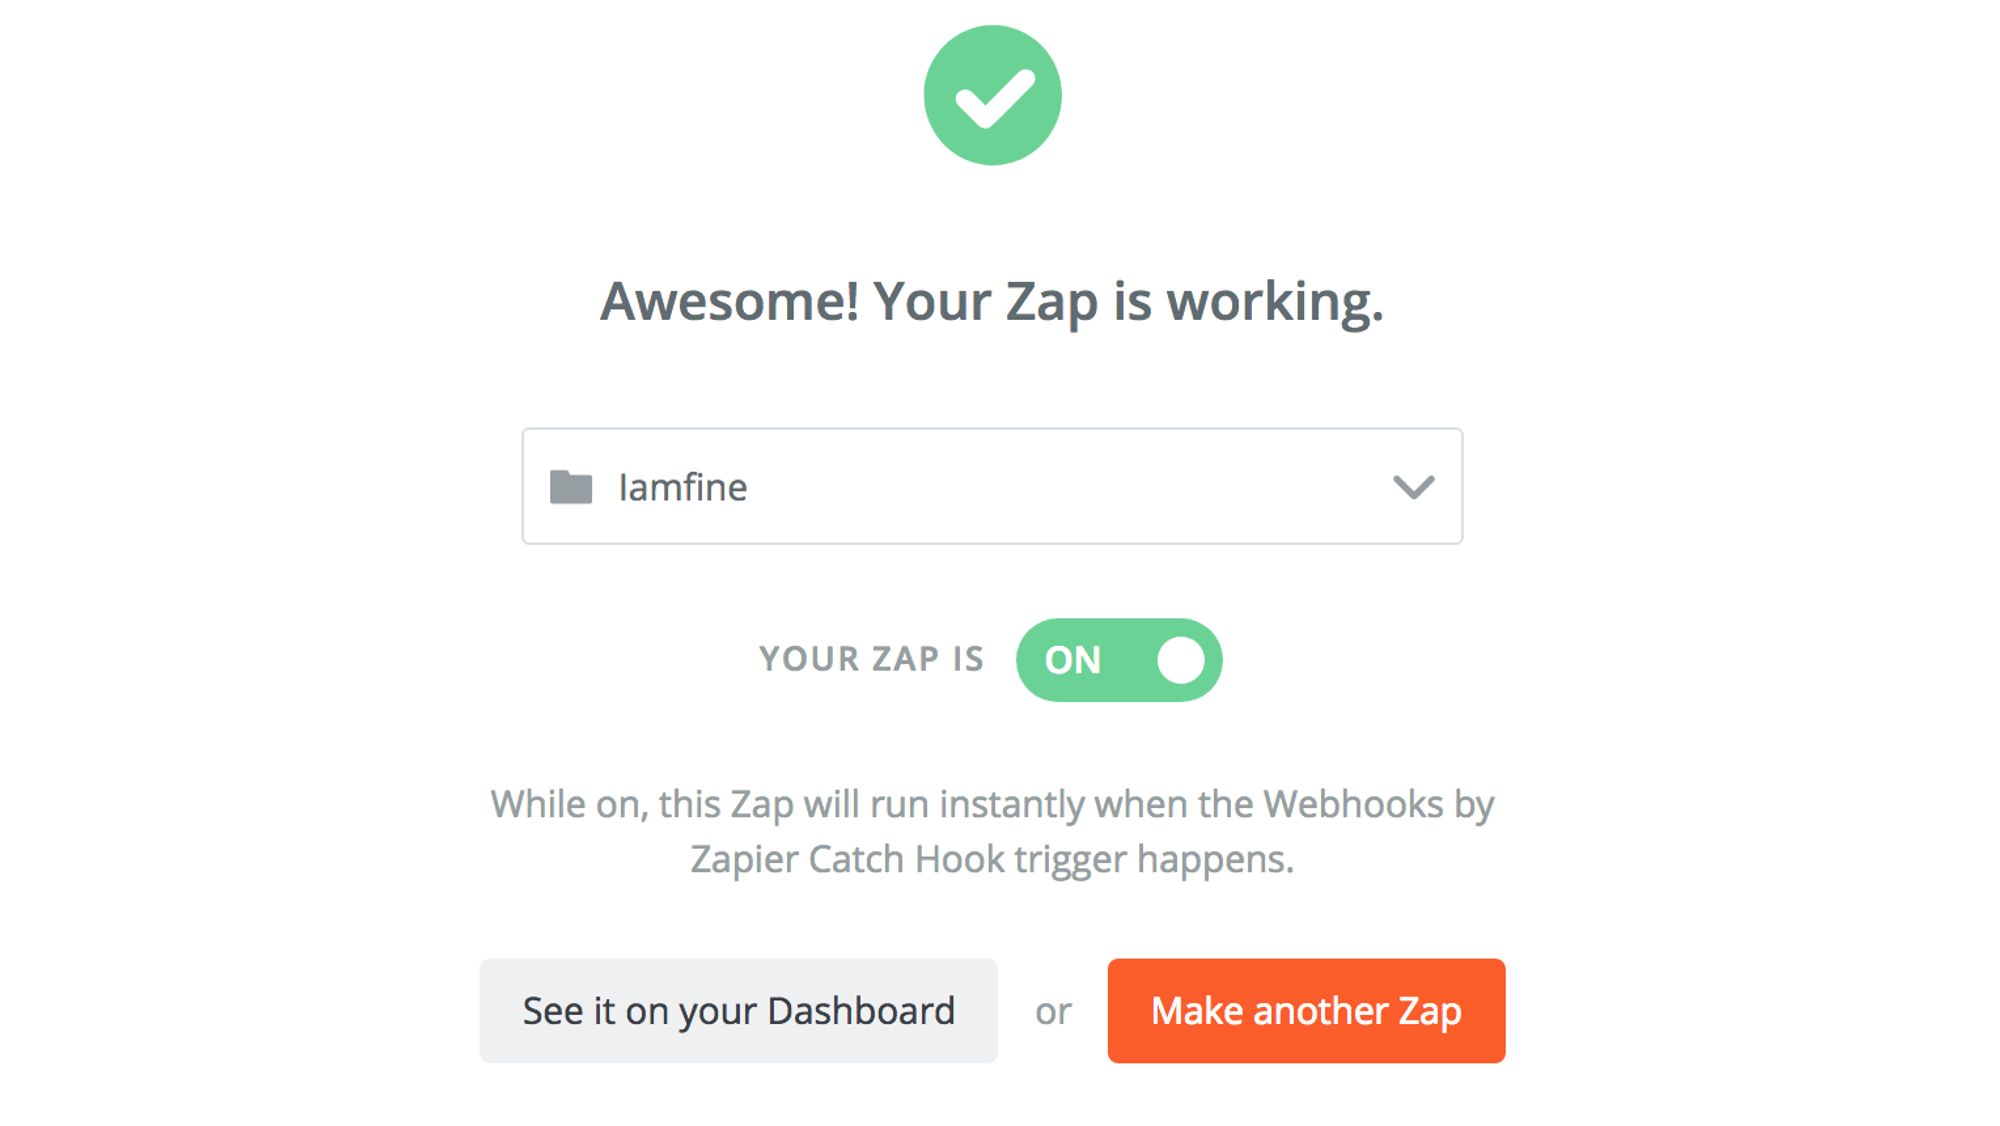
- Now we’re ready to test the integration. Start by turning on your Zap.
- Next, place a call into your Dash phone system. You should get a notification in Slack similar to this:
- It works! We have now captured all the incoming calls with a Slack message. If you have multiple inbound numbers you may modify the Zap to show which number a caller has dialed and added a bit of formatting for fun.
Phase 4: Formatting Your Notification

- In our example, the Webhook from Dash adds an IP address after the number. We need to strip that out to make the message look pretty.
- We can solve this by adding a “Formatter by Zapier” action to the Zap.
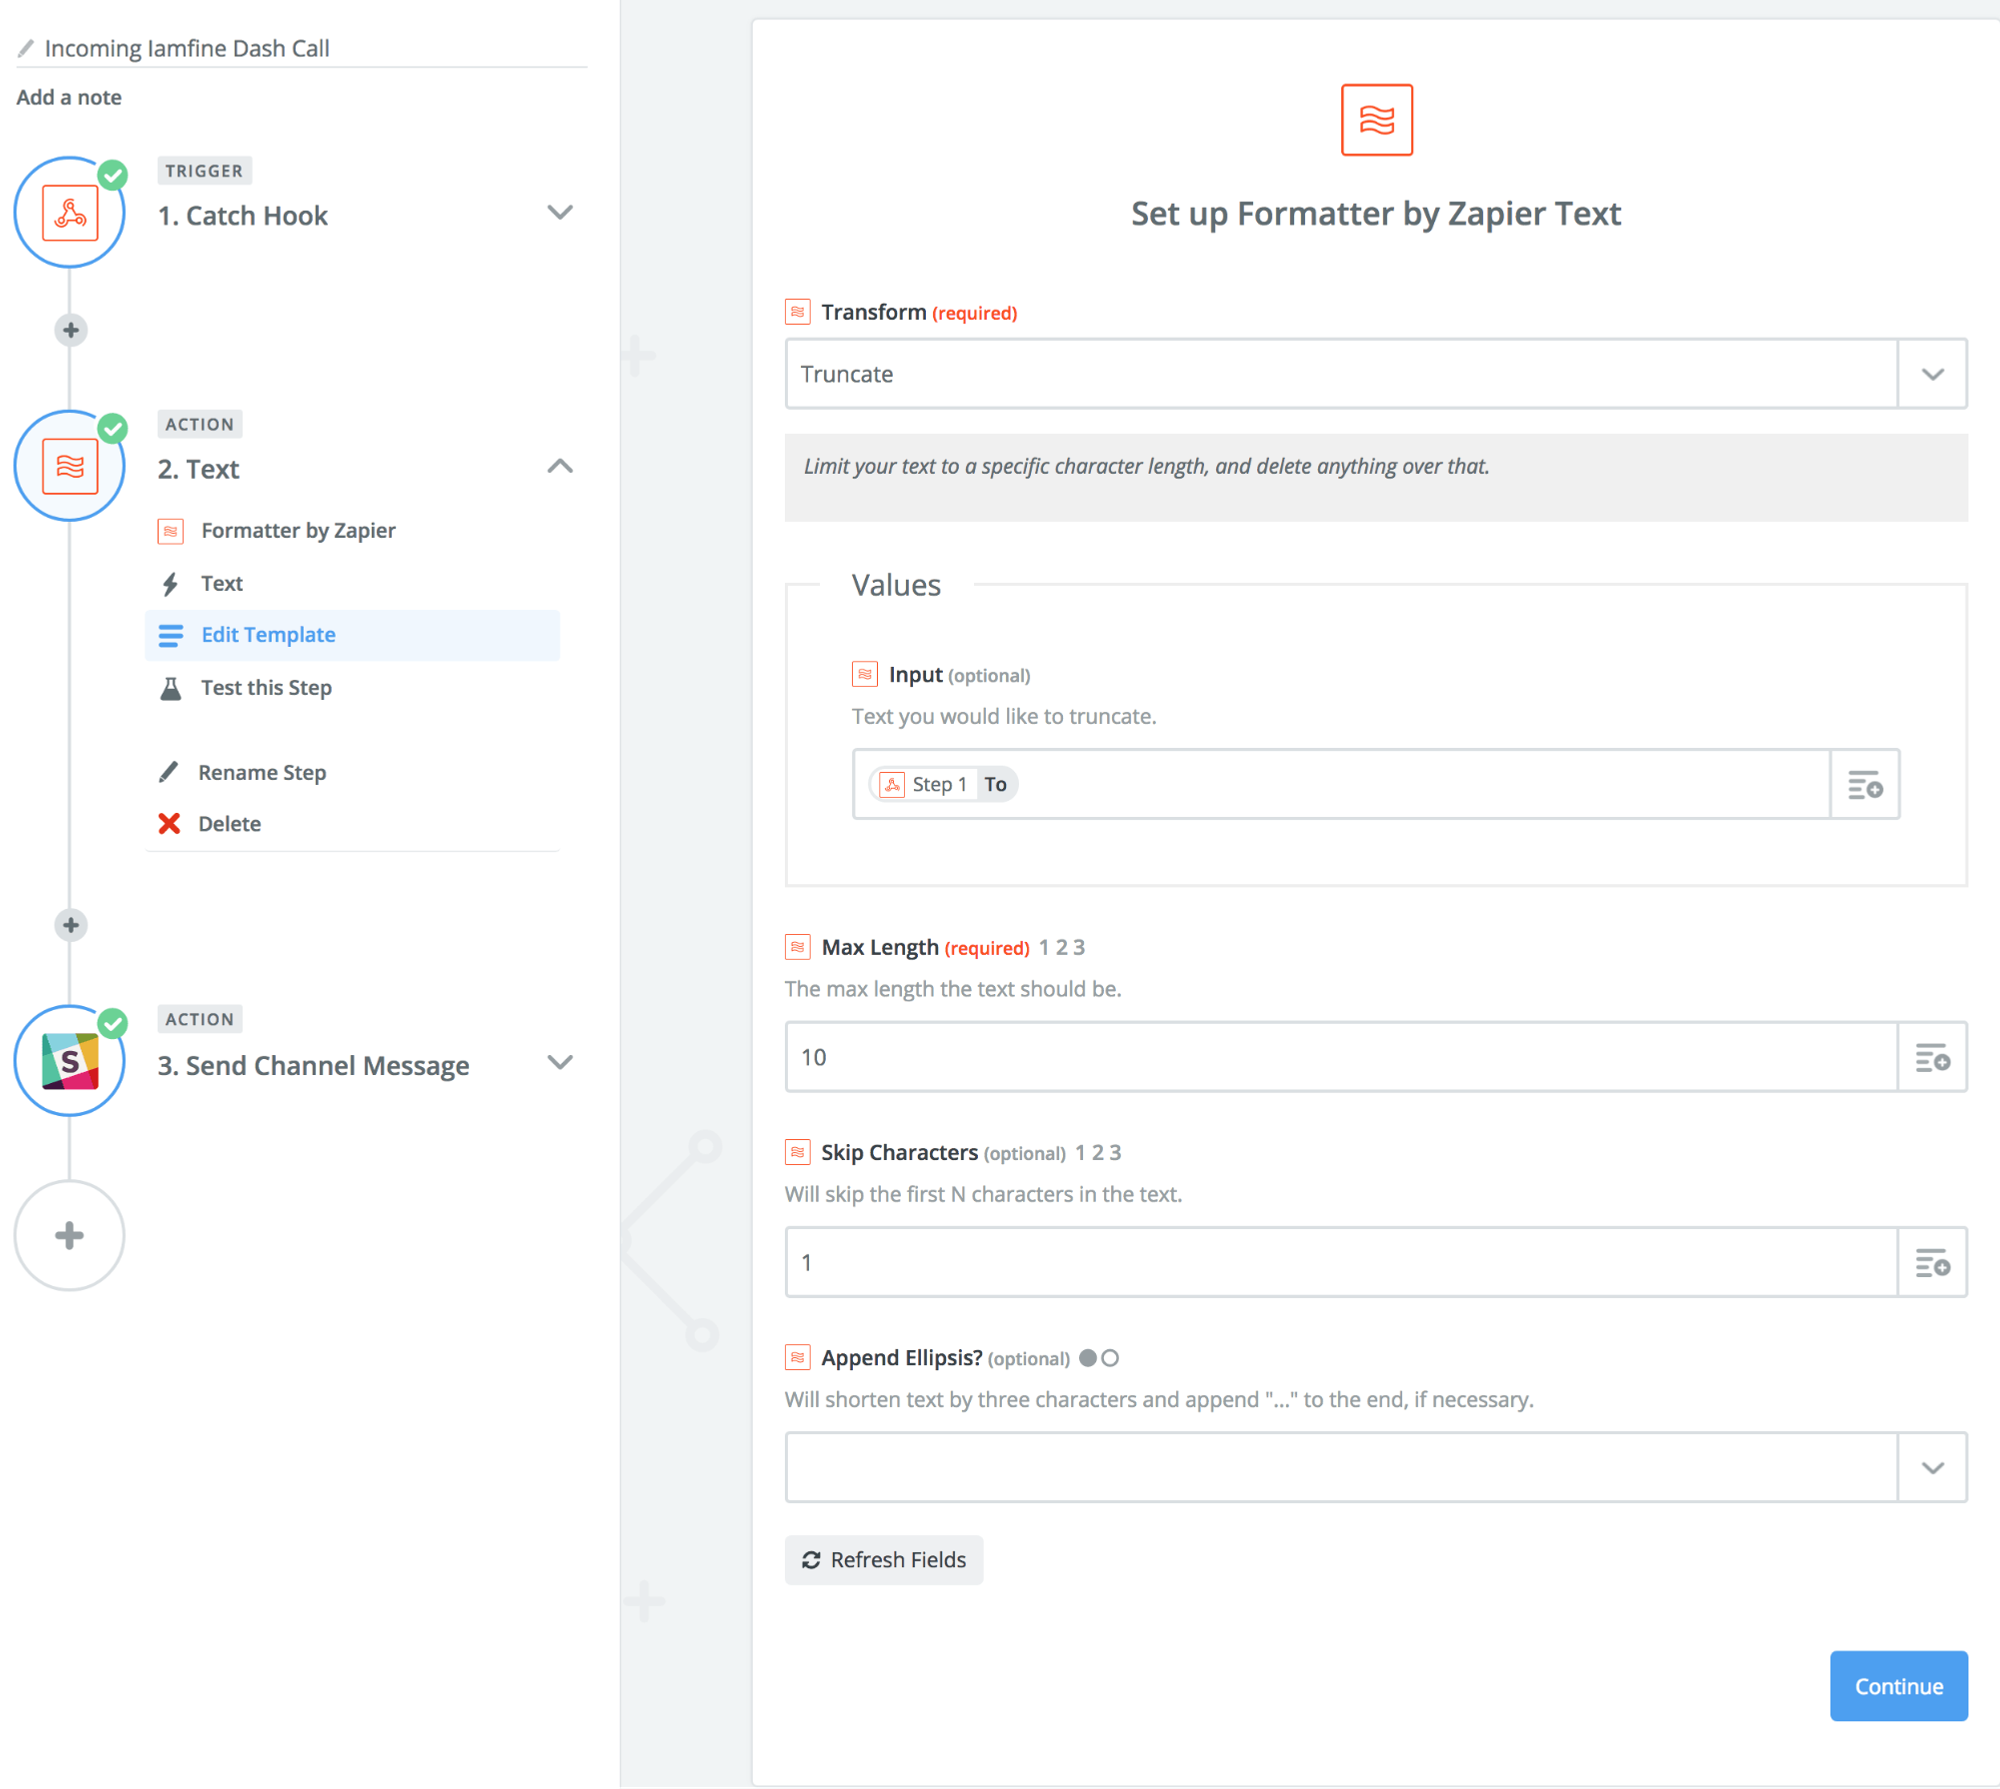
- Update your Formatter by Zapier screen to match the following settings:
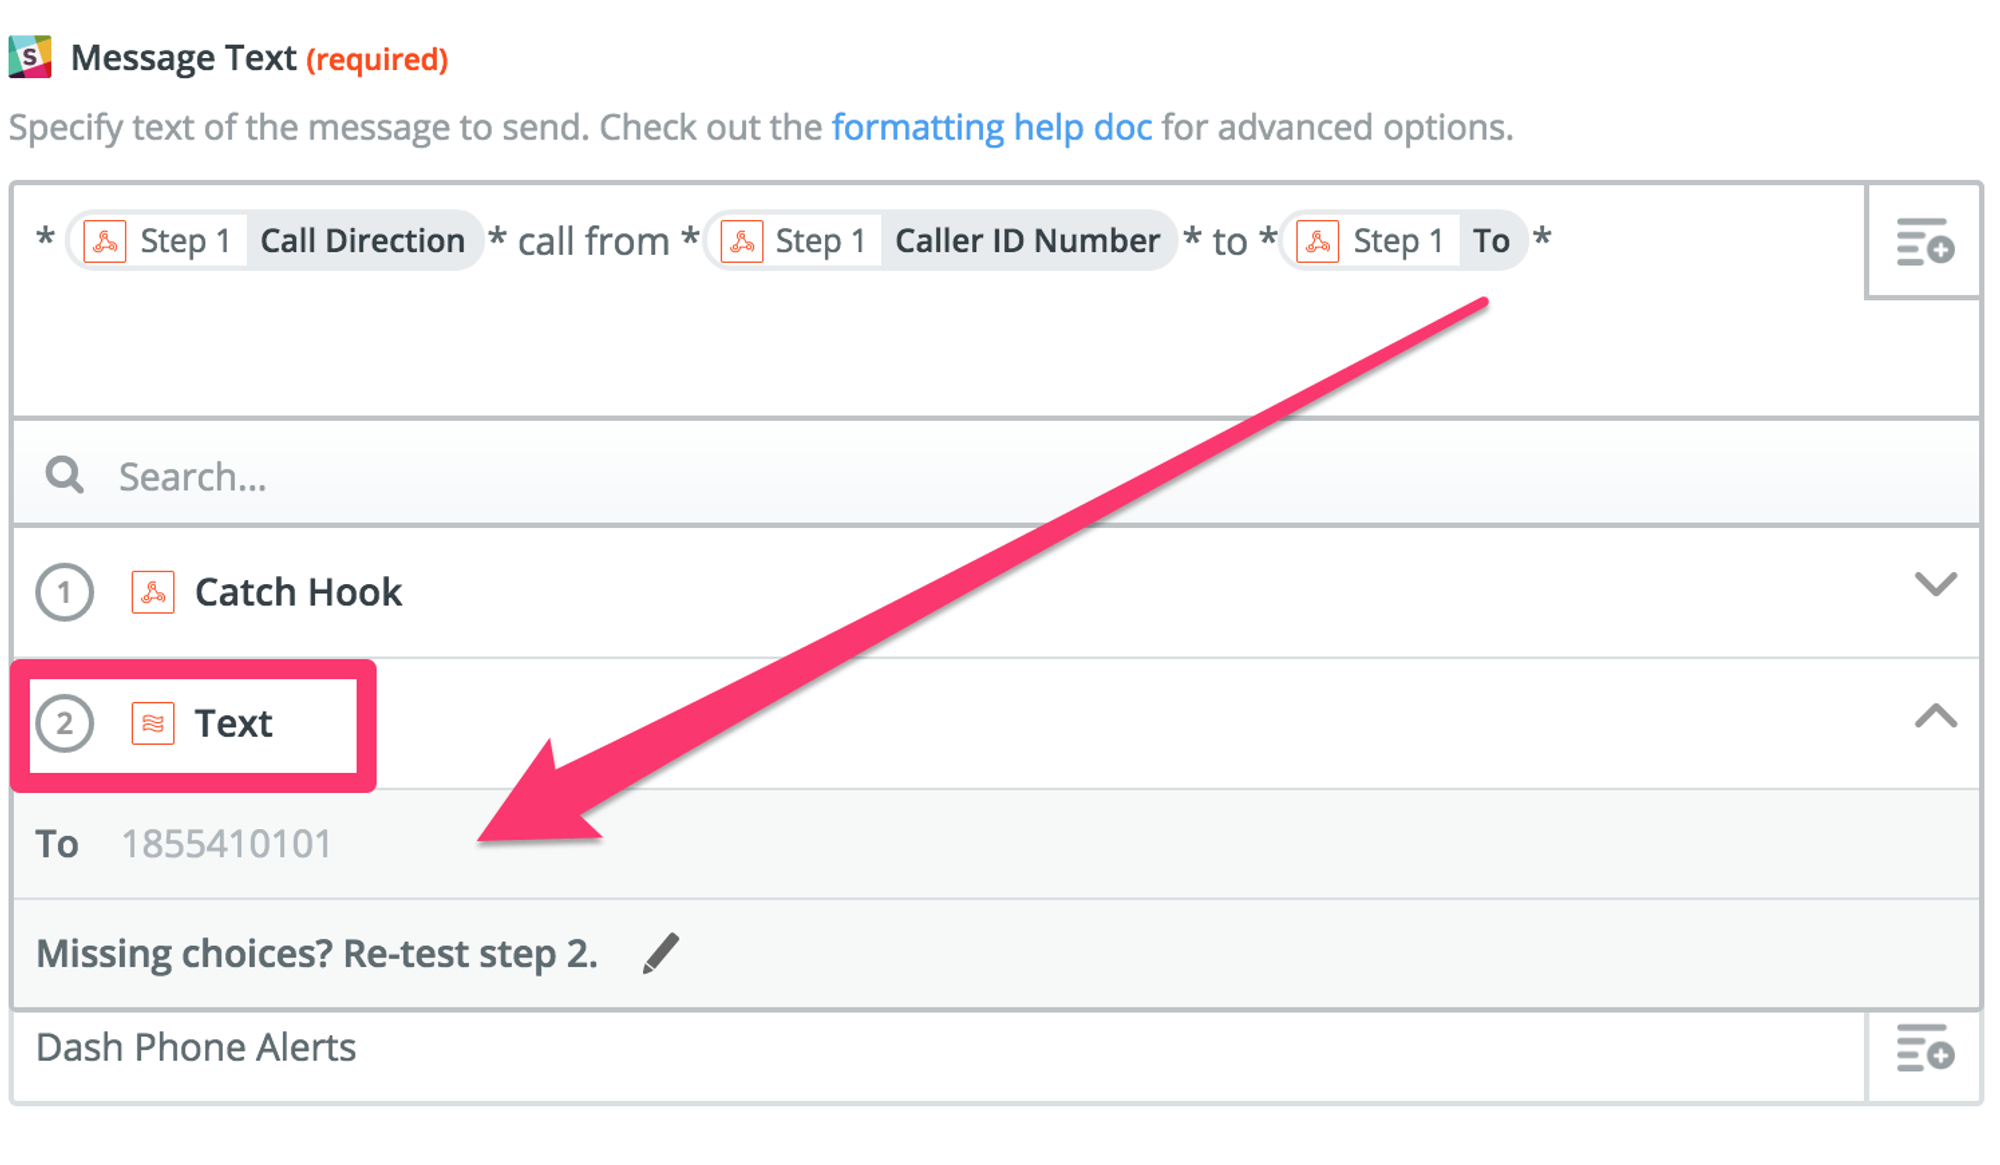
- At this point, your notification in Slack will look the same as before. Our final step is to modify the Slack message to use the formatted version of the text field and not the original. Select your action “Send Channel Message” and change “Step 1” in your message to “Step 2”
- The message now looks like this.
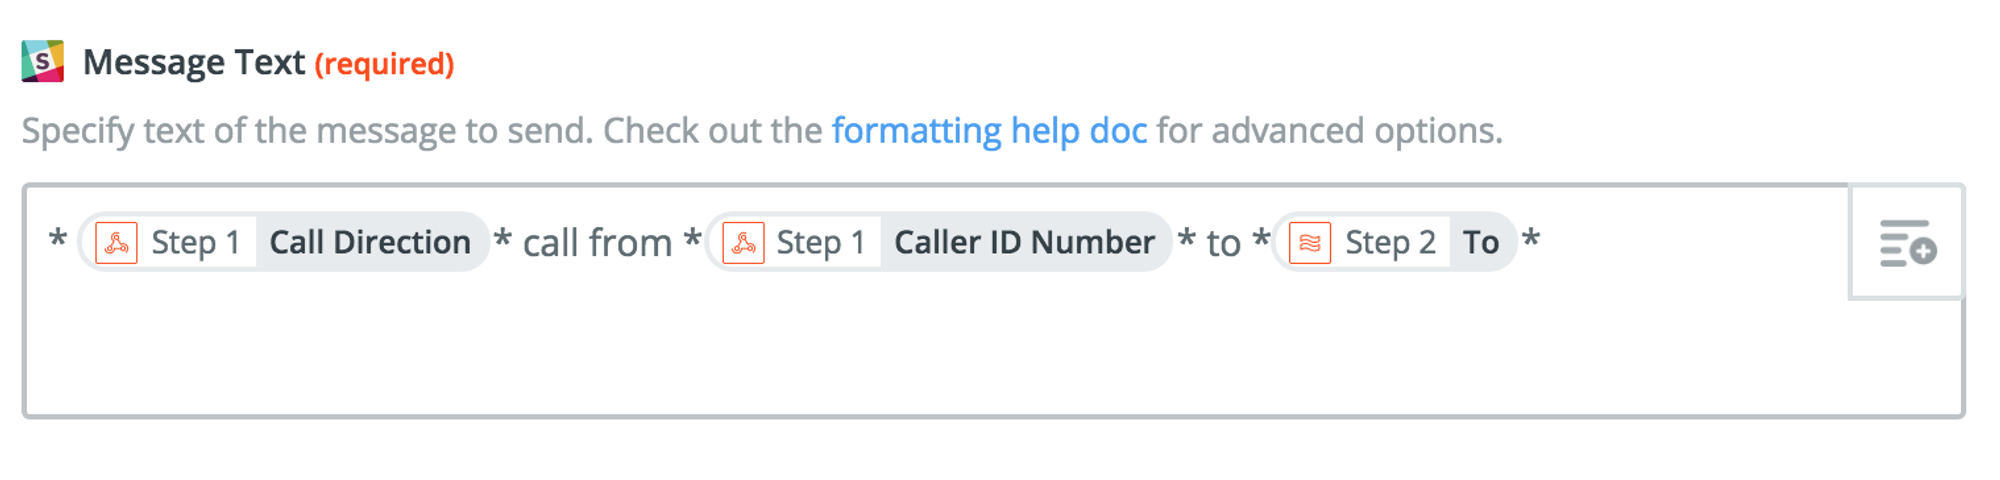

- Slack will now show the properly formatted result.
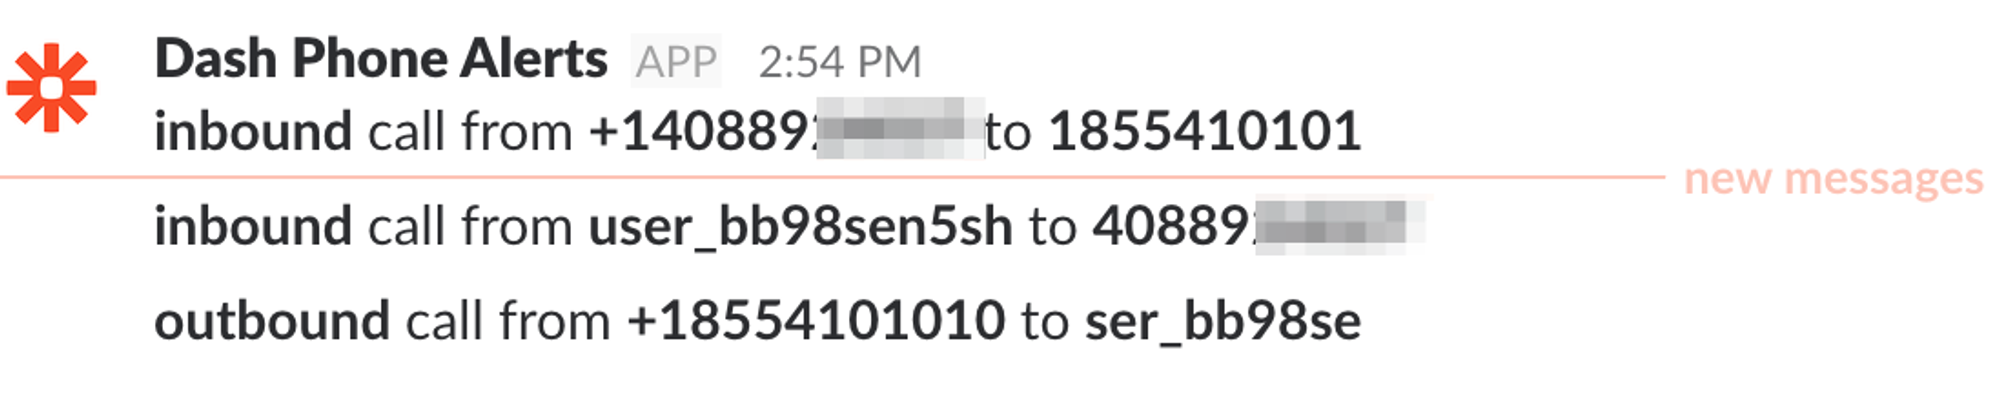
- You may see notifications when someone from your company makes an outbound call. These may also appear as two notifications, indicating two legs of the call – an inbound call from the user to the system and then the system placing the outbound call. If you do not wish to see these notifications, please continue to filter them out of your Slack channel.
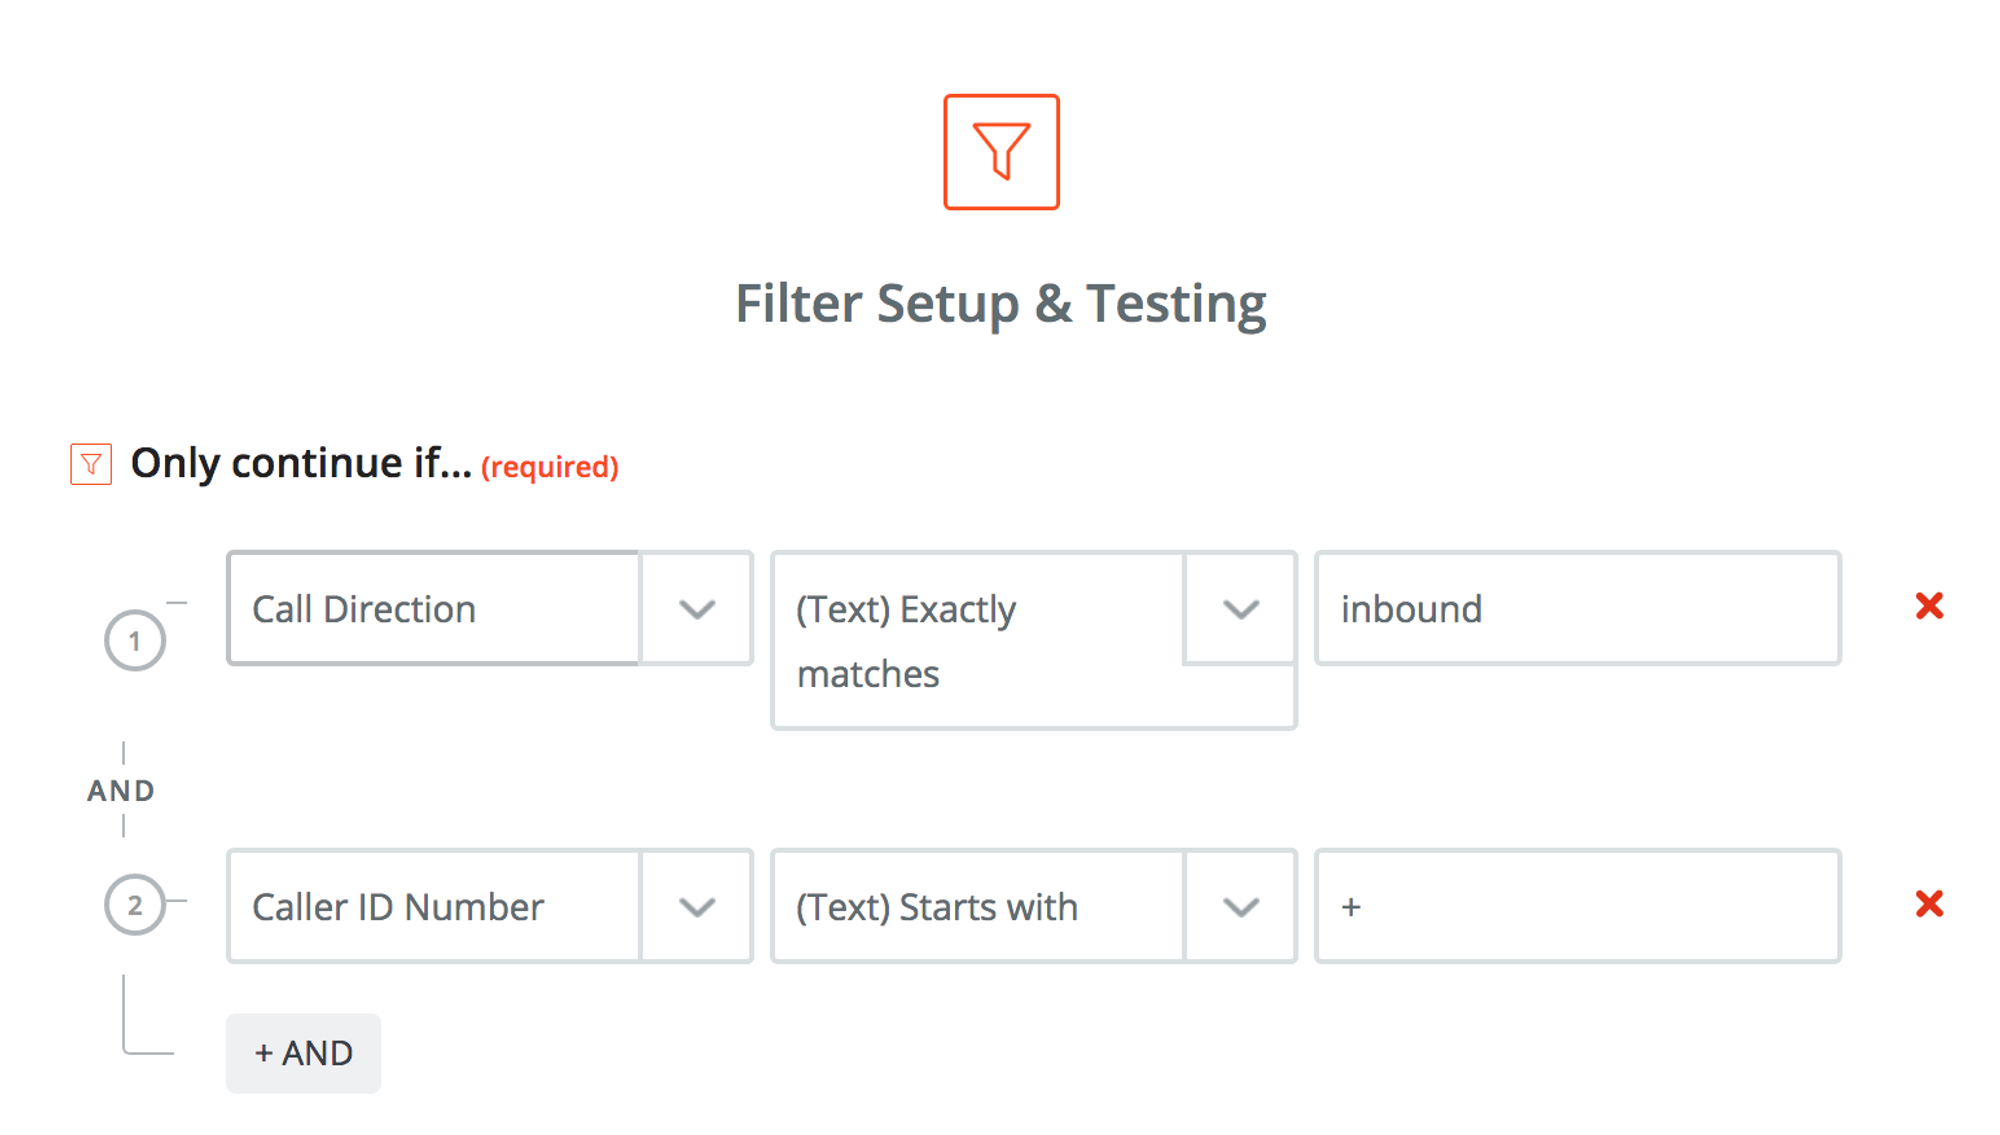
- To exclude outbound calls, we need to modify the original ZAP to filter out all calls except inbound callers dialing into our system. This is achieved by adding a filter to the Zap in-between the Catch Hook and the Formatter that will only allow the Zap to continue IF the call meets the following conditions:
- Call Direction (Text) Exactly Matches “inbound”
- Caller ID Number (Text) Starts with “+” (this indicates that it is a Caller ID number)
- Solved! We have now filtered the results to ONLY show incoming calls to our Dash phone system.