Setting Up A User With VirtualText
Warning: Once a user/email address has been assigned to a number, it can not be changed. Warning: Deleting an existing user from VirtualText will render the user’s email address in limbo for 60 days (A safeguard against losing old conversations).
- Only one user can be assigned to one phone number in VirtualText. The VirtualText user’s email address syncs with the email address assigned to your user
- Once a user is assigned a phone number, it can be assigned to other users in VirtualText. Contact our support team for assistance with this at this time
- If you need additional plan users to allow more users in VirtualText, please speak with our Services team for pricing
- An admin user in Dash will become an admin user in VirtualText
- Each user can only have one number assigned. Once that is complete, those numbers can be shared with other VirtualText Users
- The maximum length of messages sent from the VirtualText App contains two parts; a maximum word count of 346 and a maximum character count of 2,048. Like all text messaging services, standard text messages are billed in segments of 160 characters.

- As an admin, log in to your Dashboard. Go to the dropdown menu in the top right.
- Select “Messaging”
- Click on the “Add User” button.

- Select the User you want to add to Virtualtext in the dropdown
- Select the phone number you want to assign to that user under the dropdown
- Please Note: The selectable numbers here will include all numbers on this user and any Main or Auto-Attendant numbers that have not already been assigned to VirtualText.
- Click Create User.
The user will get an email with their login credentials for use with https://virtualtext.app/, or the VirtualText app for iOS or Android
Sharing A Number In VirtualText

Login in as an Admin, and on the left, click on Admin Menu and then Manage Users

- Enter the user’s name in the search bar. Or browse the list of users
- Click View under Action

- Click on the Number Sharing Tab
- Click on the box to show the list of other users to share the number to
- Click on Share Number. Repeat this for any other users you wish to share this number with.
Adding/Importing Contacts
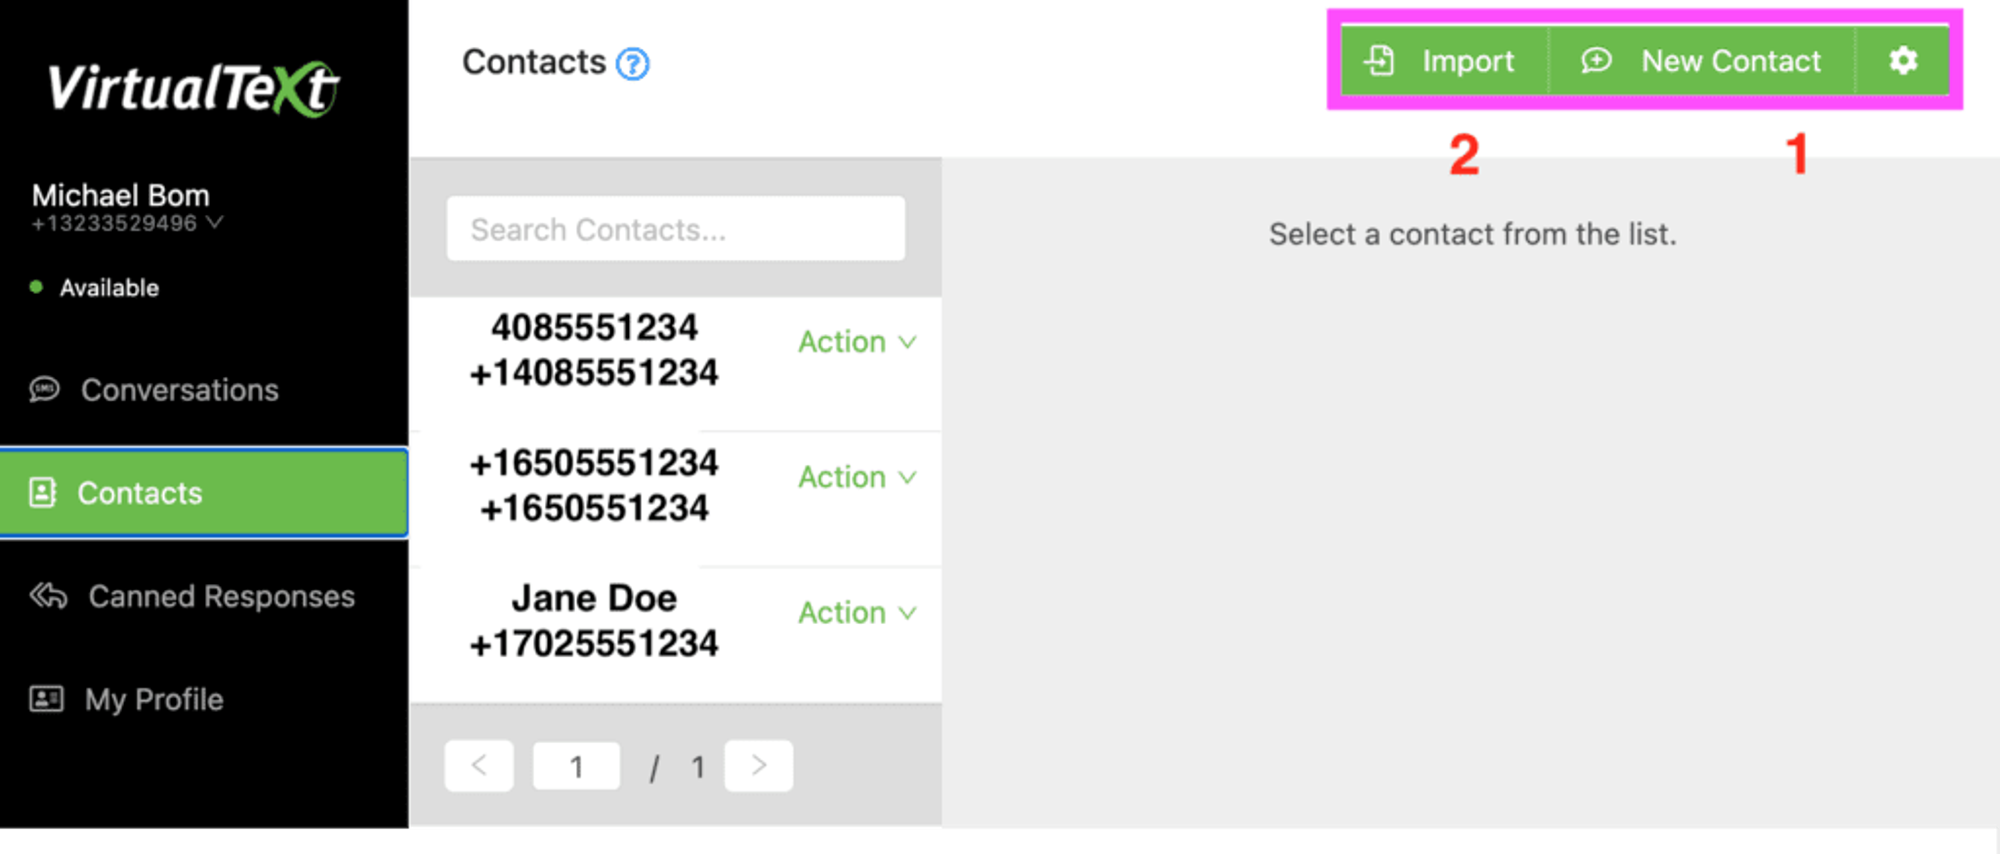
To add contacts, click on Contacts on the left menu.
When adding contacts you have two options.
- Manually enter a single contact, by clicking on New Contact at the top right
- Upload a .CSV with the following format (Format: Full Name, Phone Number, E-mail Address). Start this by clicking on Import
Note, that if you go to the import Contacts section, there is a download sample of the CSV file.
Texting With VirtualText
Conversation history is only available per user for each phone number while it is ACTIVE or ACTIVELY shared with that user. In other words, texting history for a number will not be transferred to a user who just started using a given number.
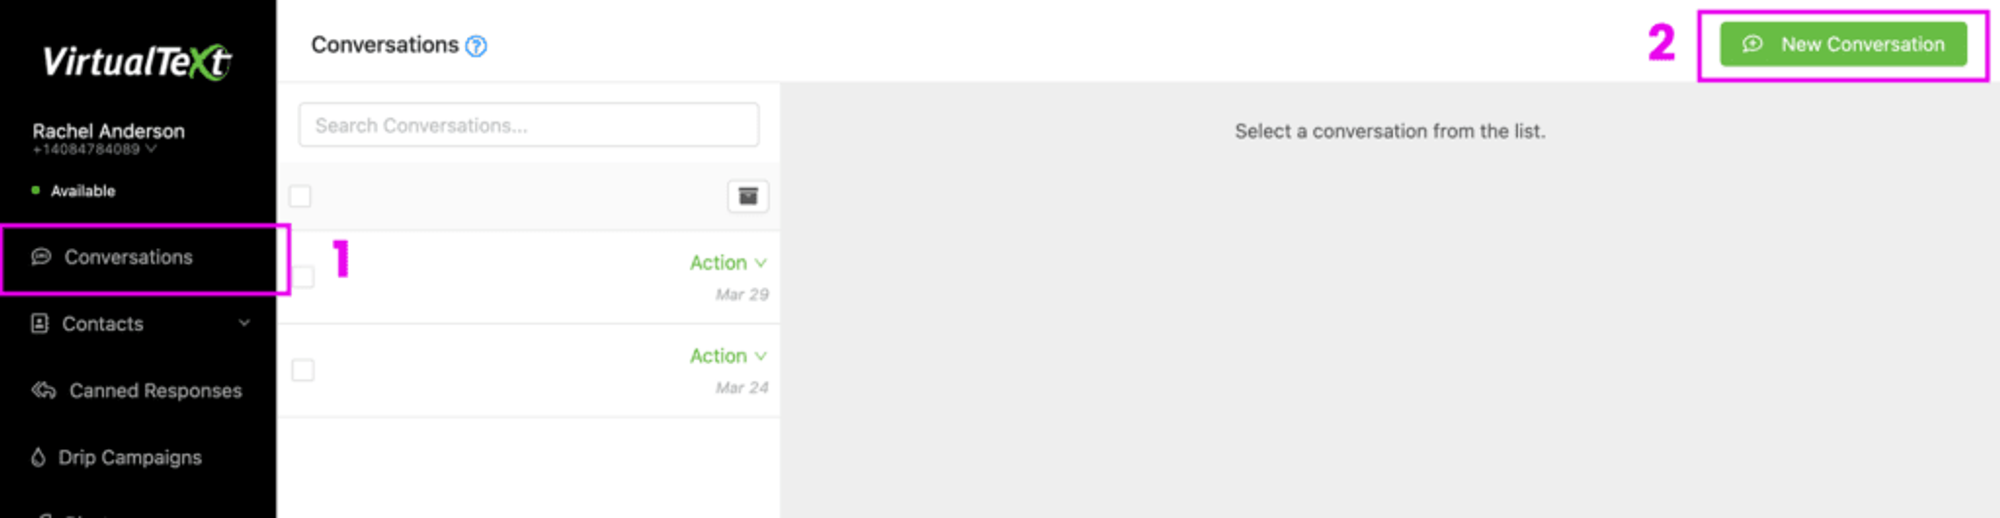
To start a conversation:
- Click on Conversations on the left menu
- Click on New Conversations at the top right to start a new conversation. At that point you will be given the option to enter in a new phone number or select an existing conversation.
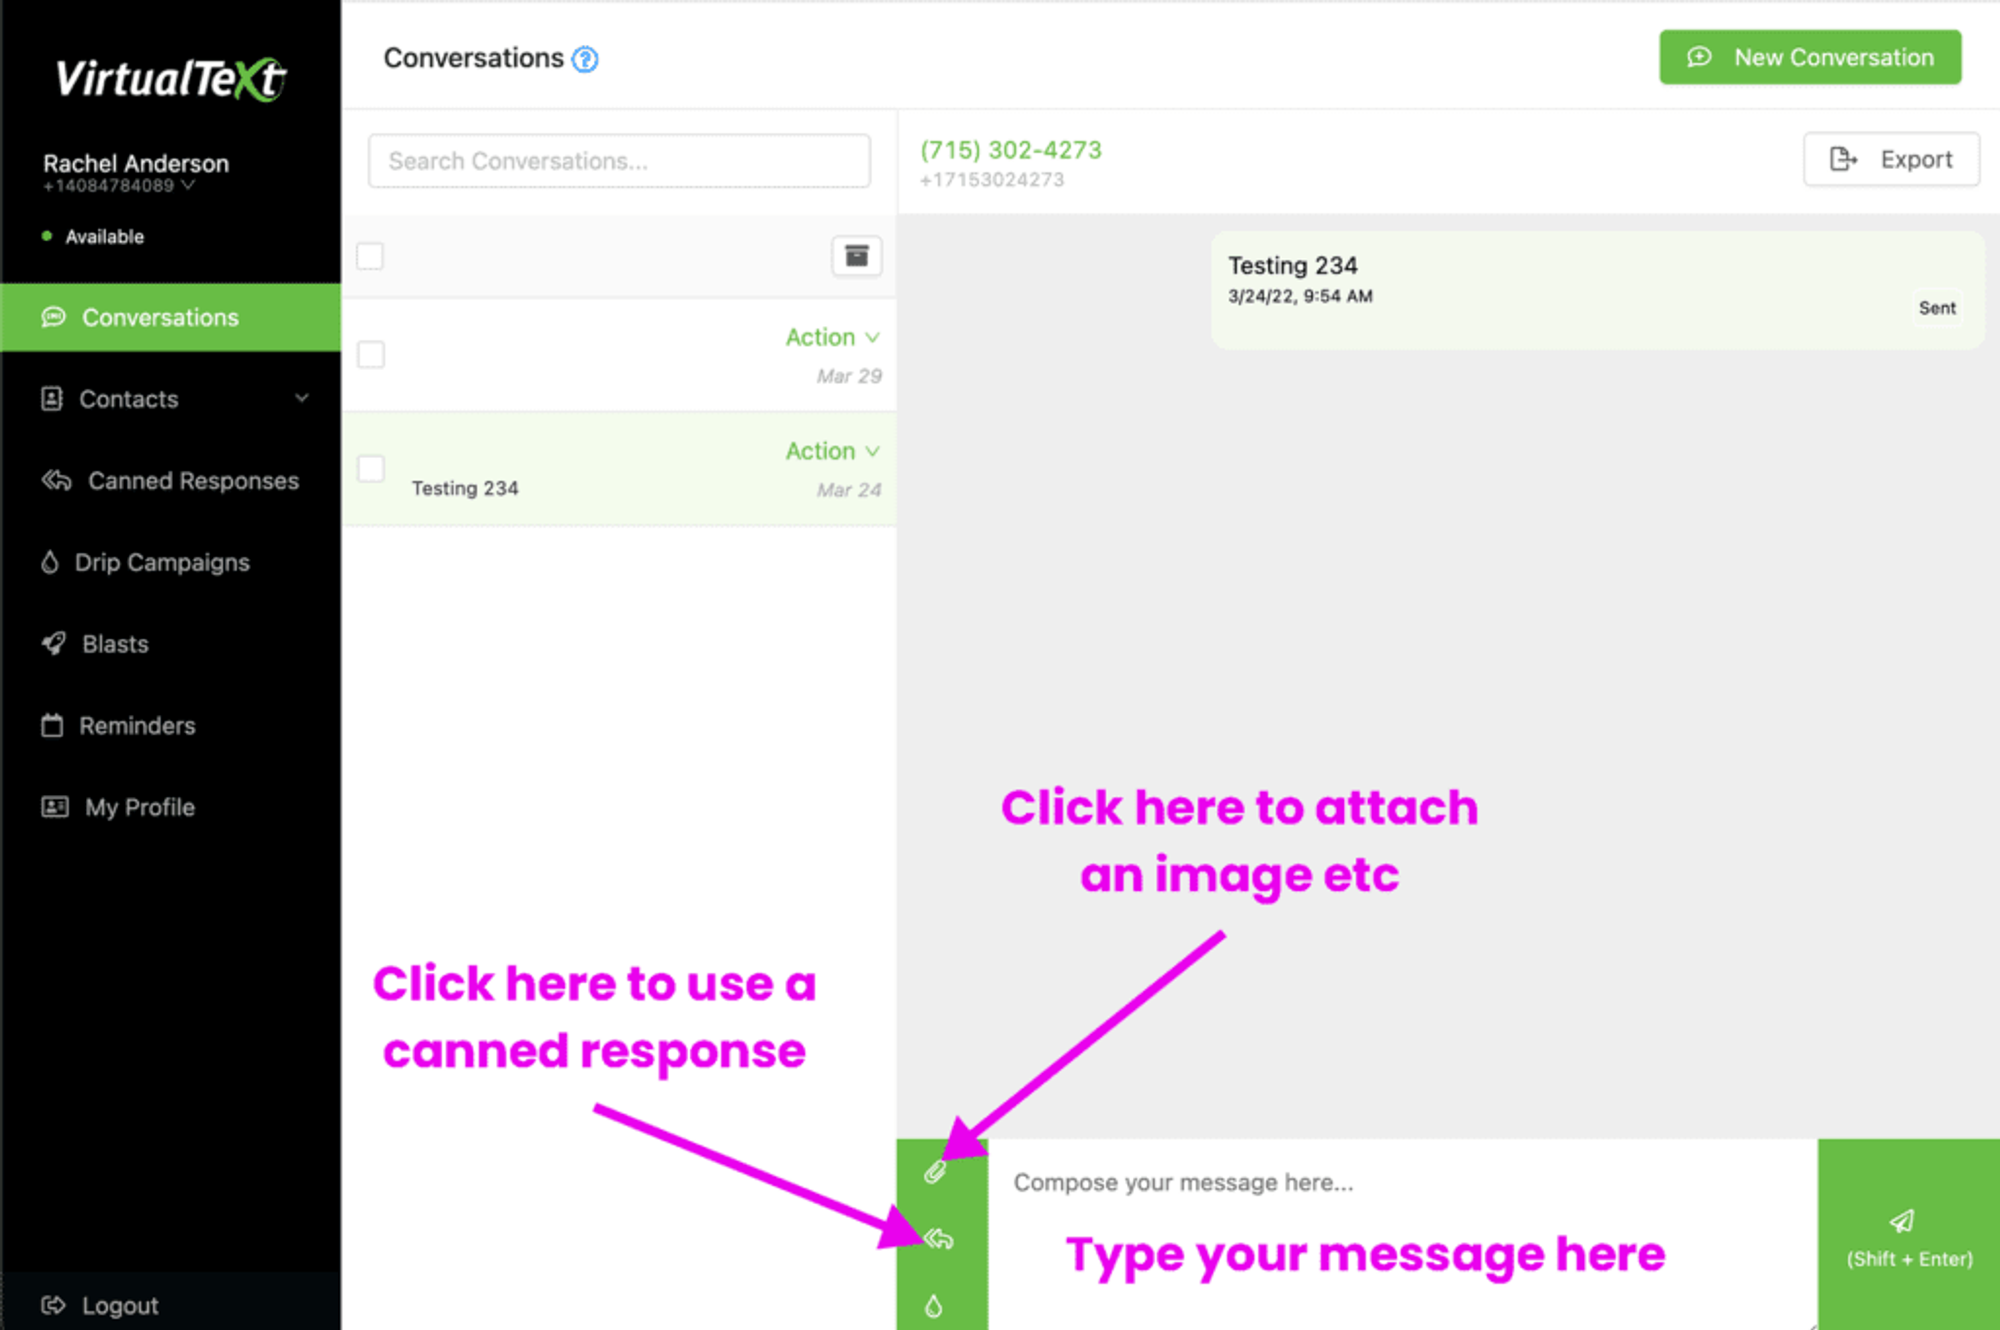
You can then type your message, use the paper click to add an attachment, such as an image or other media (MMS). You can also click the arrow pointing to the left below the attachment to insert a “Canned Response”.
Canned Responses
You can also create canned responses to send quick replies out.
To create one, go to “Canned responses” on the left and then click on “Add New Response”.
From there give it a title and enter text in the message body. There are also two additional functions you can use.
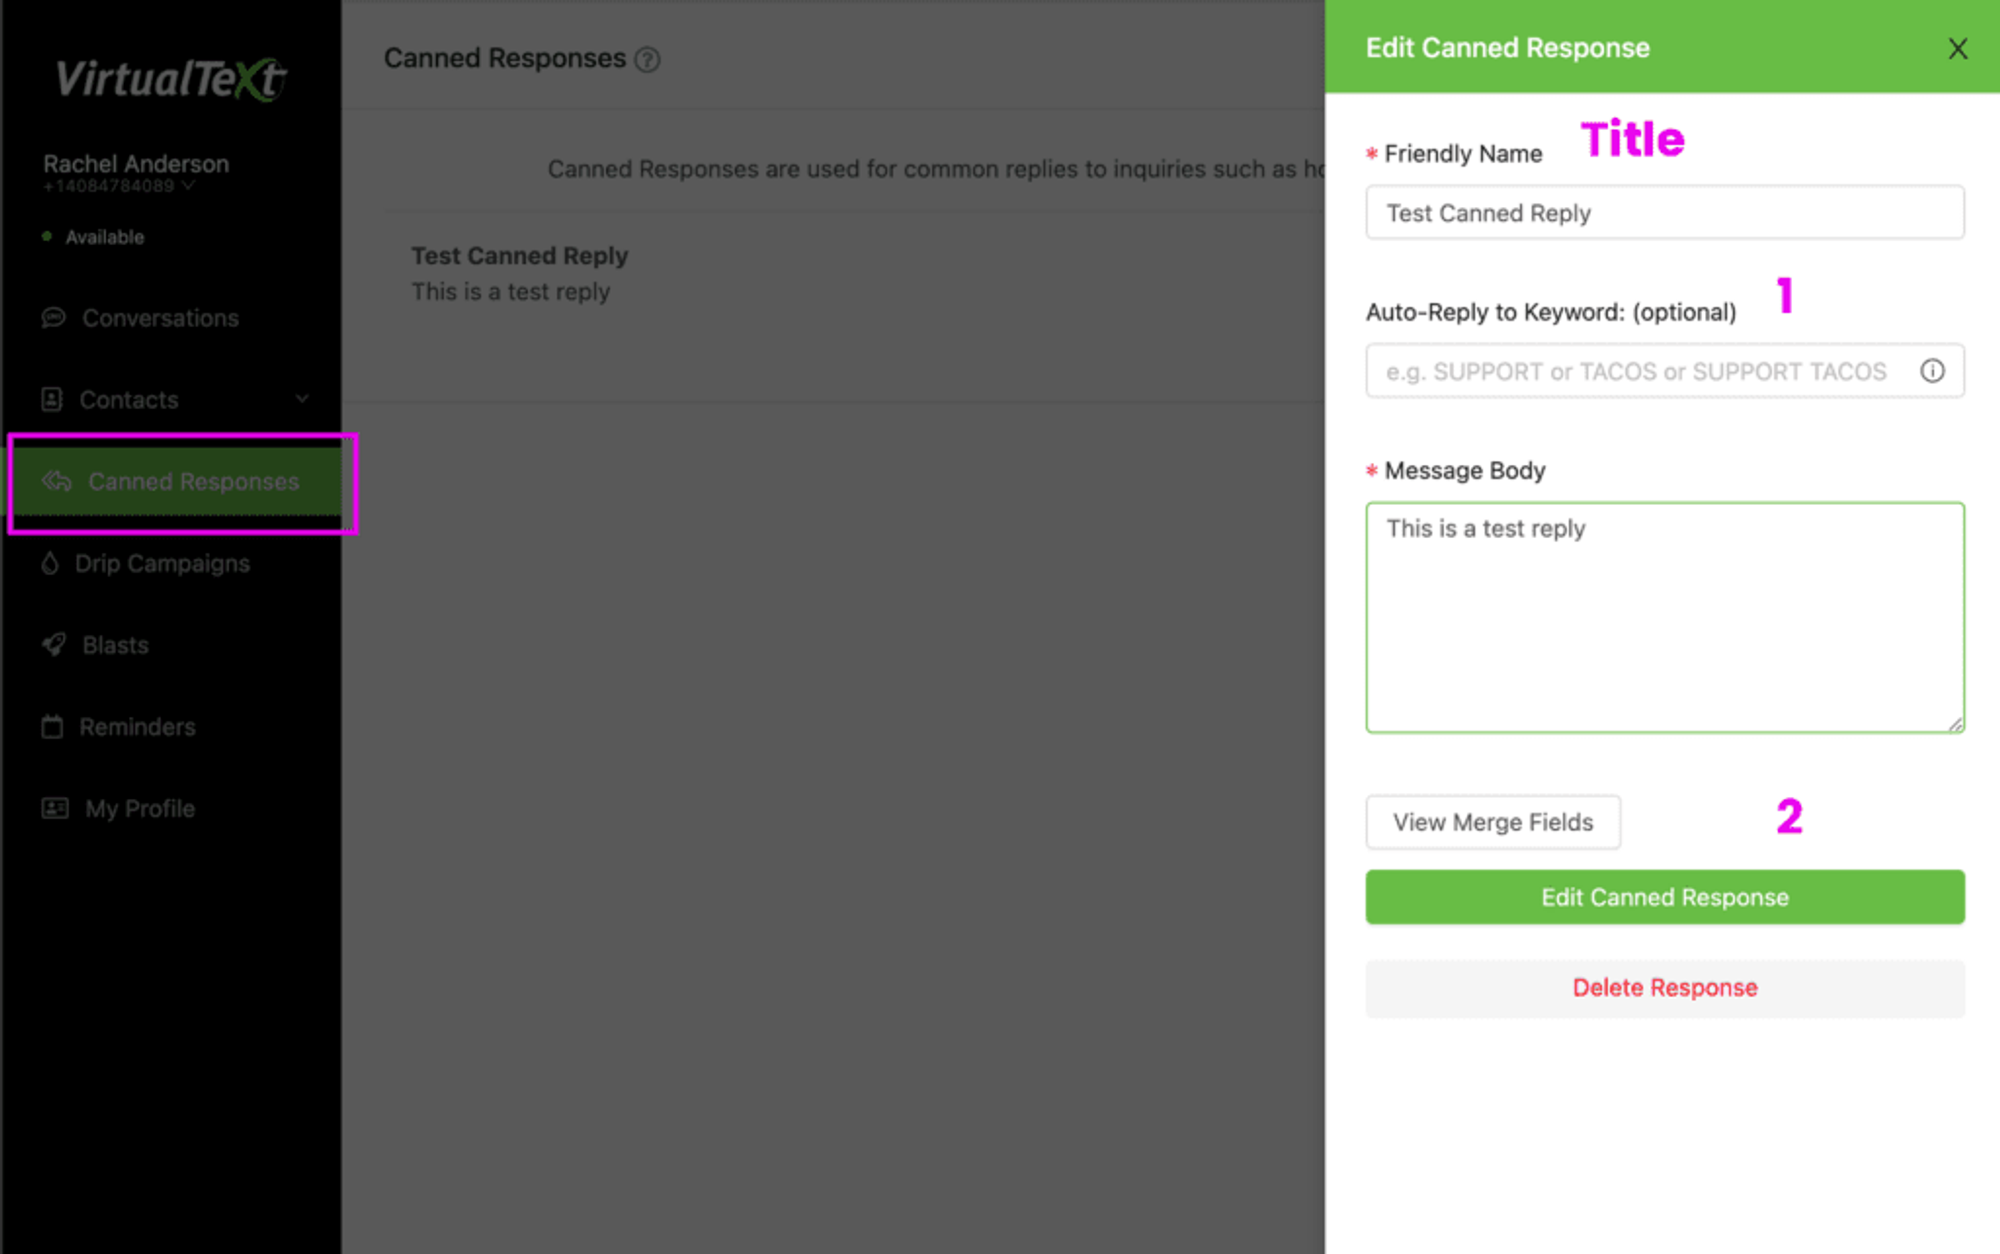
- Auto-Reply to Keyword
- If you receive an SMS message that matches exactly this, it will auto reply this canned response. This is useful for sending things like an address, hours of operation or other information that the user can request.
- In the message body, you can use “View Merge Fields”. This will let you customize the canned response to include the respondent’s name.
[title](e.g. Mrs.)[first] (e.g. Jane)[last] (e.g. Doe)[suffix] (e.g. Jr.)Example: “Hi [first]. I am out of the office, I will reply when I have a chance. Thank you.” This response will pull the first name out of the contact and include it in the message. If you only have the number in the contact, then it will fallback and use the number instead.
Adding contacts to VirtualText from your mobile phone.
Currently there is no in app way to import your phone’s contacts directly into the VirtualText app. In order to import contacts you will first need to export your contacts from your phone into a .CSV file. Then you can import them via the website interface.
The following guides are possible suggestions to explore. VirtualPBX has not tested these methods to verify how well they work with VirtualText. In many cases, you may need to use 3rd party applications or online tools
For Android phones, you can check out the following guides
Google contacts - CSV. Probably easiest if you sync your phone’s contacts with your Gmail account.
Android contacts to VCF. You would then need to convert the VCF to a CSV. Journeybytes has a guide using MS Excel
For IOS phones you can check out the following guides
Remember to make your CSV file for import with only 3 columns: Name / Phone Number / Email address