Depending on your Grandstream model and firmware version, your Grandstream interface may look different than the screenshots included below. The steps, however, are the same.
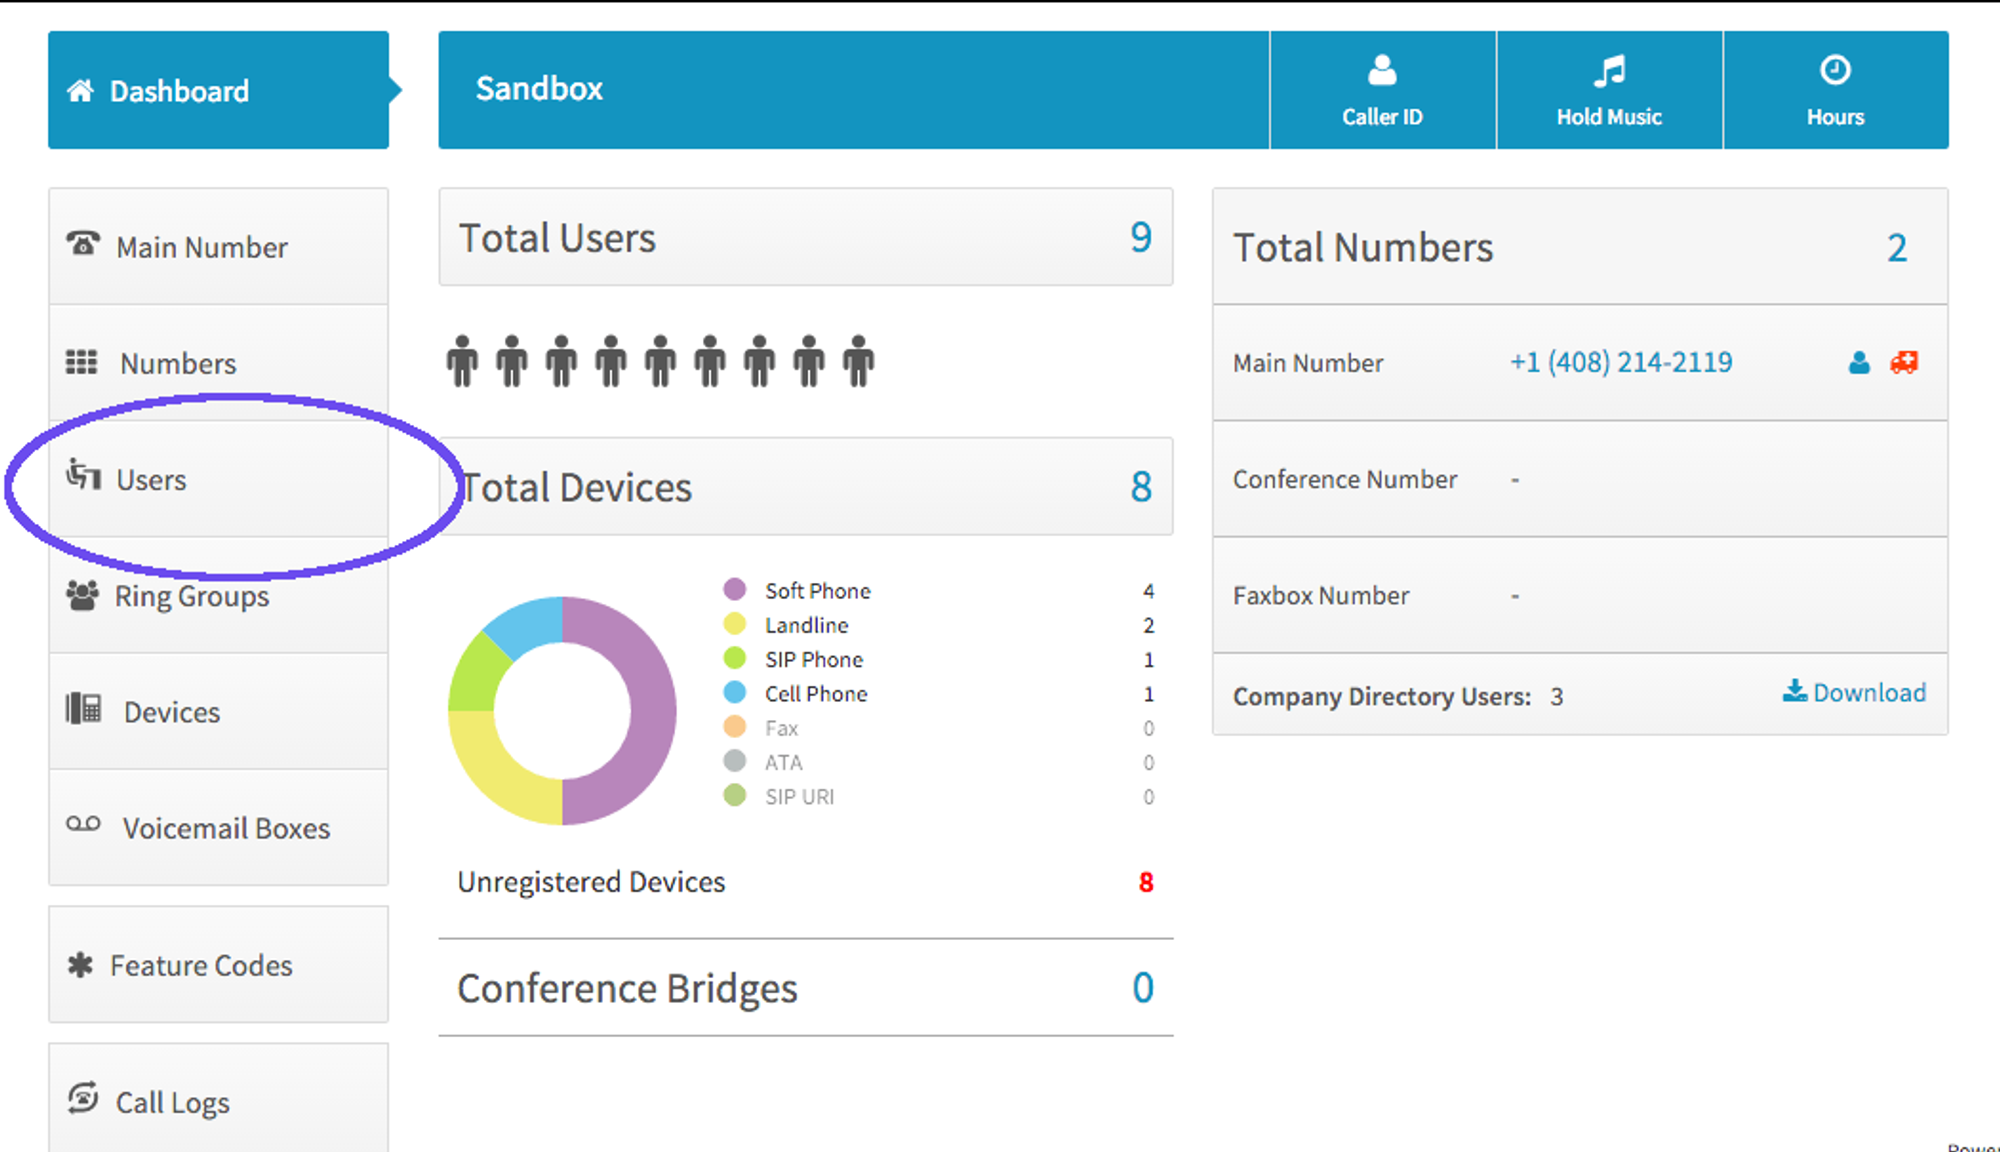
- In the Dashboard, click on Users
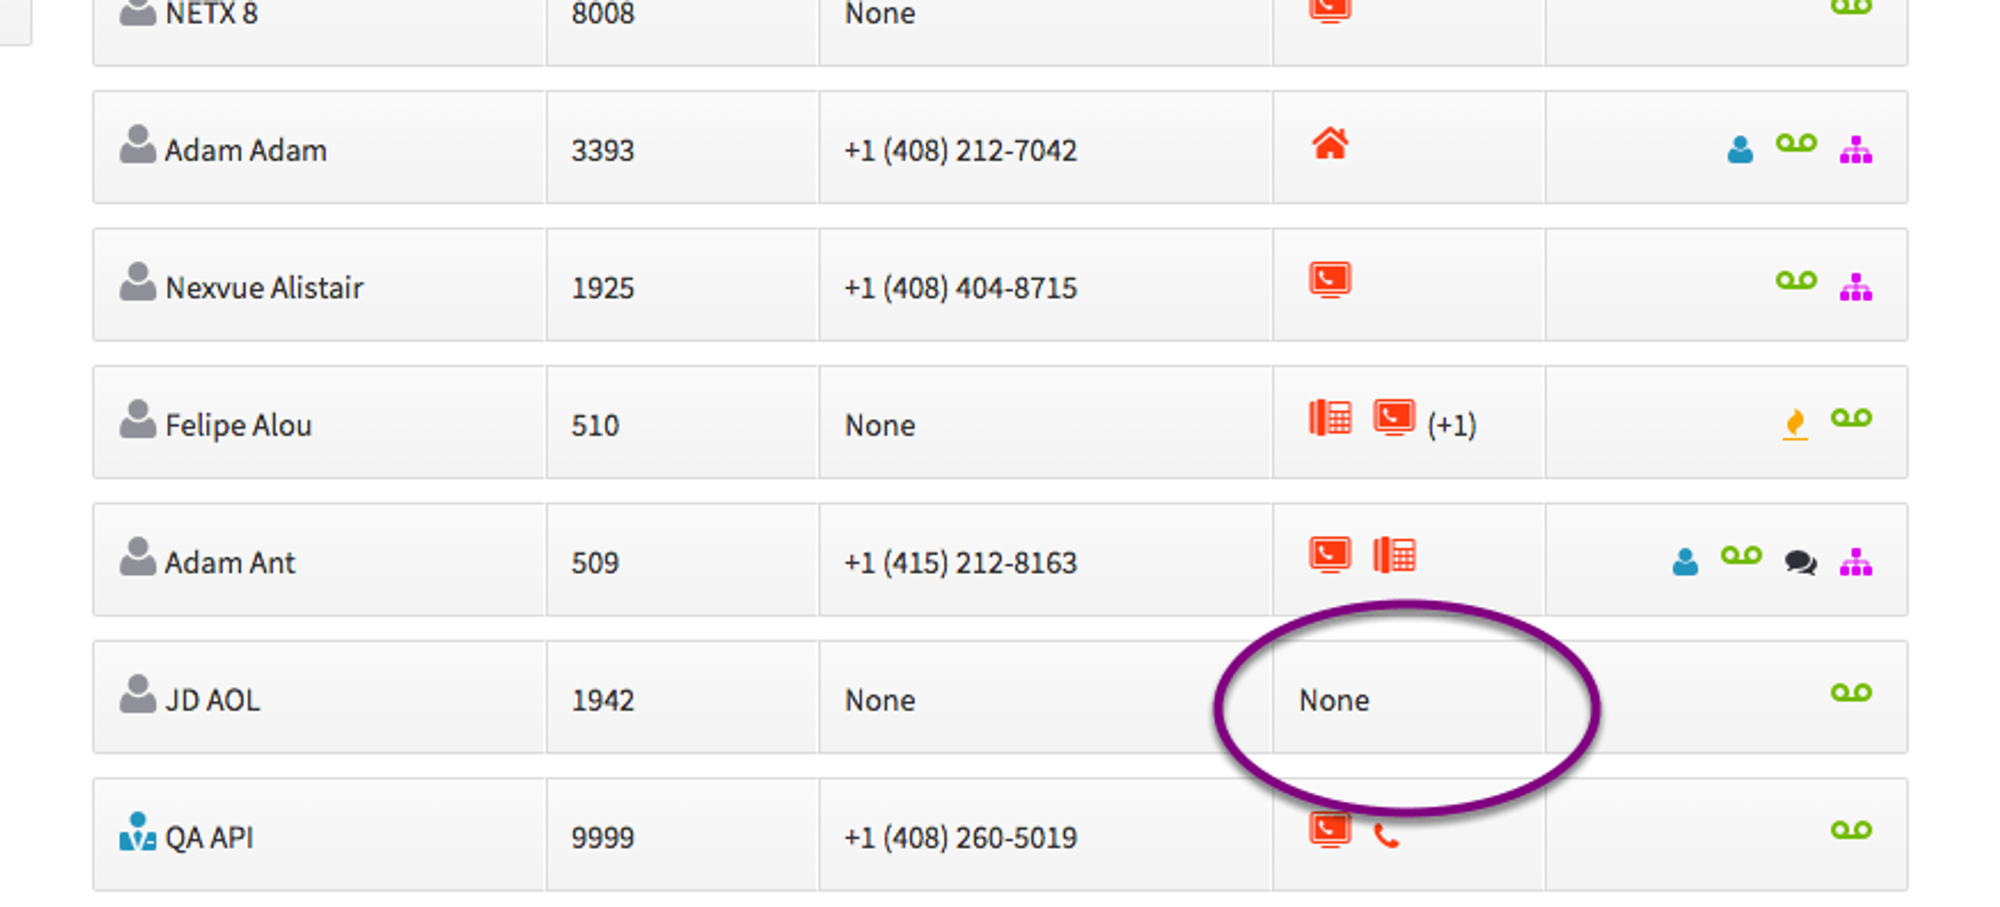
- Click on Devices for the user you wish to add the Grandstream phone
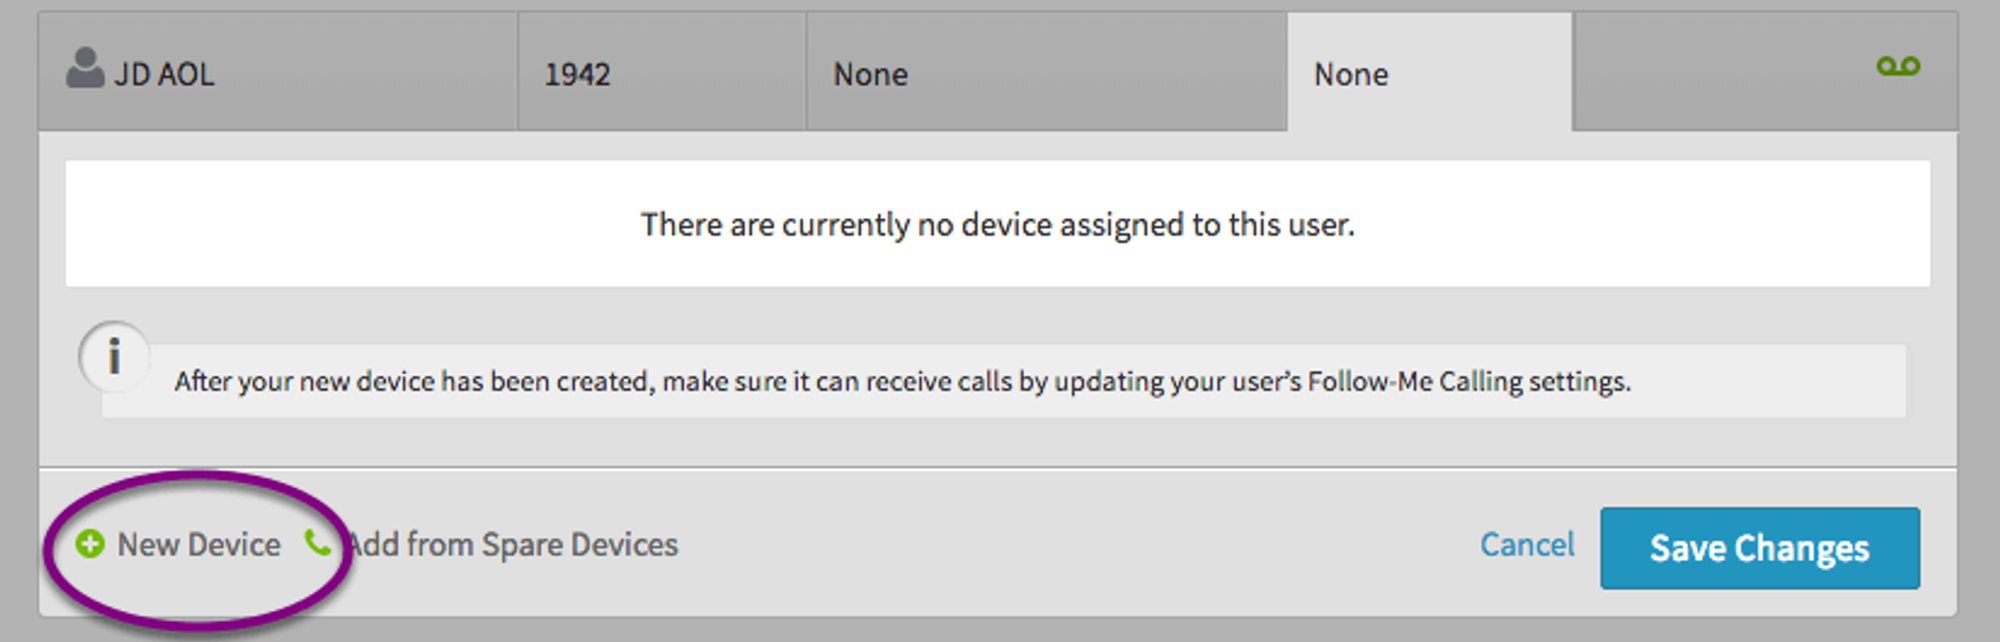
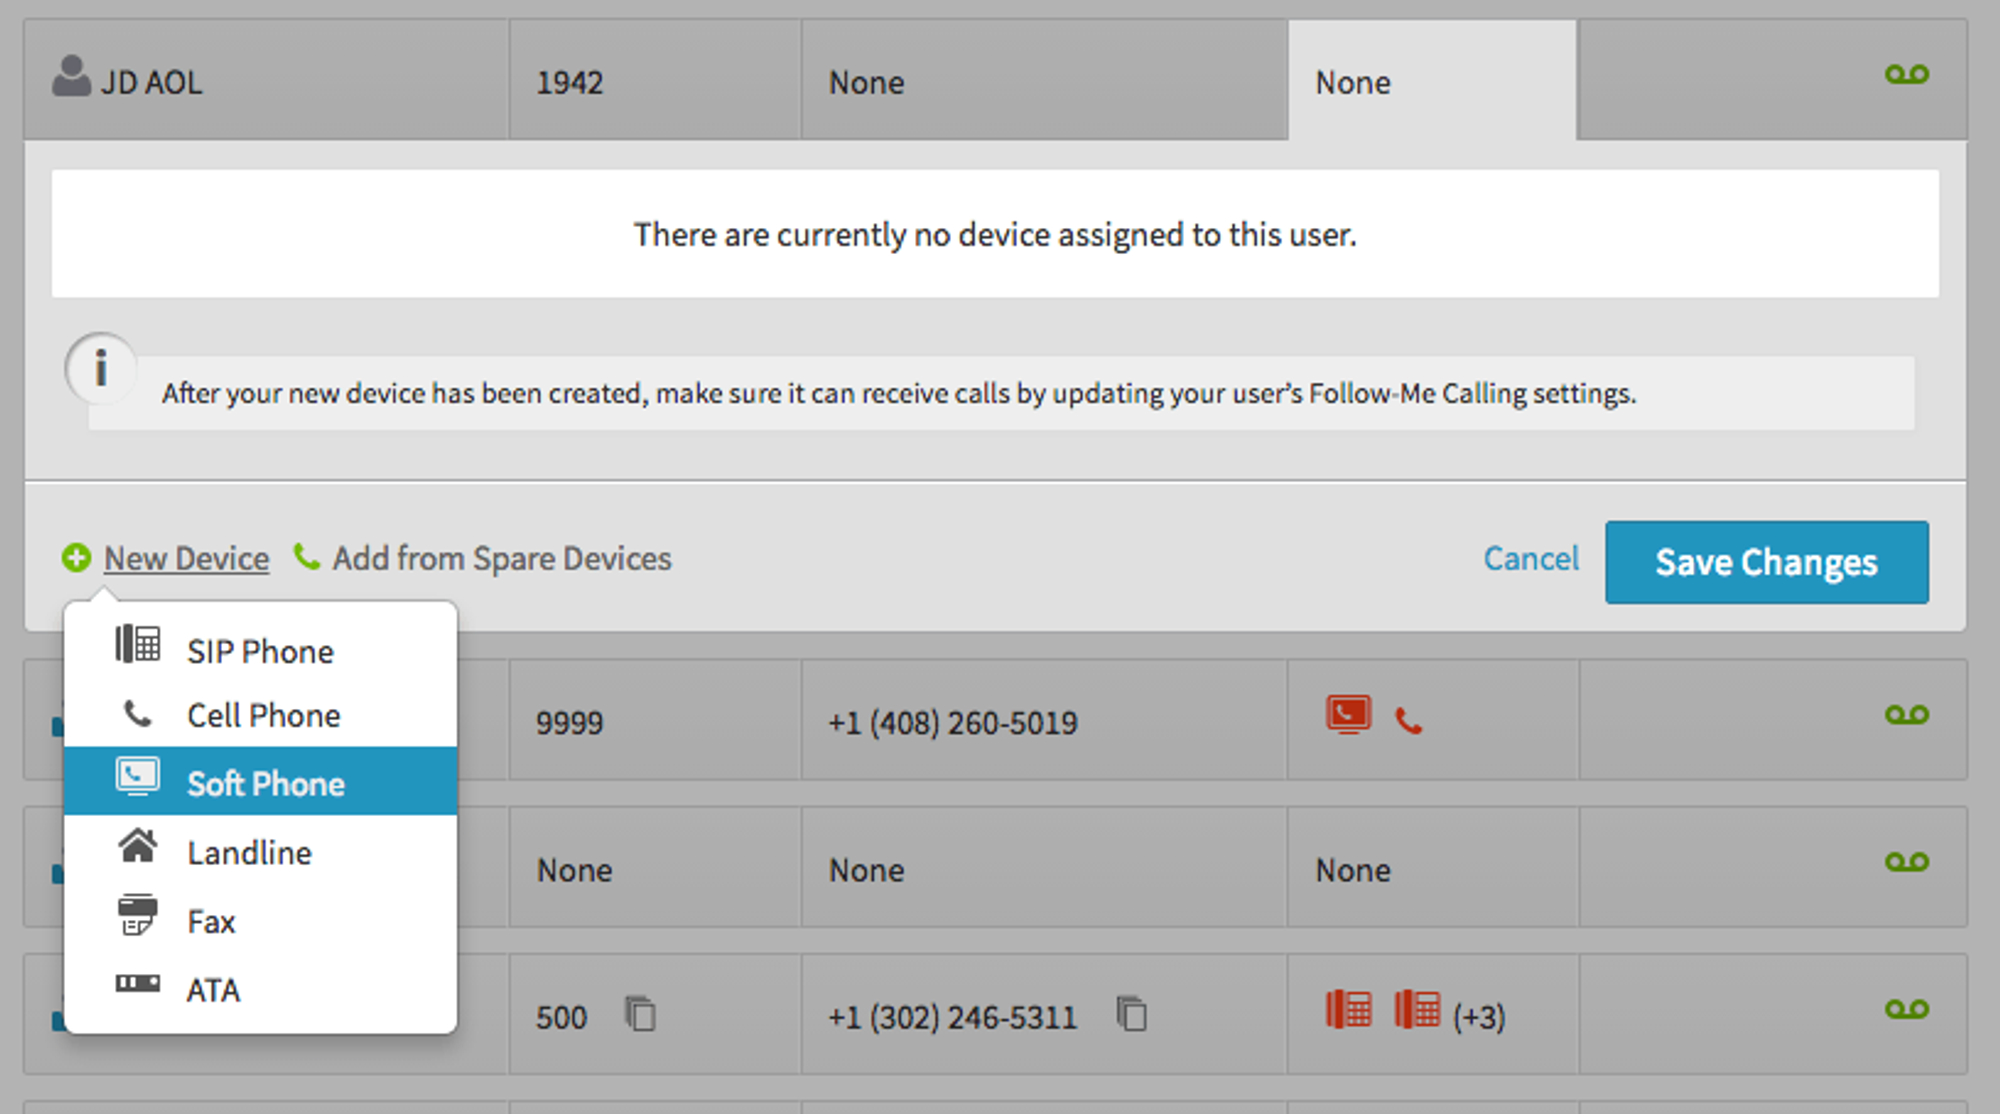
- Click “New Device” and select “Softphone” from the dropdown list

- Give your Device a name for your identification.
- Record your SIP Username, SIP Password, and Realm – you will need these shortly. To display your SIP Password simply click on the text box to reveal it.
- Click on Create Device

- Click on “Save Changes” to create the device properly and assign it to the user.
Login to your Grandstream phone’s interface using username and password “admin” – you may need to refer to your phone’s manual if you have forgotten how to access this interface.

- Click on Accounts
- Click on “General Settings” under account 1 on the left
- Account Active: Set to Yes
- Account Name - Name this device for your identification
- SIP Server: (enter the Realm you were given in the Dash interface)
- Outbound Proxy - proxy-west.virtualpbx.net
- Backup Outbound Proxy - proxy-east.virtualpbx.net
- SIP UserID: (enter the SIP Username you were given in the Dash interface)
- SIP Authentication ID: (enter the SIP Username you were given in the Dash interface)
- SIP Authentication Password: (enter the SIP Password you were given in the Dash interface)
- Click on Save