First, Create a Softphone or Retrieve Your Credentials
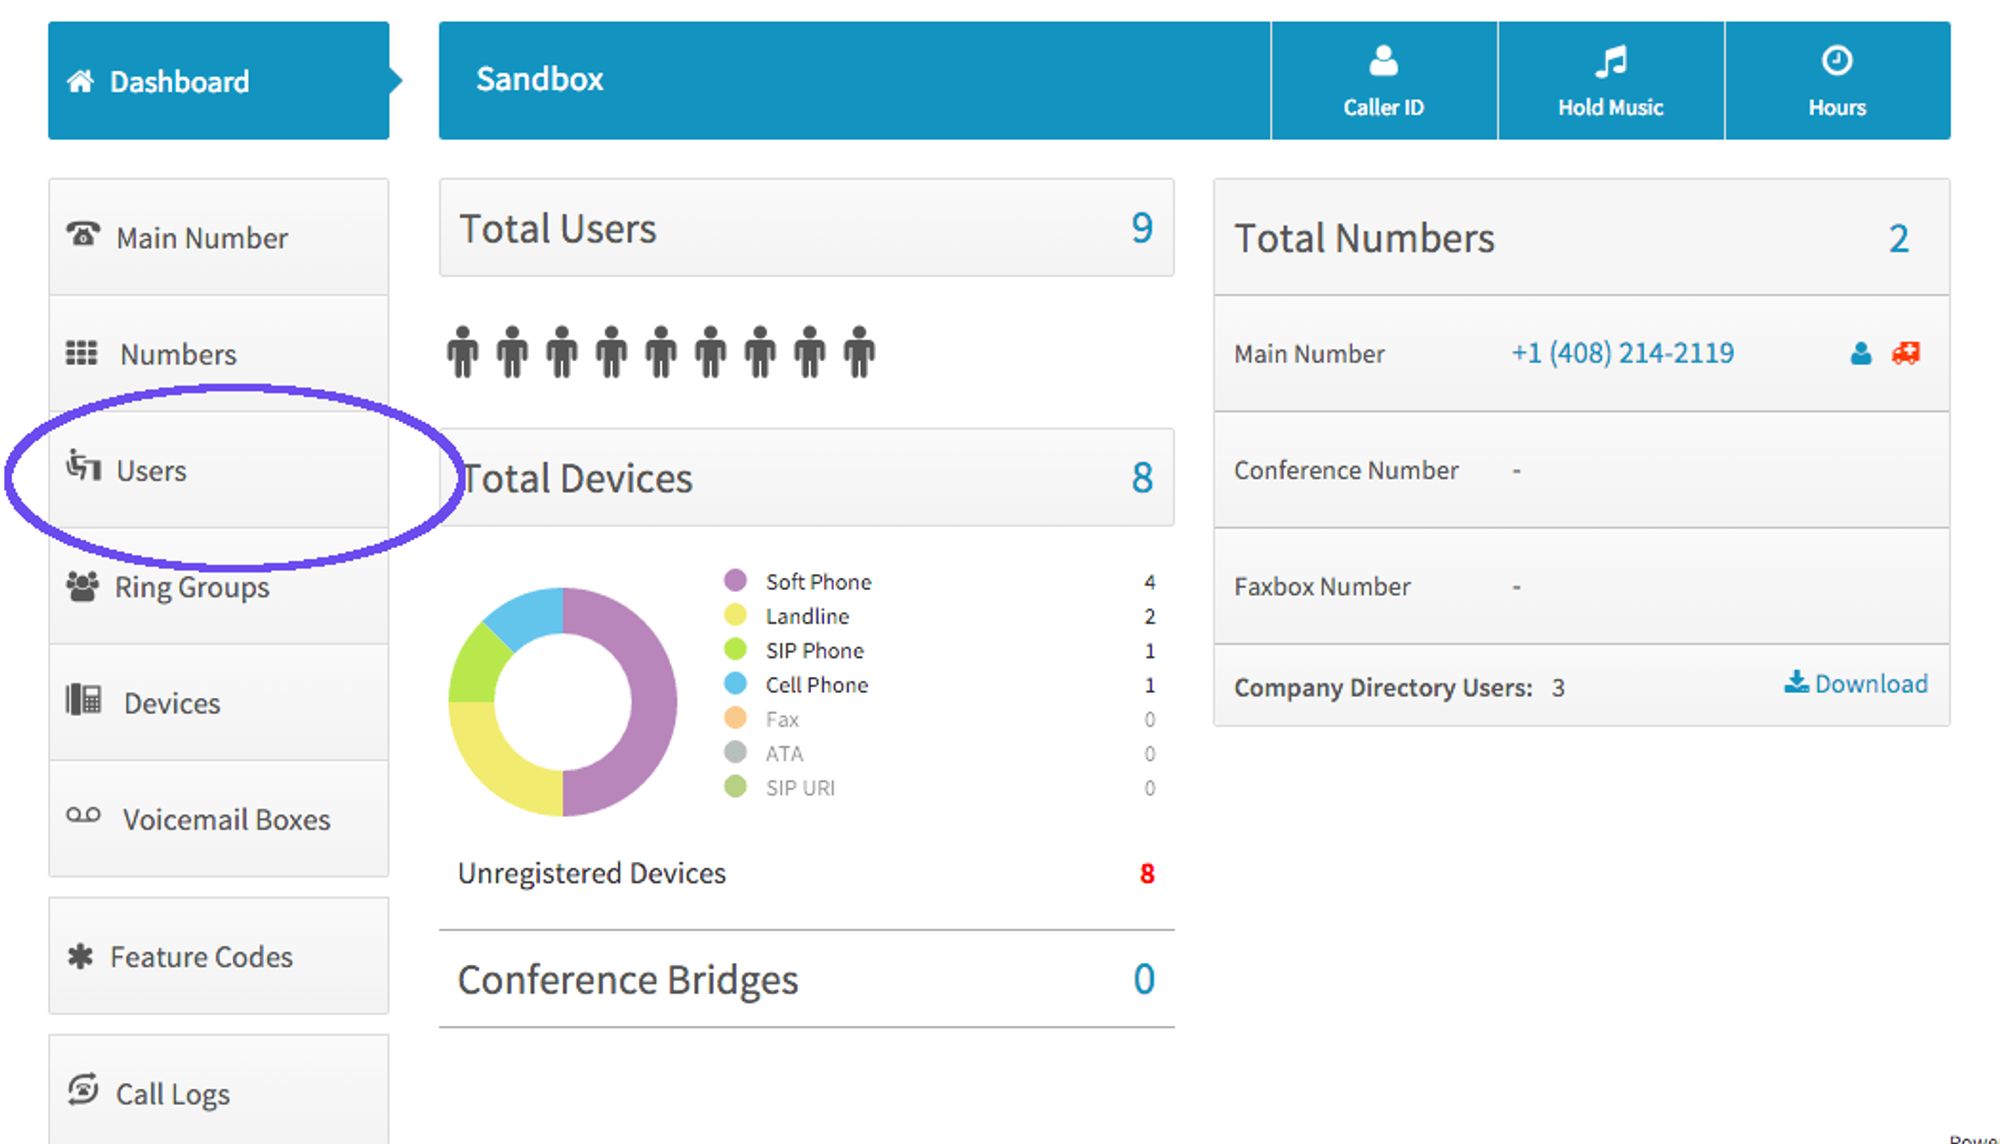
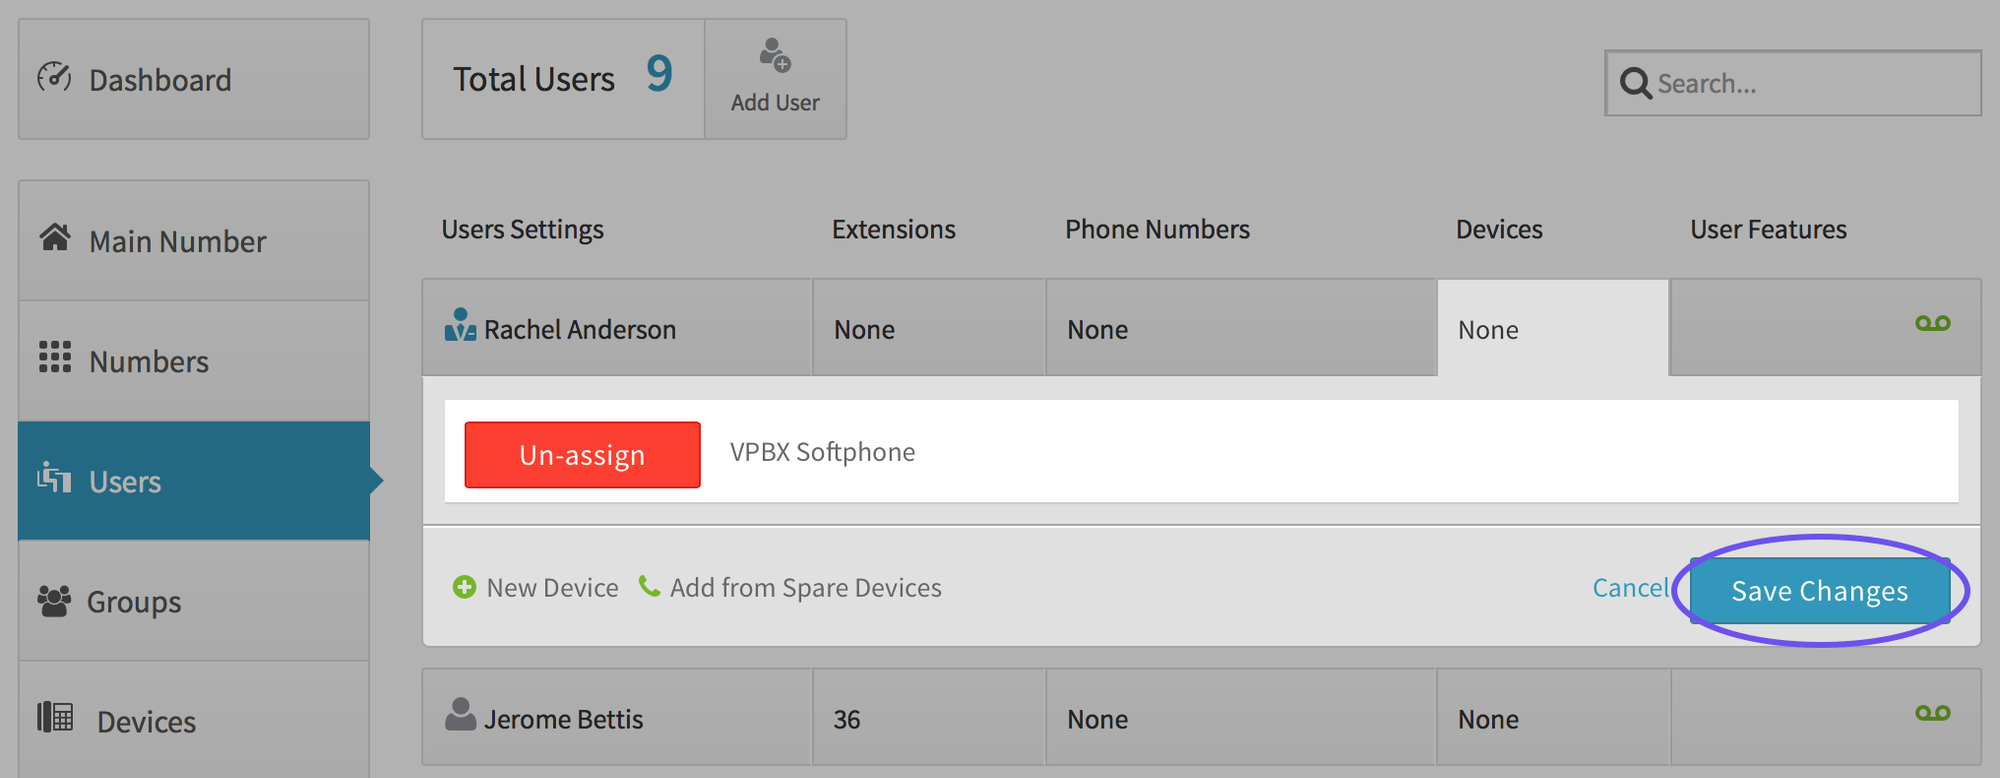
- In the Dashboard, click on Users
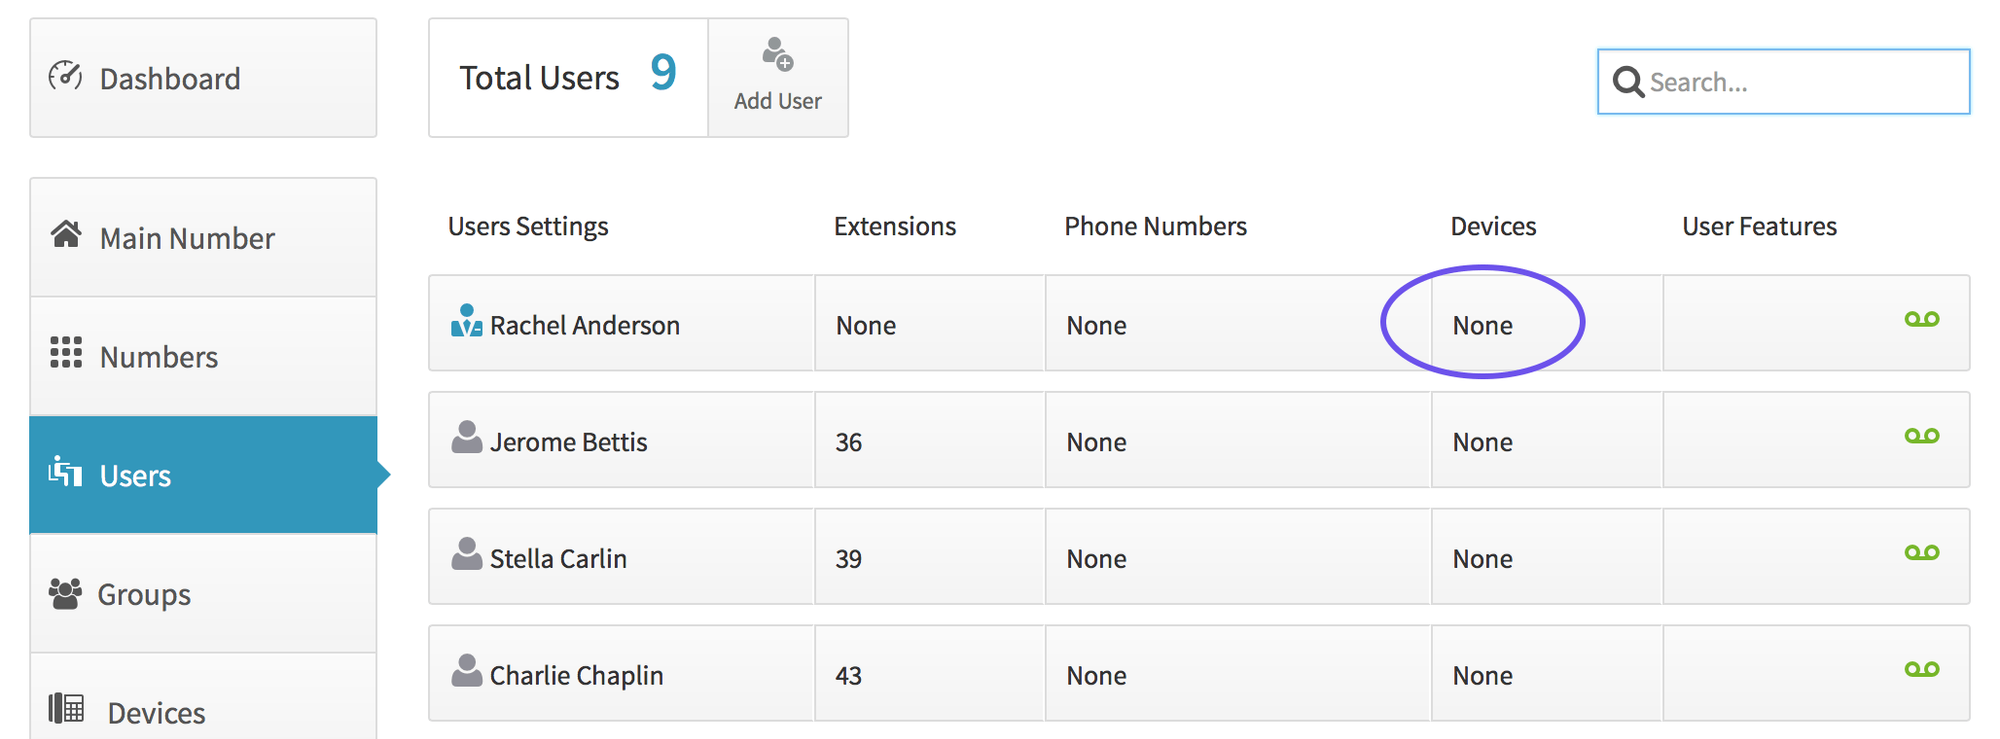
- Click Devices alongside the user you wish to assign the device
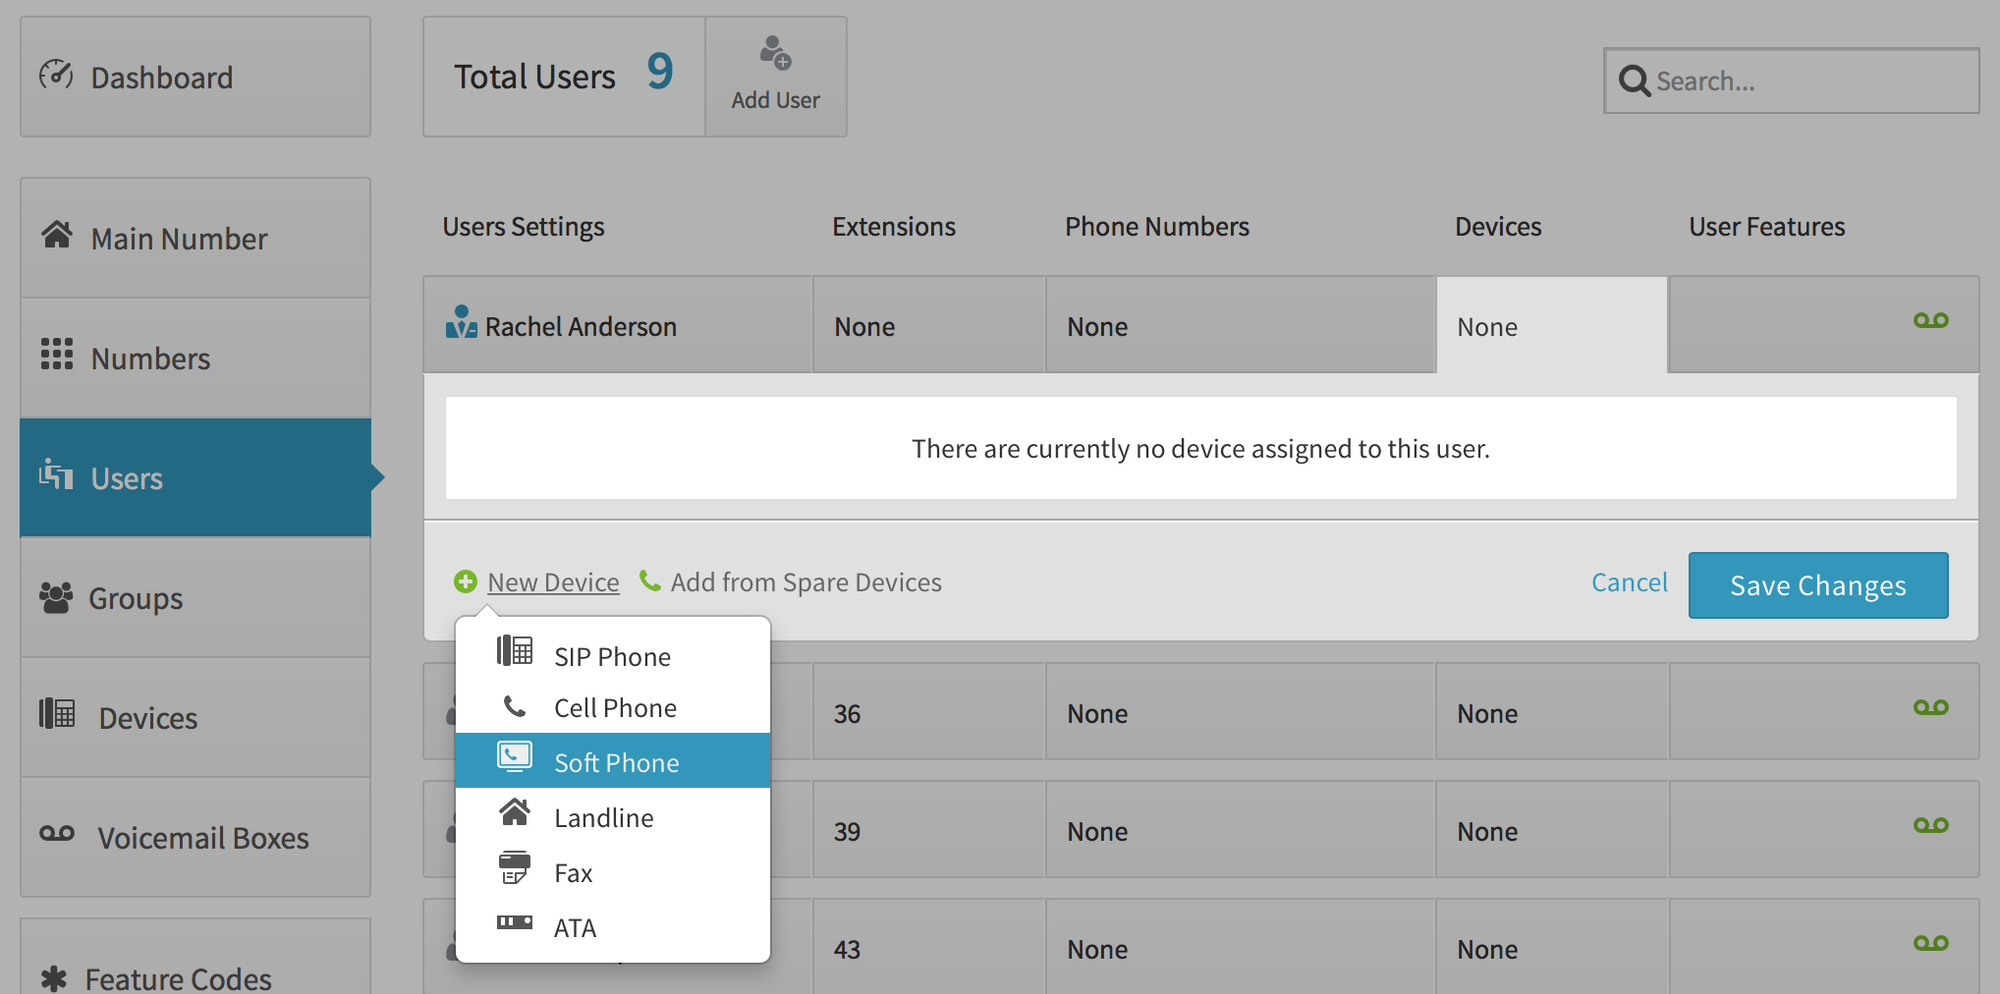
- Click Choose Device and select Softphone
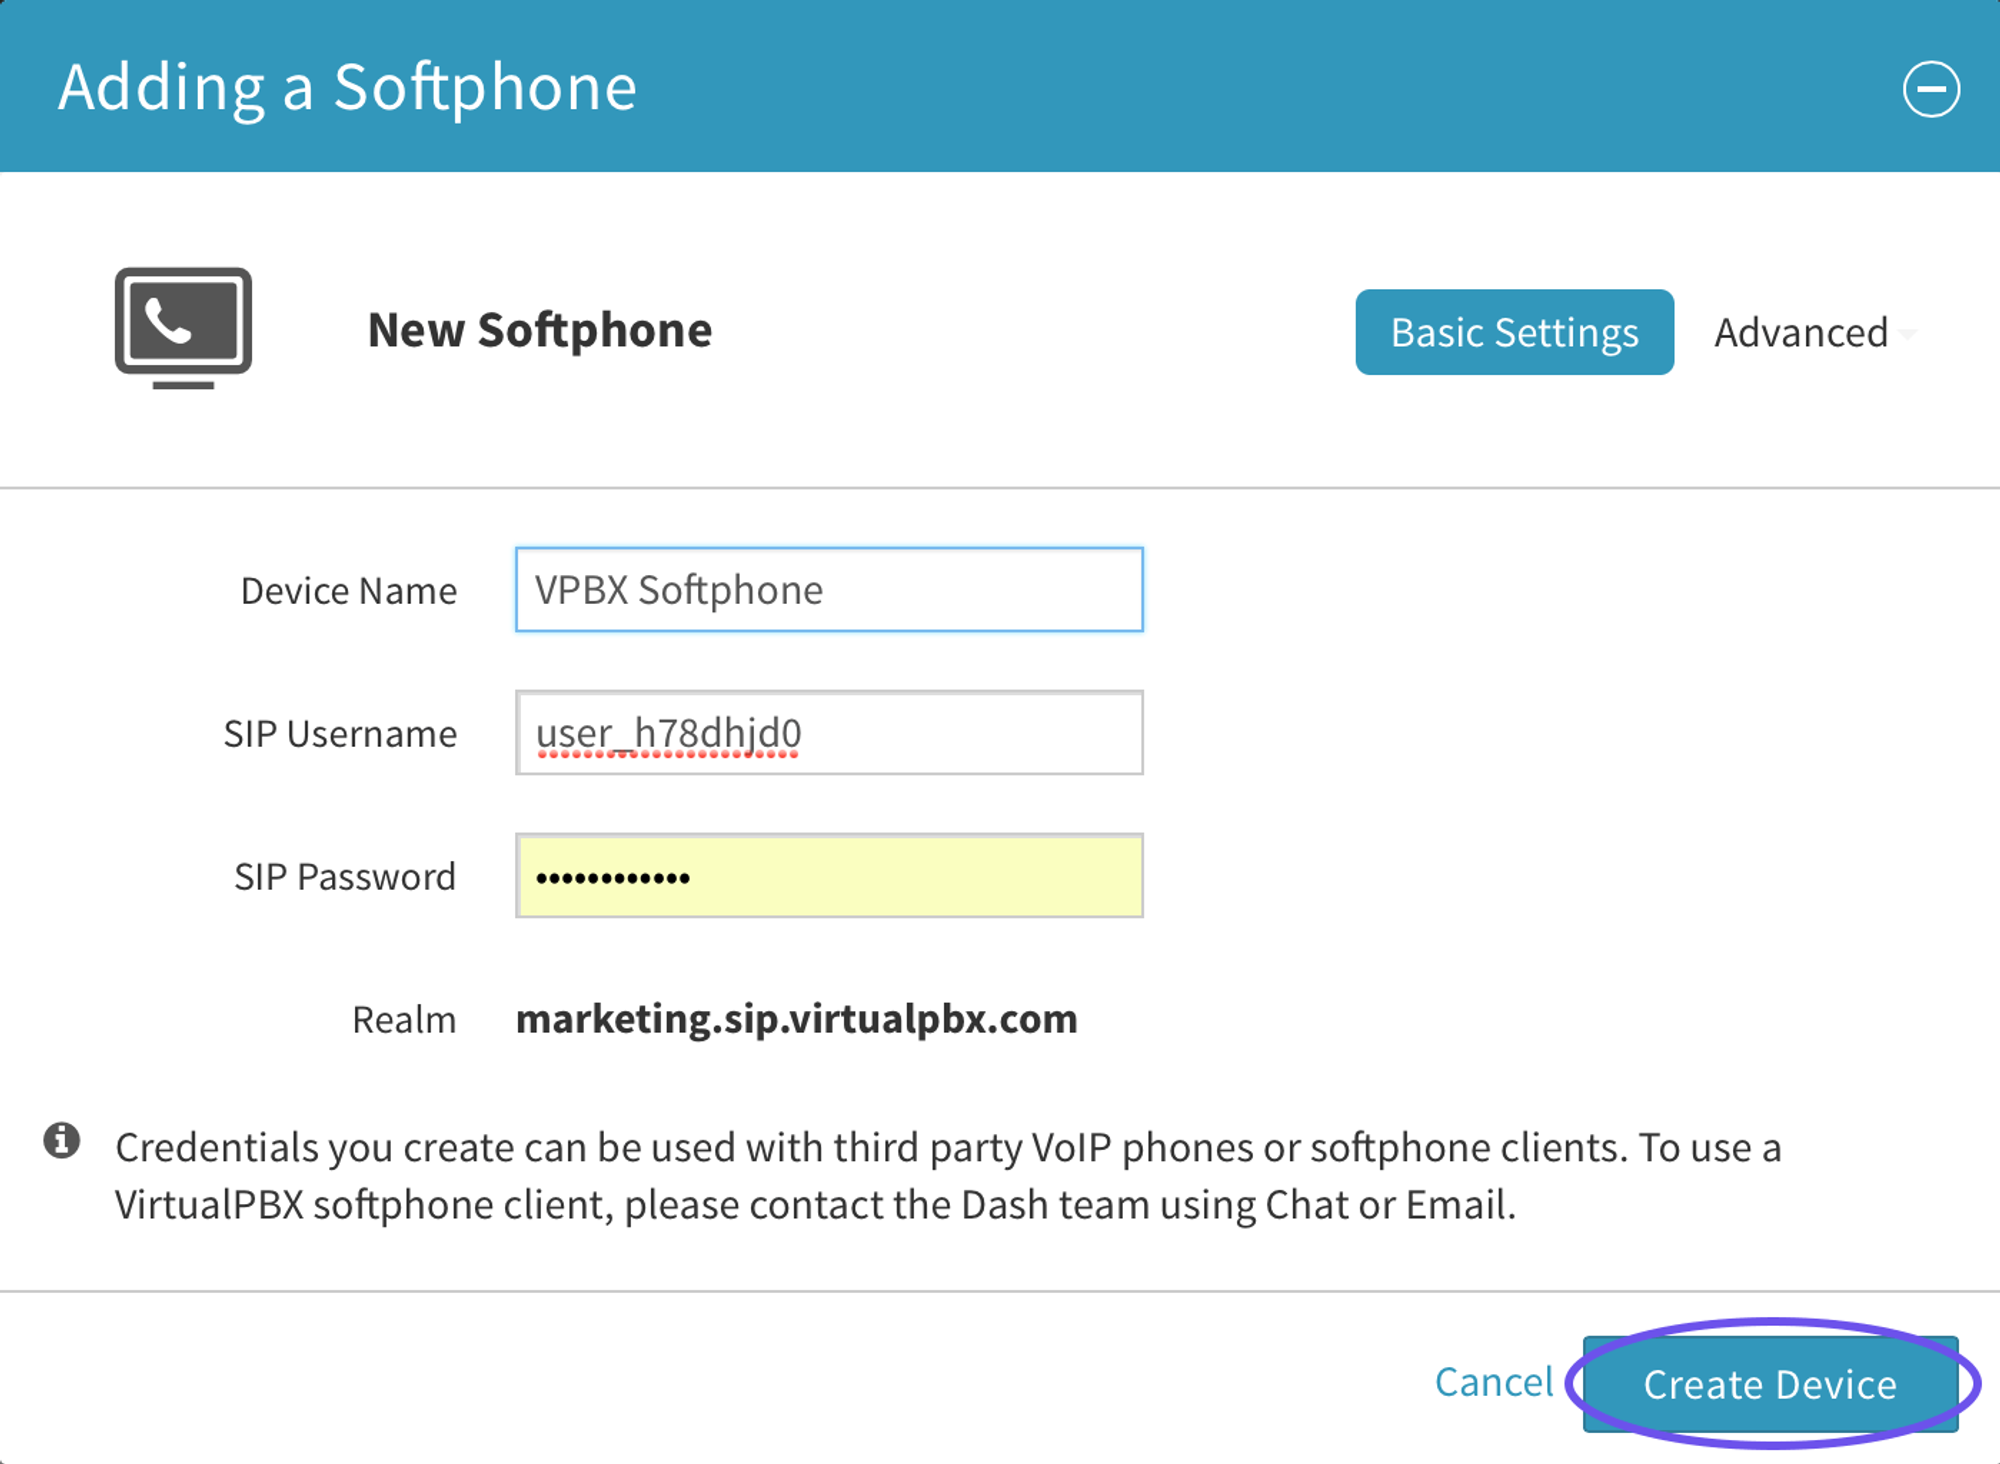
- Change your device name and click Create Device. Record this information to use in your Yealink W52P setup. You can always return to reference your credentials by clicking on devices (under users) and selecting the device.
- Click Save Settings
Provisioning Your Panasonic KX-UT113/123
- Find your IP Address:
- Go to Settings > Information Display > IP address, on your computer
- Enable Web Interface by going to Setting > #534 > Set Embedded Web to “On” on your computer > Enter
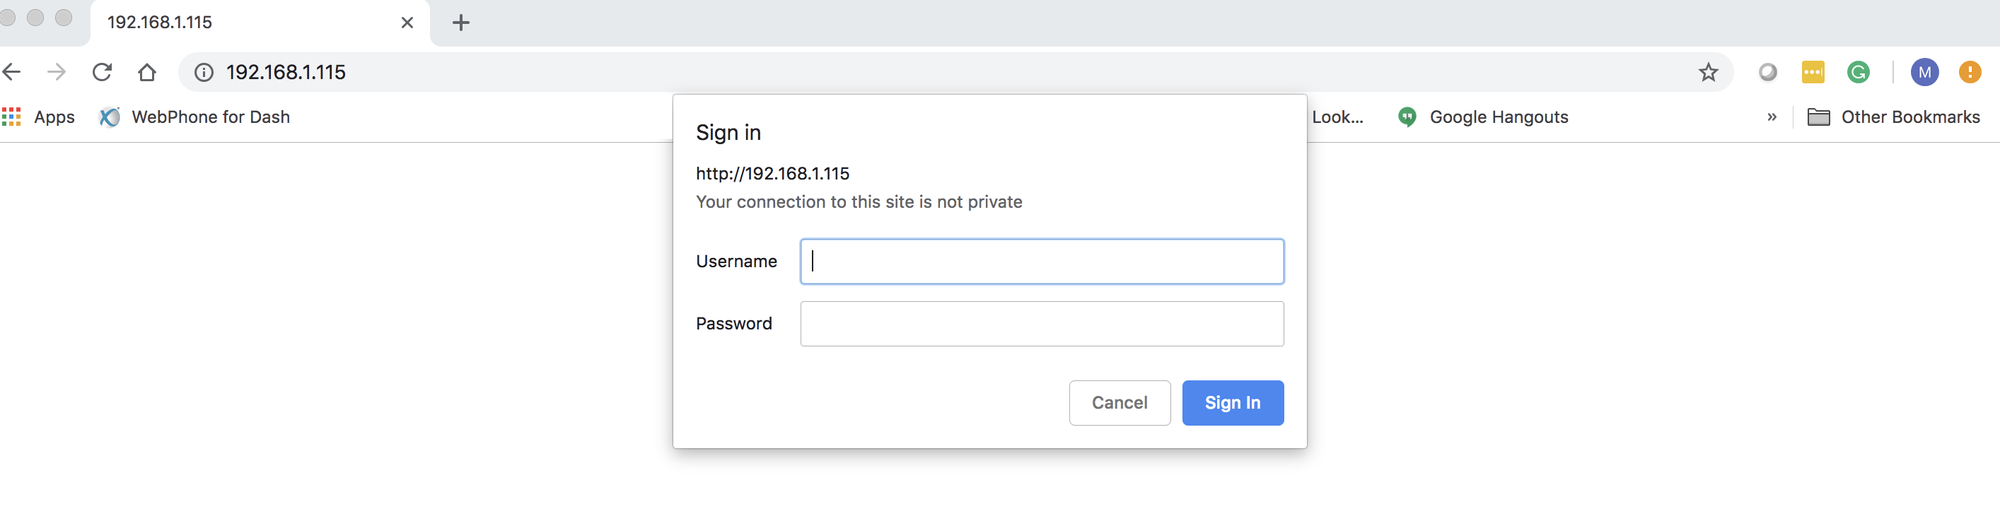
- Enter IP address into Web browser
- Username: admin
- Password: adminpass
To Enable VoIP - Click on SIP Settings > Line 1
- Phone Number – Enter what you want to be displayed on the phone
- SIP URI – Enter SIP Username
- Registrar Server Address: proxy-west.virtualpbx.net
- Registrar Server Port - 5060
- Proxy Server Address – proxy-west.virtualpbx.net
- Proxy Server Port - 5060
- SIP Service Domain – Enter realm
- SIP Source Port – 5060
- Authentication ID – Enter SIP Username
- Authentication Password – Enter SIP Password
- Enable SSAF (SIP Source Address Filter) – Yes
- Click Save on bottom

- To Enable Call Control
- Telephone > Call Control > Line 1
- Voice Mail Access Number – *97
- Click Save on bottom

To Adjust Your Time Settings - System > Time Adjust Settings
- NTP Server Address – pool.ntp.org
- Time Zone – Select based off your time zone (pacific -8, mountain -7, central -6, eastern -5)
- Click save on bottom
