To setup a Sangoma S305 phone, you will need to create softphone credentials for the user who will be using the phone.
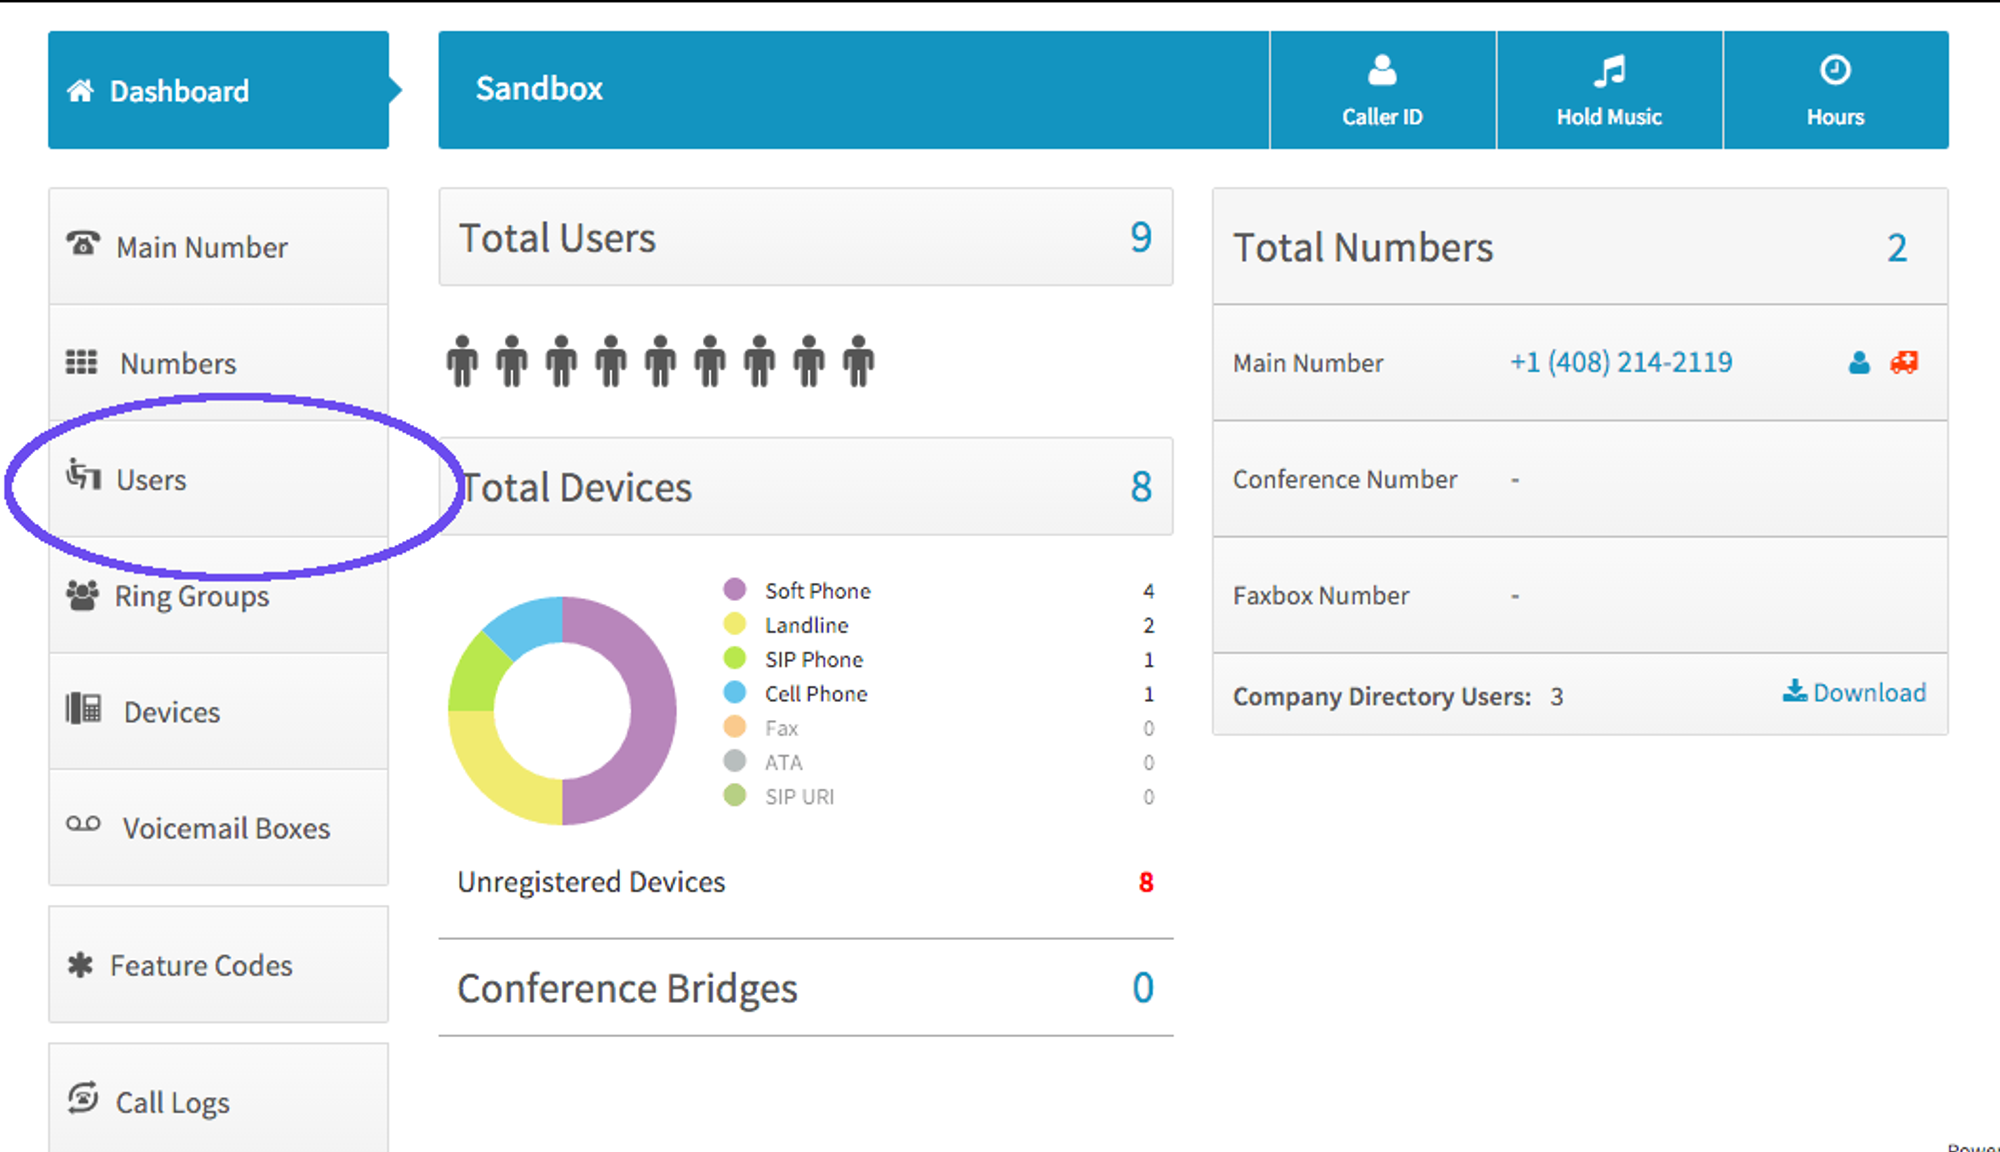
- Start by clicking on “Users” in your VirtualPBX Dashboard.
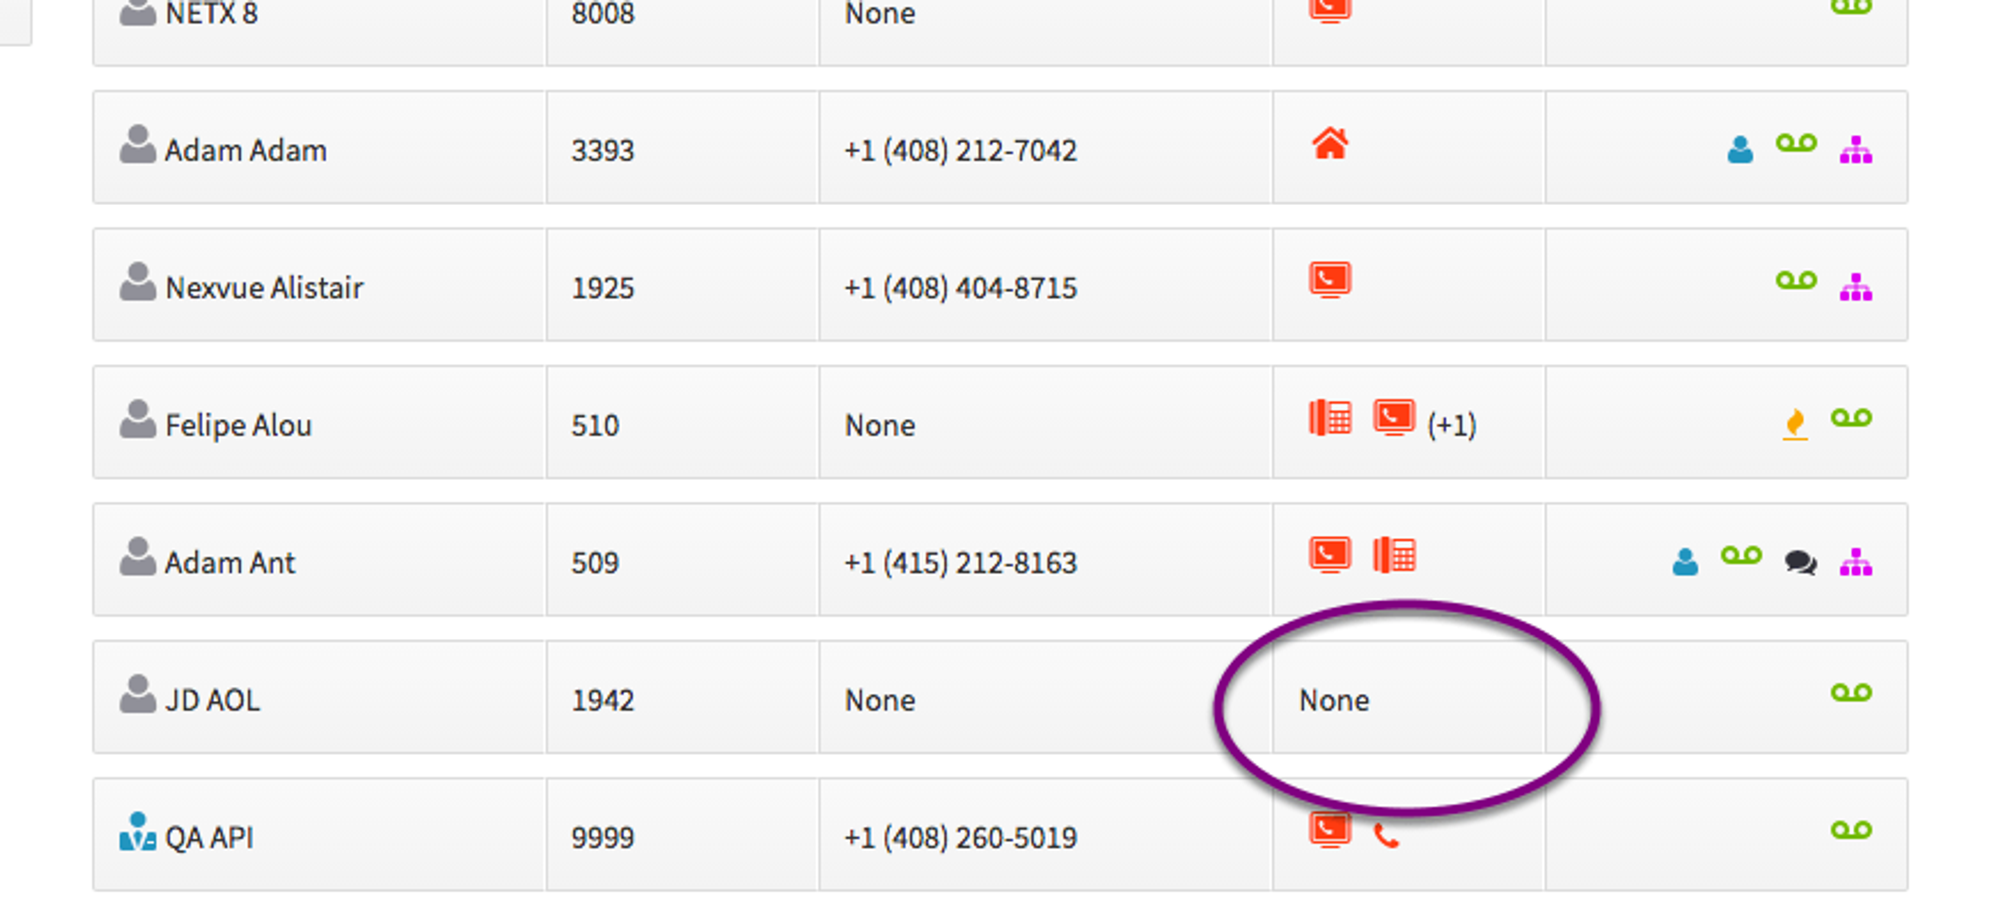
- Under “Devices”, click on the user you wish to add the Sangoma phone.
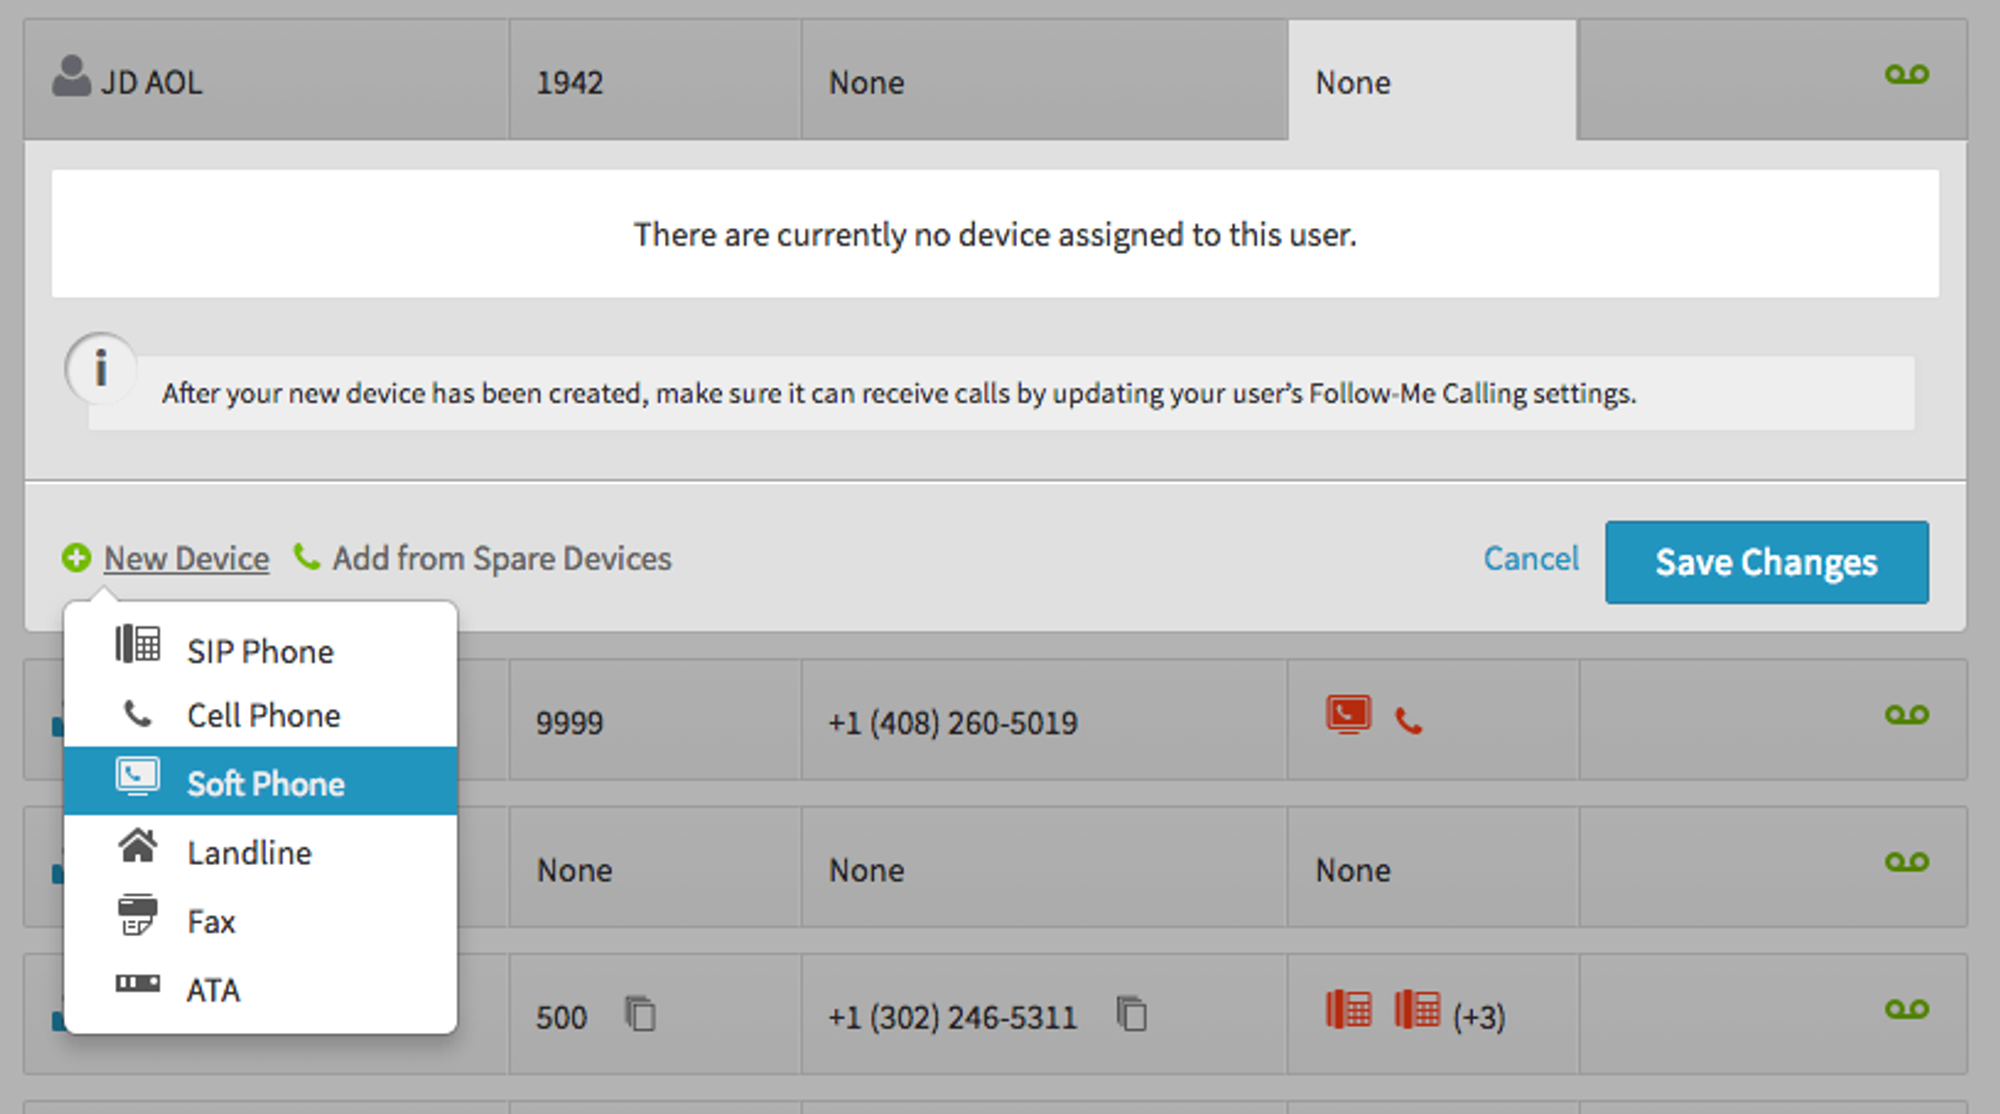
- Click on “New Device”.

- Select “Soft Phone”.
- The Dash system will automatically create your credentials. You may adjust the device name to your liking.
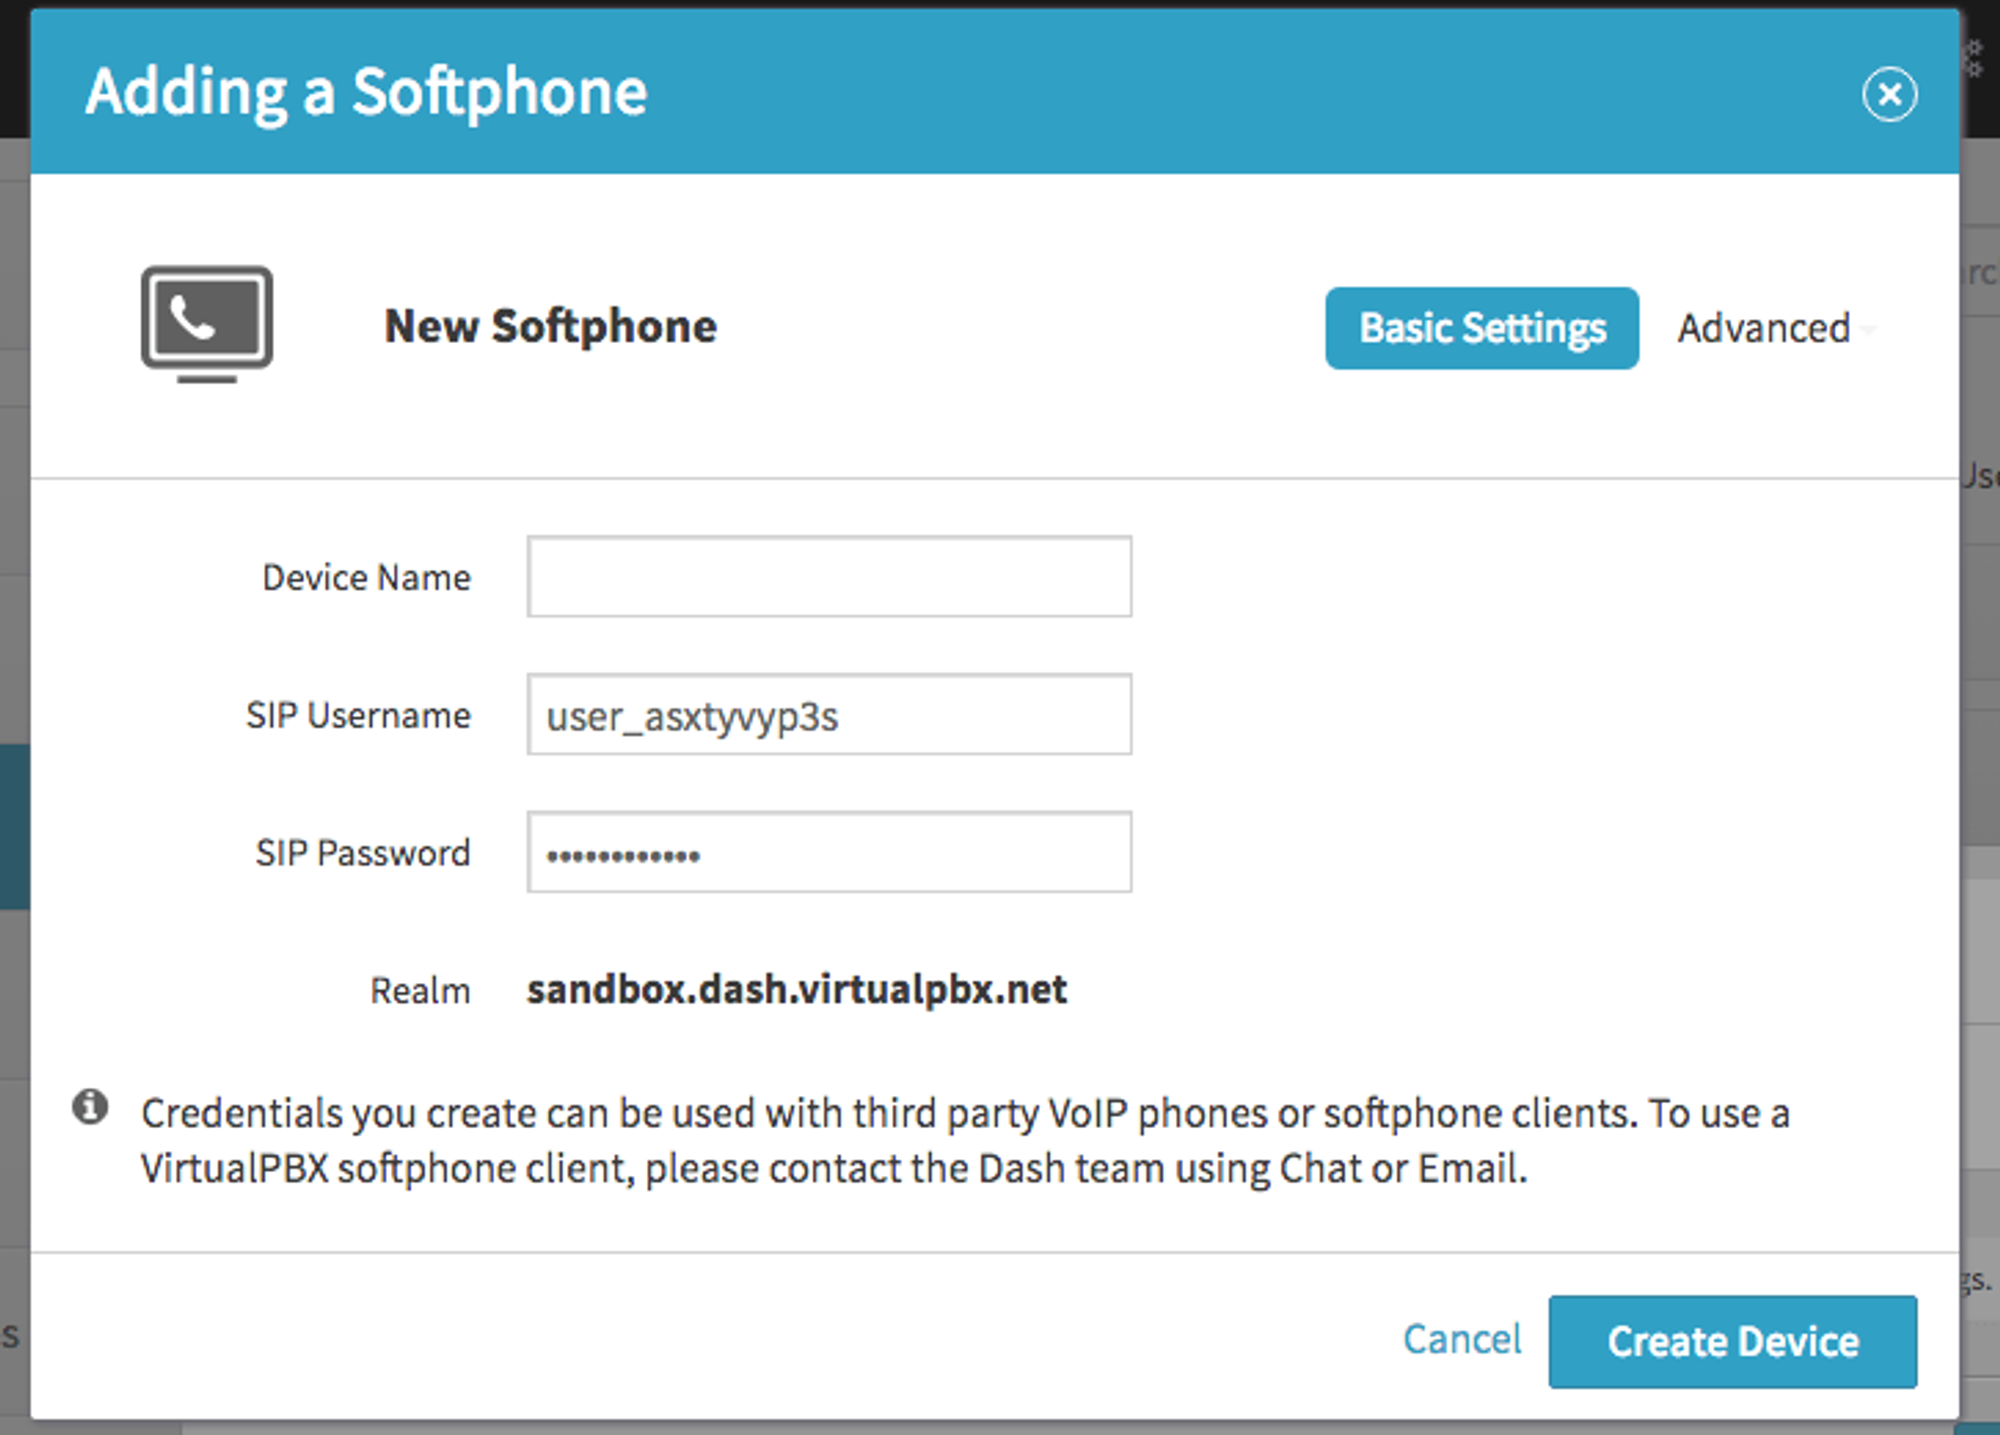
- Record your SIP Username, SIP Password, and Realm – you will need these shortly to use in the Sangoma interface. To display your SIP Password simply click on the text box to reveal it.
- Click on “Create Device”.
- Next, open a browser and login to the phone’s IP address: Admin / 4221200 (this may vary depending on your provider. Please verify with your system administrator)”.
- Click on “Go to the “Account” Tab – “Basic””.
- Finally, verify that the settings match the following:
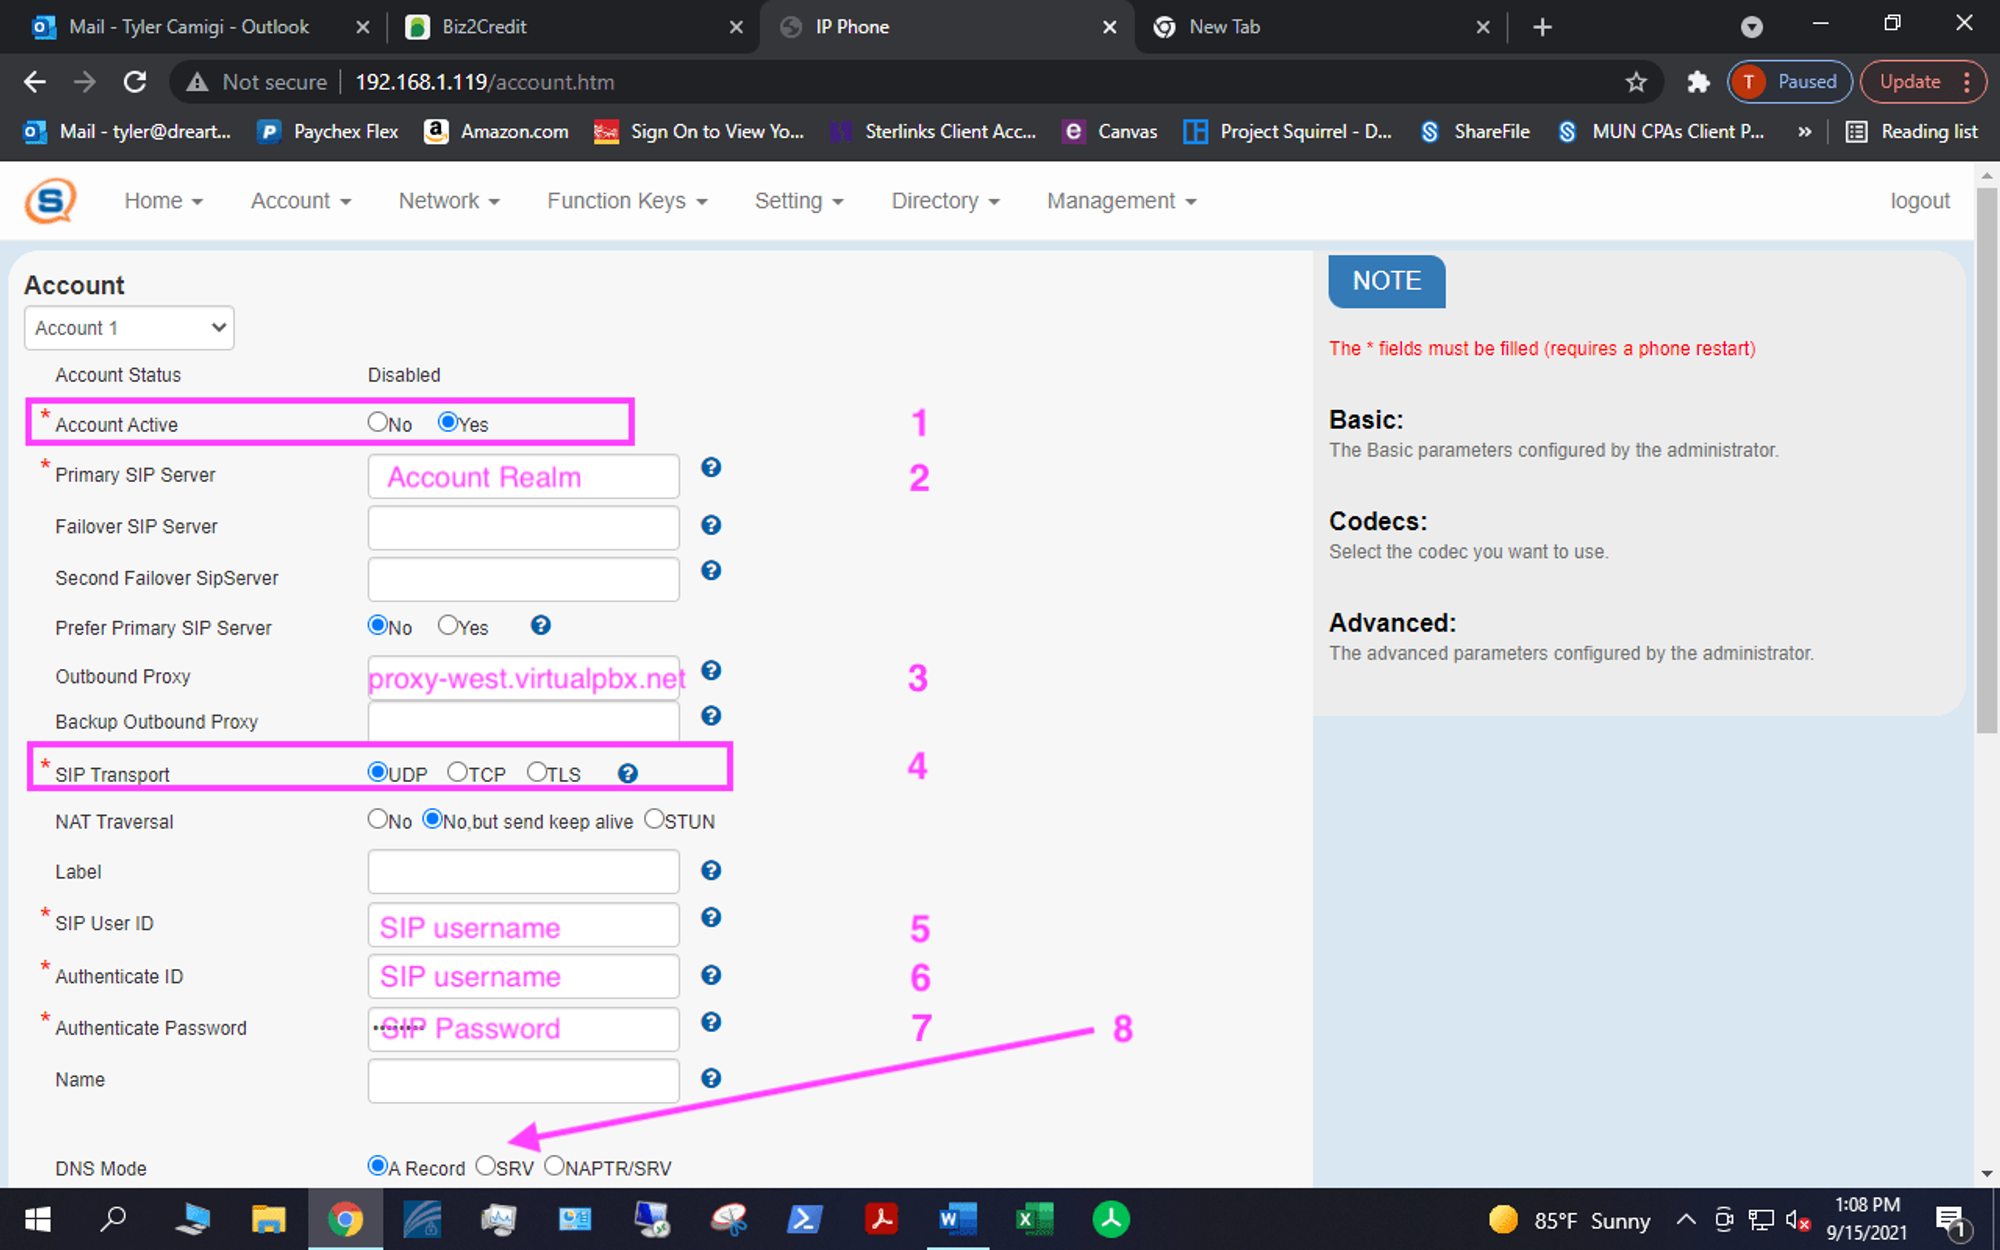
1 = Account Active – Yes 2 = Primary Sip Server – Account Realm 3 = Outbound Proxy – proxy-west.virtualpbx.net 4 = SIP Transport: UDP 5 = SIP User ID – SIP Username 6 = Authenticate ID – SIP Username 7 = Authenticate Password – SIP Password 8 = DNS Mode – SRV
- Click on “Save Settings”.
- Congratulations! Your Sangoma S305phone should now be successfully registered.